background image

10

General provisions and exclusions

This limited warranty applies only within the limits of Canada and the 
United States. However, a number of foreign distributors benefit from 
an official certification from the Manufacturer which covers this 
warranty. Please contact your distributor or the Manufacturer directly 
([email protected]) for further details.

This limited warranty does not apply if the affixed serial number is 
removed, defaced or obliterated.

This limited warranty does not apply if service of the seal refrigeration 
system or cold water system or parts furnished as original equipment 
by the Manufacturer are not obtained from an approved service center 
or the factory.

The limited warranty does not apply to any water components that 
become inoperative due to liming conditions.

This limited warranty does not cover performance, failure or damages 
of any part resulting from external causes such as alterations, abuse, 
misuse or misapplication.

The foregoing is in lieu of all other agreements expressed, implied or 
statutory and all other obligations of liabilities of the Manufacturer.

The Manufacturer does not assume or authorize any person to assume 
any obligations of liability in connection with this product or its 
warranty. In no event will the Manufacturer be liable for special or 
consequential damages or for any delay in the performance of this 
agreement due to causes beyond their control.

LIMITED WARRANTY (CONT’D)

OWNER MANUAL:


BEAUFORT 

- Edition 2 

Summary of Contents for BEAUFORT

Page 1: ...produced and assembled in North America Quebec Canada We manufacture water coolers that are ergonomic reliable and durable For human communication 1 800 363 1333 business day from 9h to 16h HE or digitally by email at info thermoconcepts com 12 Dimensions in inches Weight when packaged 59 8 lbs 27 1 kg Appliance s weight 46 lbs 20 8 kg 26 33 3 4 37 Power cord Drip Tray Probe 12 1 4 43 1 2 La versi...

Page 2: ...imal safety distances 12 from a window 36 from a heat source 3 from any wall to the side and 2 from any wall behind the machine Plug on a GFI wall outlet preferably without any other device or appliance LEGEND INSTALLATION 6 Probe 7 Loading platform 8 Right door 9 Left door 10 Water bottle weight 11 LED chart definition 12 Thermostat adjustment cold water 13 Stability extensions 14 Power supply 15...

Page 3: ...ur hand push down on the loading platform and bring it forward until the platform is 3 4 out of its original position 1 To access the water bottle you have to remove the drip tray from its working position 4 Put the bottle on the loading platform and remove its disposable cap OWNER MANUAL BEAUFORT Edition 2 ...

Page 4: ...thing back together by doing the steps in reverse order 3 2 then 1 in order for the loading platform to be back in its original position Note After the machine is plugged in the water will take approximately half an hour to become cold this can vary depending on the thermostat adjustment When the cap is pressed on the neck of the bottle complete a slight rotation clockwise to activate the lock mec...

Page 5: ...ortion of this liquid staying at least 10 minutes in the water circuit This waiting time is ideal to clean the exterior of the water cooler with a gentle soap and a clean cloth especially the loading platform if it was moved with feet a method we do not recommend You should also check the black grid behind the machine condenser and remove any dust with a vacuum The drip tray and its metal grid are...

Page 6: ...ng 1 Thermostat setting 2 The tank is completely empty 3 The condenser is dirty 4 The cycle is not receiving electricity 1 Thermostat setting 1 Compressor is running its cycle frequent on off when there is no water in the bottle 2 Humming sound with continuous rumbling PROBLEM No water is coming out of the faucets The water is not cold The water is too cold The water cooler makes too much noise OW...

Page 7: ...a quarter turn clockwise 2 When the tank has been emptied completely there is a waiting time of about half an hour before cold water is available again 3 Clean the condenser at the back of the machine with a vacuum 4 Check the machine is correctly plugged into the wall outlet as well as in the power supply at the back of the water cooler In the electrical panel check the fuse that is connected to ...

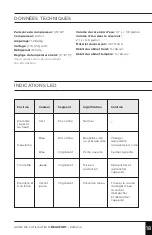
Page 8: ... temperature setting 3 8 C May vary according to the environment of the water cooler Position First from the top Second Third First and third Color Green Blue Blue Yellow Green and yellow Segment Continuous Continuous Blinking Blinking Blinking Meaning Normal Bottle empty or almost empty Door Open Auto protect Water spill Solution _ Change the bottle when empty Close the door Unplug and reconnect ...

Page 9: ...nditions was transported safely and was cleaned as per advised sanitary maintenance instructions This includes the refrigeration cycle the electric circuit thermostat power cord internal wiring 120V or 220V depending on the region compressor overload device starting relay and the electronical components During the second year of ownership and maximum three years after manufacture date both conditi...

Page 10: ...ined from an approved service center or the factory The limited warranty does not apply to any water components that become inoperative due to liming conditions This limited warranty does not cover performance failure or damages of any part resulting from external causes such as alterations abuse misuse or misapplication The foregoing is in lieu of all other agreements expressed implied or statuto...

Page 11: ... et assemblé en Amérique du Nord Québec Canada Nous produisons des refroidisseurs ergonomiques fiables et durables Pour communication humaine 1 800 363 1333 jour ouvrable de 9h à 16h HE ou électroniquement l adresse courriel info thermoconcepts com Dimensions en cm Poids avec l emballage 59 8 livres 27 1 kg Poids de l appareil 46 livres 20 8 kg GUIDE DE L UTILISATEUR BEAUFORT Édition 2 30 5 66 85 ...

Page 12: ...pecter les distances minimales de sécurité 12 d une fenêtre 36 d une source de chaleur 3 d un mur de côté et 2 d un mur arrière Brancher sur une prise murale GFI de préférence sans aucun autre appareil LÉGENDE INSTALLATION 6 Tube d alimentation d eau 7 Tiroir 8 Porte droite 9 Porte guahce 10 Lecteur de présence de bouteille 11 Charte de définition des LED 12 Ajustement du thermostat eau froide 13 ...

Page 13: ...une main appuyer sur le tiroir puis amener le vers l avant afin de sortir le tiroir au de son emplacement 1 Pour accéder à l emplacement de la bouteille il faut d abord que le gobelet soit retiré de sa position fonctionnelle 4 Installez la bouteille sur le tiroir puis retirez son bouchon jetable GUIDE DE L UTILISATEUR BEAUFORT Édition 2 ...

Page 14: ...le 6 Finalement remettez le tout ensemble en effectuant de nouveau l étape 3 puis l étape 2 et l étape 1 pour remettre le tiroir dans sa position initiale Note Après le branchement électrique l eau du refroidisseur deviendra froide dans environ une demi heure peut varier selon l ajustement du thermostat Une fois que le bouchon du tube d alimentation s appuie sur le goulot effectuez une légère rota...

Page 15: ...de ce liquide doit être demeuré au moins 10 minutes dans le circuit d eau Ce temps d attente de 10 minutes est idéal pour laver l extérieur du refroidisseur avec un savon doux et un linge propre surtout le dessus du tiroir si certains ont déplacé le tiroir avec leur pied une méthode non conseillée Vérifiez aussi la grille arrière noire condenseur et s il y a lieu enlevez la poussière avec un aspir...

Page 16: ...ée de son raccord 1 Réglage du thermostat 2 Réservoir récemment vidé 3 Condenseur sale 4 Le cycle ne reçoit pas d électricité 1 Réglage du thermostat 1 Cyclage du compresseur on off trop fréquent quand il n y pas d eau dans la bouteille 2 Ronronnement accompagné de bruits de tambours continus DÉFAILLANCE Il n y a pas d eau qui sort des robinets L eau n est pas froide L eau est trop froide La machi...

Page 17: ...horaire sur le bouton d ajustement à l arrière du refroidisseur 2 Une attente d une demi heure peut être nécessaire lorsque le réservoir du refroidisseur a été complètement vidé 3 Nettoyer la grille noire à l arrière du refroidisseur avec un aspirateur 4 Vérifier le branchement de l appareil dans la prise murale ainsi qu au niveau de la fiche électrique à l arrière du refroidisseur Dans le panneau...

Page 18: ...roid 3 8 C Peut varier selon l environnement du refroidisseur Position Première à partir du haut Deuxième Troisième Première et troisième Couleur Vert Bleu Bleu Jaune Vert et jaune Segment En continu En continu Clignotant Clignotant Clignotant Signification Normal Bouteille vide ou presque vide Porte ouverte Mise en protection Présence d eau Solution _ Changer la bouteille lorsqu elle est vide Fer...

Page 19: ...eaufort a fonctionné dans des conditions normales d utilisation de transport et d entretien sanitaire Cela inclut le cycle de réfrigération le circuit électrique thermostat cordon d alimentation câblage interne 120V ou 220V selon la région dispositif de surcharge du compresseur relais de démarrage et les composantes électroniques Durant la deuxième année de possession et au maximum trois ans après...

Page 20: ...n centre de service approuvé ou du service de réparation en usine La présente garantie limitée ne s applique pas lorsque les composantes du système d eau froide ne fonctionnent plus à cause de la présence de calcaire La présente garantie limitée ne couvre pas les mauvais rendements panne ou dommages causée entre autres par des modifications des abus une mauvaise utilisation ou une mauvaise applica...

Reviews: