background image

Printer Status 

Item Description 
Manufacturer 

Displays the name of the USB printer manufacturer. 

Model 

Displays the model of the USB printer. 

Status Displays 

the 

status of the USB printer. 

Remove document 

from Queue 

Click to remove all documents from printer queue 

Restart Printer service 

Click to restart printer service 

 
If a corrupt print job is sent to a printer, printing may suddenly fail. If your print 

jobs seem to be locked up, pressing the Remove All Documents button to clear 
the print queue may resolve the issue. 

 
For information on how to set up the Printer Server, refer to Chapter 5: 

Additional Feature Setup > 

Printer Server


UPS Settings 

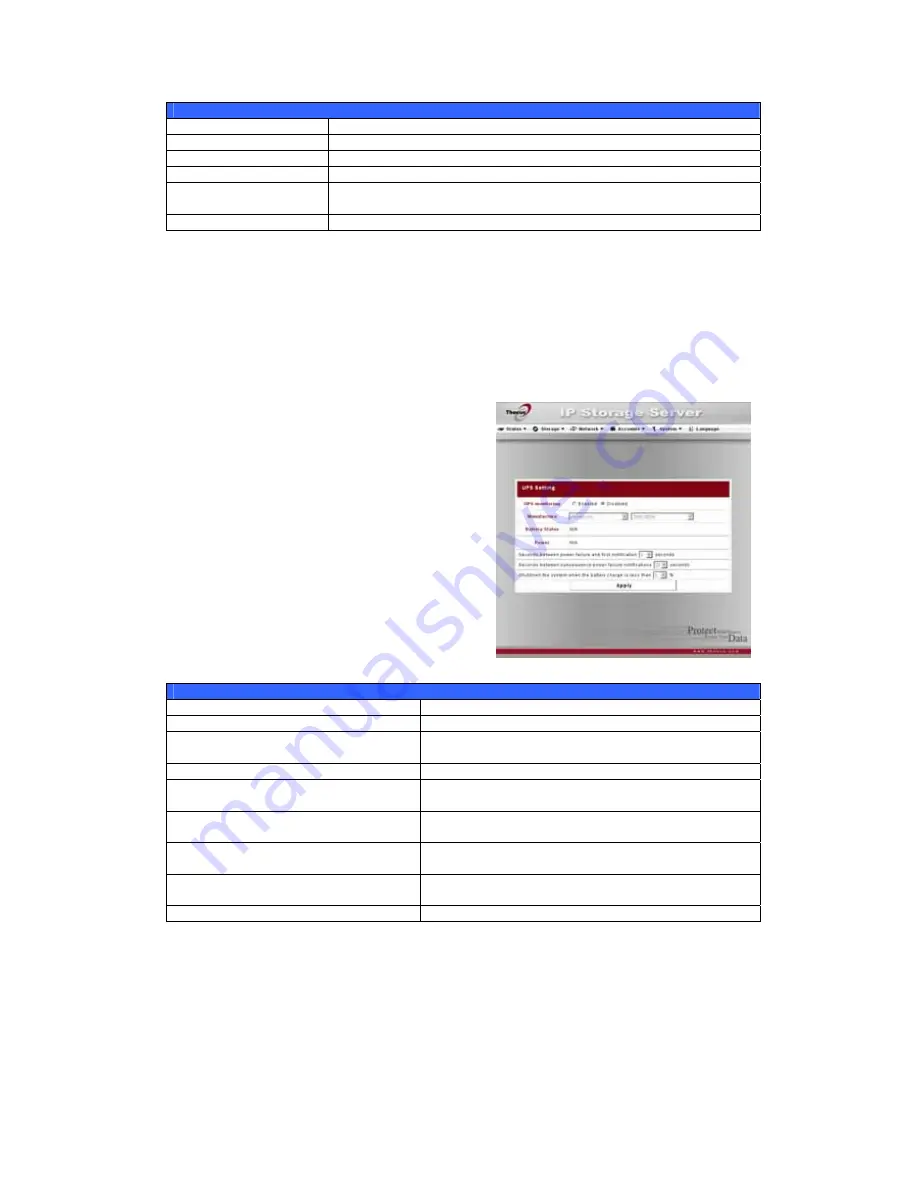
The N5200 can also support various 
uninterruptible power supply units, 
providing extra data security and 

accessibility in the case of a power failure. 
 

From the Status menu, choose the UPS 
item and the UPS Setting screen appears. 

Make any changes you wish, and press 
Apply to confirm changes. See the 

following table for a detailed description of 
each item. 


UPS Settings 

Item Description 
UPS Monitoring 

Enable or disable UPS monitoring. 

Manufacturer 

Choose the UPS manufacturer and model number 
from the dropdowns. 

Battery Status 

Current status of the UPS battery 

Power 

Current status of the power being supplied to the 

UPS 

Seconds between power failure and 

first notification 

Delay between power failure and first notification 

in seconds. 

Seconds between subsequent power 

failure notifications 

Delay between subsequent notifications in 

seconds. 

Shutdown the system when the 

battery charge is less than 

Amount of UPS battery remaining before system 

should auto-shutdown. 

Apply Press 

Apply to save your changes. 


For a list of supported UPS units, see 

Appendix E: UPS Compatibility List


26 

Summary of Contents for N5200BR

Page 1: ...Thecus N5200B N5200BR User s Manual...

Page 2: ...se provide us with your feedback Thecus Technology Corporation reserves the right to modify the contents of this manual without notice Product name Thecus N5200B BR Manual Version 1 1 Release Date Mar...

Page 3: ...C with relative humidity of 20 85 Using the N5200 under extreme environmental conditions could damage the unit Ensure that the N5200 is provided with the correct supply voltage AC 100V 240V 50 60 Hz 3...

Page 4: ...onnections 14 Checking System Status 15 System Status Normal 15 System Trouble 15 Chapter 3 First Time Setup 16 Overview 16 Thecus Setup Wizard 16 LCD Operation 18 LCD Controls 18 Display Mode 18 USB...

Page 5: ...Web Services Configuration 45 AFP Apple Network Setup 46 NFS Setup 46 User and Group Management 47 Local User Configuration 47 Adding Users 47 Modifying Users 48 Deleting Users 48 Local Groups Configu...

Page 6: ...nable DDNS on the Router 71 Part III Setting up Virtual Servers HTTPS 71 Firewall Software Configuration 72 Replacing Damaged Hard Drives 72 Hard Drive Damage 72 Replacing a Hard Drive 72 RAID Auto Re...

Page 7: ...81 What is Active Directory 81 ADS Benefits 81 Appendix E UPS Compatibility List 82 Appendix F Licensing Information 85 Overview 85 Source Code Availability 85 CGIC License Terms GNU General Public L...

Page 8: ...ice you can centralize your files and share them easily over your network With the easy to use web based interface users on your network can access these files in a snap To learn about the Web User In...

Page 9: ...nd off refer to Chapter 4 System Management System Settings Reboot and Shutdown System Scheduled Power On Off Package Contents Your N5200 package should contain the following items QIG CD Title Ethern...

Page 10: ...s dongles Note For supported USB wireless dongles please contact http esupport thecus com support 7 Power Button Power on off N5200 Solid blue Device is powered on Blinking blue eSATA hard disk is con...

Page 11: ...s and connectors N5200B Back Panel Item Description 1 eSATA Port eSATA port for high speed storage expansion 2 USB Port USB 2 0 port for compatible USB devices such as USB disks and USB printers 3 USB...

Page 12: ...USB Port target For connecting the N5200 to your PC as a mass storage device 4 4 port Gigabit Switch This 4 port switch can be used for connection sharing 5 WAN Port WAN port for connecting to an Eth...

Page 13: ...omponents on the N5200 3 Be careful not to use magnetized screwdrivers around the N5200 s electronic components Hard Disk Installation The N5200 supports five standard 3 5 Serial ATA SATA hard disks T...

Page 14: ...rk to the WAN port on the back panel of the N5200 2 Connect the provided power cord into the universal power socket on the back panel Plug the other end of the cord into a surge protector socket Press...

Page 15: ...s glow green assuming both are connected 2 The Power LED on the Front Panel glows blue 3 The HDD Power LED on each HDD tray glows blue assuming all disks are installed 4 The default IP address of the...

Page 16: ...perform the following steps 1 Insert the installation CD into your CD ROM drive the host PC must be connected to the network 2 The Setup Wizard should launch automatically If not please browse your C...

Page 17: ...f your switch or router is configured as a DHCP Server configuring the N5200 to automatically obtain an IP address is recommended You may also use a static IP address and enter the DNS Server address...

Page 18: ...s Use the Up Down Enter and Escape ESC keys to select various configuration settings and menu options for N5200 configuration The following table illustrates the keys on the front control panel LCD Co...

Page 19: ...s to enter the correct LCD password System will check whether the correct LCD password has been entered The default LCD password is 0000 If correct password is entered you will enter into the Manageme...

Page 20: ...e to setup authentication protocols such as Active Directory AD For more on managing users go to Chapter 4 System Management User and Group Management For more information on configuring Active Direct...

Page 21: ...21 File Transfer Protocol FTP Media Server Printer Server...

Page 22: ...x where x is a number between 1 and 254 but not 100 NOTE 2 Login to the system using the administrator user name and password The factory defaults are User Name admin Password admin If you changed yo...

Page 23: ...display the dropdown menu selections for each group In the following sections you will find detailed explanations of each function and how to configure your N5200 Language Selection The N5200 supports...

Page 24: ...m manufacturer Product No Shows the model number of the system Firmware version Shows the current firmware version Up time Displays the total run time of the system To access this screen again navigat...

Page 25: ...ice System Information From Status menu choose the Info item and the System Information screen appears You can change the system information that appears on the Login page by entering the new informat...

Page 26: ...ty in the case of a power failure From the Status menu choose the UPS item and the UPS Setting screen appears Make any changes you wish and press Apply to confirm changes See the following table for a...

Page 27: ...ode via WAN port From the Status menu choose the WOL item and the Wake up On Lan Configuration screen appears From here you can Enable or Disable Wake up On Lan Configuration Item Description WOL Serv...

Page 28: ...save your changes Example Monday On 8 00 Off 16 00 System will turn on at 8 00 AM on Monday and off at 16 00 on Monday System will turn on for the rest of the week If you choose an on time but do not...

Page 29: ...city Shows the SATA hard disk capacity Model Displays the SATA hard disk model name Firmware Shows the SATA hard disk firmware version Status Indicates the status of the disk Can read OK Warning or Fa...

Page 30: ...as remapped If this attribute value remains at zero it indicates that the quality of the corresponding surface area is low Raw Read Error Rate This attribute value depends on read errors and disk sur...

Page 31: ...is usually required only when you first set up the device A brief description of each RAID setting follows RAID Levels Level Description JBOD The storage volume is a single HDD with no RAID support JB...

Page 32: ...storage layout in the storage volume A larger stripe size is better for large files Used Percentage The percentage of the RAID volume that will be used to store data Apply Press this button to config...

Page 33: ...g a RAID To expand a RAID 1 RAID 5 RAID 6 or RAID 10 volume follow the steps below 1 Replace one of the hard drives in the RAID volume and allow it to automatically rebuild 2 Once rebuilt you can cont...

Page 34: ...5 RAID 0 HDDx2 to RAID 5 HDDx3 RAID 0 HDDx2 to RAID 5 HDDx4 RAID 0 HDDx2 to RAID 5 HDDx5 RAID 0 HDDx3 to RAID 5 HDDx4 RAID 0 HDDx3 to RAID 5 HDDx5 RAID 0 HDDx4 to RAID 5 HDDx5 RAID 1 RAID 1 HDDx2 to R...

Page 35: ...me assigned to the volume Capacity Capacity of the allocated space Target USB Click to allocate space to Target USB volume Allocating Space for Target USB Volume To allocate space for a Target USB vol...

Page 36: ...which users have access to this folder Edit Press Edit to enter the Edit screen and modify the folder s name and description Del Press Del to delete the folder A prompt appears asking to confirm the d...

Page 37: ...15 characters NOTE Editing Folders On the Folder screen press the Edit button and the Edit Folder screen appears This screen allows you to change folder information After entering the information pre...

Page 38: ...are two selections available Unix Linux System AIX Allow source port 1024 Choose the one which best fits your needs IO Mapping There are three selections available Guest system root account will have...

Page 39: ...en added but yet appear from list Submit Submits and confirms settings Reset Cancel your settings and return to the Folder screen To configure folder access follow the steps below 1 On the ACL screen...

Page 40: ...e Storage menu click Filesystm Check and the File System Check prompt appears To perform a file system check click Apply Once clicked the following prompt will appear Click Yes to reboot the system On...

Page 41: ...ious screen Click Reboot to reboot the system When the file system check is run the system will show 20 lines of information until it is complete Once complete the results will be shown at the bottom...

Page 42: ...k which is generally 255 255 255 0 Gateway Default Gateway IP address DNS Server Domain Name Service DNS server IP address IP Sharing Mode LAN port will be able to When enabled PCs connected to the ac...

Page 43: ...e or disable Jumbo Frame Support on the LAN interface Before enabling Jumbo Frame Support please make sure your network equipment supports Jumbo Frame If your equipment is incompatible you might not b...

Page 44: ...by the N5200 This will prevent the Access Point from broadcasting the ESSID The N5200 will still respond to a wireless device that wants to communicate if it sends a matching ESSID Channel The channe...

Page 45: ...r changes Click Cancel to exit without saving Web Services Configuration From the Network menu choose the Service item and the Web Service screen appears This screen displays the service support param...

Page 46: ...fies Zone for Applet Talk service If your AppleTalk network uses extended networks and is assigned with multiple zones assign a zone name to the N5200 If you do not want to assign a network zone enter...

Page 47: ...modify a local user Delete Press the Delete button to delete a selected user from the system Adding Users 1 Click on the Add button on Local User Configuration screen and Local User Setting screen app...

Page 48: ...Local Groups Configuration From the Accounts menu choose the Groups item and the Local Groups Configuration screen appears This screen allows you to Add Modify and Delete local groups Local Groups Con...

Page 49: ...to save your changes Deleting Groups 1 On the Local Group Configuration screen select a group name from the list 2 Press Delete to delete the group from the system Batch User and Group Creation The N...

Page 50: ...y Work Group Domain Name Specifies the SMB CIFS Work Group ADS Domain Name e g N5200 ADS NT Support Select Disable to disable authentication through Windows Active Directory Server or Windows NT Authe...

Page 51: ...ssword Confirm Password The Administrator Password field is for the password of ADS Active Directory Server not N5200 The system time difference between N5200 and ADS should be less than five minutes...

Page 52: ...per that beeps when a problem occurs Email Notification Enable or disable email notifications of system problems SMTP Server Specifies the hostname IP address of the SMTP server Port Specifies the por...

Page 53: ...the Time screen appears Set the desired Date Time and Time Zone You can also elect to synchronize the system time on the N5200 with an NTP Network Time Protocol Server You can change any of these item...

Page 54: ...re that you can revert to a working configuration when you are experimenting with new system settings The system configuration you have backup can be only restore in same firmware version And the back...

Page 55: ...the main menu Resetting to factory defaults will not erase the data stored in the hard disks but WILL revert all the settings to the factory default values WARNING Upgrading System Firmware From the S...

Page 56: ...le for a detailed description of each item Change Administrator Password Item Description New Password Type in a new administrator password Confirm Password Type the new password again to confirm Appl...

Page 57: ...en appears You can change any of these items and press Apply to confirm your settings A description of each item follows FTP Item Description FTP Enable FTP Service on the N5200 FTP ENCODE If your FTP...

Page 58: ...e folder s that contains media files to be shared Rescan Click the Rescan button to have the N5200 for new contents in the selected media folder Adding Media Share Folders Once the Media Server softwa...

Page 59: ...video output to video input of your TV set 3 Turn on the TV and change the video signal input to DMA 4 Setup the DMA These steps will be different if you use a different DMA a From the Server List scr...

Page 60: ...option 6 Select Connect to a printer on the Internet or on a home or office network and enter http N5200_IP_ADDRESS 631 printers usb printer into the URL field 7 Your Windows system will ask you to i...

Page 61: ...ver in Windows Vista follow the steps below 1 Open Printer Folder from the Control Panel 2 Click the right mouse button in anywhere on the Printers folder and then select Add Printer 3 Select Add a ne...

Page 62: ...d to go into next page without waiting for Searching for available printers to finish 5 Click Select a shared printer by name Type http Thecus_NAS 631 printers usb printer in the box where Thecus_NAS_...

Page 63: ...ontact your printer manufacturer for help 7 Windows will attempt to connect to the printer 8 You can choose to set this printer as the default printer by checking the Set as the default printer box Cl...

Page 64: ...ID and password that were previously set for you in the Accounts menu See Chapter 4 System Management User and Group Management Local User Configuration 2 The WebDisk page appears showing folders made...

Page 65: ...follows Windows 1 Go to the My Computer folder in Windows 2 In the menu bar select Tools and then Map Network Drive 3 The Map Network Drive window appears 4 Assign a drive letter for the share folder...

Page 66: ...he IP address of your target server Share folder The share folder you would want to backup Last Time The time when the last Nsync task was executed Last Status The status of your last Nsync task Actio...

Page 67: ...e this is done the target server will start accepting Nsync tasks from server using that ID and password Setting Up an Nsync Target on Another Device If you selected Other Device when setting up your...

Page 68: ...backup will be incremental If unchecked the backup will be a full backup Destination Click to specify the destination folder file location Excluded extensions Files with these file name extensions wil...

Page 69: ...2 Click Next to skip past the opening page Choose Backup files and settings from the second page and then click Next 3 Select which option you want to back up 4 Click Next and in the Backup Type Dest...

Page 70: ...d OK OK Write OK Adding a Spare Disk With a RAID 1 RAID 5 RAID 6 or RAID 10 volume you can add a spare disk after the initial RAID is setup To add a spare disk follow the steps below 1 On the RAID Con...

Page 71: ...check Enable Wildcard and create a password i e xxxx 4 Wait for an email from www dyndns org 5 Open the email and click on the link to activate your account Part II Enable DDNS on the Router 1 Go to t...

Page 72: ...e When a hard drive is damaged and data in the RAID volume the system LCD will display warning message also the system beeps Replacing a Hard Drive To replace a hard disk drive in the N5200 1 Remove t...

Page 73: ...ll system ready and press the Reset button while buzzer with long beeping approximately 3 5 seconds The reset button is right below power button 2 This resets the N5200 to its default IP address and p...

Page 74: ...le to select an NTP Server to keep the N5200 s time synchronized However if the N5200 can not access the Internet you may encounter a problem when setting the Time and Time Zone If this happens 1 Logi...

Page 75: ...USB Copy System Busy Physical Height 230 mm Width 190 mm Depth 230 mm Power Supply Server rated AC power supply 100 220V AC 50 60Hz Auto detect Security Lockable disk trays Environment Temperature 0...

Page 76: ...lified Chinese Japanese Korean and Spanish NTP support Wake on LAN Scheduled Power On Off Event Notification Email notification Buzzer notification LCD UPS Support UPS monitoring via RS 232 and system...

Page 77: ...Our newest firmware is available on our Download Center http www thecus com download php If you are still experiencing problems with your N5200 or require a Return Merchandise Authorization RMA feel...

Page 78: ...from a hard disk drive failure If a hard drive fails the RAID volume can regenerate data from the data and parity stored on its other hard disk drives RAID Levels The Thecus N5200 supports standard RA...

Page 79: ...for an extremely high data fault tolerance and can sustain two simultaneous drive failures This is a perfect solution for mission critical applications RAID 10 RAID 10 is implemented as a striped arra...

Page 80: ...are of the same size and used in RAID N5200 disk usage percentage is listed below RAID Level Percentage Used RAID 0 100 RAID 1 20 RAID 5 80 RAID 6 60 RAID 10 50 JBOD 100 NOTE RAID 10 allows only 4 dis...

Page 81: ...mes can be resolved ADS Benefits ADS lets the N5200 integrate itself with the existing ADS in an office environment This means the N5200 is able to recognize your office users and passwords on the ADS...

Page 82: ...newer Fortress Telecom Axxium Rackmount Patriot Pro Patriot Pro II Patriot INT51 cable Micro Ferrups Best Power Fortress Ferrups f command support Centralion Blazer Clary ST 800 Compaq T1500h Cyber Po...

Page 83: ...al cable Premium S Ellipse Office 600 Serial cable 750 Serial cable 1000 Serial cable 1500 Serial cable Pulsar EXtreme C EX RT Comet EX RT Serial port 3 1 Serial port Pulsar Esprit Evolution S 1250 17...

Page 84: ...oyntec Sekury C 500 800 SquareOne Power QP1000 SuperPower HP360 Hope 550 500 1000 smart shipped with SafeNet 500 1000 contact closure shipped with UPSmart Sweex BC100060 800VA Sysgration UPGUARDS Pro6...

Page 85: ...nd its contributors This product includes software developed by Winning Strategies Inc This product includes software developed by the Apache Group for use in the Apache HTTP server project http www a...

Page 86: ...General Public License applies to most of the Free Software Foundation s software and to any other program whose authors commit to using it Some other Free Software Foundation software is covered by...

Page 87: ...modification Each licensee is addressed as you Activities other than copying distribution and modification are not covered by this License they are outside its scope The act of running the Program is...

Page 88: ...e Program or with a work based on the Program on a volume of a storage or distribution medium does not bring the other work under the scope of this License 3 You may copy and distribute the Program or...

Page 89: ...ny further restrictions on the recipients exercise of the rights granted herein You are not responsible for enforcing compliance by third parties to this License 7 If as a consequence of a court judgm...

Page 90: ...rite to the author to ask for permission For software which is copyrighted by the Free Software Foundation write to the Free Software Foundation we sometimes make exceptions for this Our decision will...

Reviews: