The Singing Machine SMC2035 Instruction Manual Download Page 2

— E1 —

Important Safety Information

1. 

Read these Instructions.

2.   Keep these Instructions.
3.   Heed all Warnings.
4.   Follow all Instructions.
5.   Do not use this apparatus near water.
6.   Clean only with a dry cloth.
7.   Do  not  block  any  of  the  ventilation  openings.  Install  in 

accordance with the Manufacturer’s instructions.

8.   Do  not  install  near  any  heat  sources  such  as  radiators,  heat 

registers, stoves, or other apparatus (including amplifiers) that 
produce heat.

9.   Do not defeat the safety purpose of the polarized or grounding-

type plug. A polarized plug has two blades with one wider than 
the other. A grounding type plug has two blades and a third 
grounding prong. The wide blade or the third prong are provided 
for your safety. When the provided plug does not fit into your 
outlet, consult an electrician for replacement of the obsolete 
outlet.

10.   Protect  the  power  cord  from  being  walked  on  or  pinched 

particularly  at  plugs,  convenience  receptacles,  and  the  point 
where they exit from the apparatus.

11.   Only  use  attachments/accessories  specified  by  the 

manufacturer.

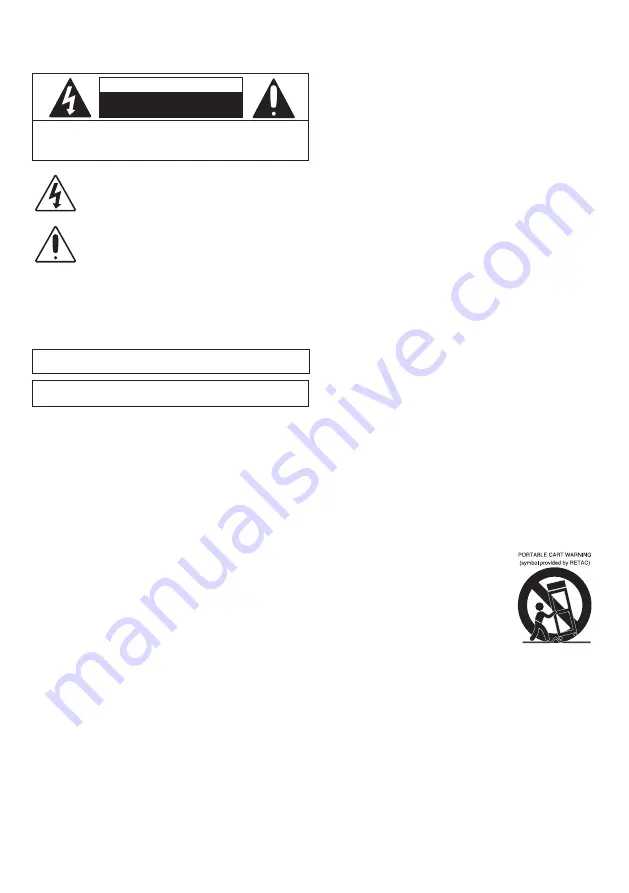
12.   Use only with a cart, stand, tripod, bracket, 

or table specified by the manufacturer, or 
sold  with  the  apparatus.  When  a  cart  is 
used, use caution when moving the cart/
apparatus  combination  to  avoid  injury 
from tip-over.

13.   Unplug  this  apparatus  during  lightning 

storms or when unused for long periods of 
time.

14.   Refer  all  servicing  to  qualified  service  personnel.  Servicing  is 

required when the apparatus has been damaged in any way, 
such as power-supply cord or plug is damaged, liquid has been 
spilled or objects have fallen into the apparatus, the apparatus 
has  been  exposed  to  rain  or  moisture,  does  not  operate 
normally, or has been dropped.

15.   WARNING: To reduce the risk of fire or electric shock, do not 

expose this apparatus to rain or moisture. Do not place objects 
filled with water, such as a vase, on the apparatus.

16.   The  AC  mains  plug  is  used  as  the  power  disconnect  device 

and  it  should  remain  readily  accessible  and  operable  during 
intended use. In order to completely disconnect the apparatus 
from  power,  the  mains  plug  should  be  completely  removed 
from the AC outlet socket.

17.   CAUTION: To reduce the risk of fire or explosion, do not expose 

batteries  to  excessive  heat  such  as  sunshine,  fire  or  other  
heat sources.

CAUTION: 

TO REDUCE THE RISK OF ELECTRIC SHOCK, DO NOT 

REMOVE COVER (OR BACK). NO USER-SERVICEABLE PARTS INSIDE. 

REFER SERVICING TO QUALIFIED SERVICE PERSONNEL. 

DANGEROUS VOLTAGE:

 The lightning flash with arrowhead 

symbol within an equilateral triangle is intended to alert the 
user to the presence of uninsulated dangerous voltage within 
the product’s enclosure that may be of sufficient magnitude to 
constitute a risk of electric shock to persons.

ATTENTION:

  The  exclamation  point  within  an  equilateral 

triangle  is  intended  to  alert  the  user  to  the  presence  of 
important operating and maintenance (servicing) instructions 
in the literature accompanying this product.

CAUTION

RISK OF ELECTRIC SHOCK

DO NOT OPEN

Warnings

WARNING: 


TO PREVENT FIRE OR SHOCK HAZARD, DO NOT EXPOSE 

THIS UNIT TO RAIN OR MOISTURE.

DRIPPING  WARNING:

  This  product  shall  not  be  exposed  to  dripping  or 

splashing, and no objects filled with liquids, such as vases, shall be placed 
on the product.

VENTILATION WARNING:

 The normal ventilation of the product shall not 

be impeded for intended use.

CAUTION: 

TO PREVENT ELECTRIC SHOCK, MATCH WIDE BLADE OF

PLUG TO WIDE SLOT AND FULLY INSERT.

FCC  WARNING: 

This  equipment  may  generate  or  use  radio  frequency 

energy.  Changes  or  modifications  to  this  equipment  may  cause  harmful 
interference  unless  the  modifications  are  expressly  approved  in  the 
instruction  manual.  The  user  could  lose  the  authority  to  operate  this 
equipment if an unauthorized change or modification is made.

This device complies with part 15 of the FCC Rules. Operation is subject 
to  the  following  two  conditions:  (1)  This  device  may  not  cause  harmful 
interference, and (2) this device must accept any interference received, 
including interference that may cause undesired operation.

NOTE:

 This equipment has been tested and found to comply with the limits 

for a Class B digital device, pursuant to part 15 of the FCC Rules. These limits 
are designed to provide reasonable protection against harmful interference 
in a residential installation. This equipment generates, uses and can radiate 
radio frequency energy and, if not installed and used in accordance with 
the instructions, may cause harmful interference to radio communications. 
However, there is no guarantee that interference will not occur in a particular 
installation. If this equipment does cause harmful interference to radio or 
television reception, which can be determined by turning the equipment off 
and on, the user is encouraged to try to correct the interference by one or 
more of the following measures:
•  Reorient or relocate the receiving antenna.
•  Increase the separation between the equipment and receiver.
•  Connect the equipment into an outlet on a circuit different from that to 

which the receiver is connected.

•  Consult the dealer or an experienced radio/TV technician for help.
The rating information is located at the bottom of the unit.

Warning:

  Changes  or  modifications  to  this  unit  not  expressly  approved 

by the party responsible for compliance could void the user’s authority to 
operate the equipment. 

RF Exposure Warning Statements:

This equipment complies with FCC radiation exposure limits set forth for an 
uncontrolled environment. This equipment shall be installed and operated  
with minimum distance 20cm between the radiator & body.

Summary of Contents for SMC2035

Page 1: ...ODE D EMPLOI www singingmachine com The Singing Machine is a registered trademark of The Singing Machine Co Inc The Singing Machine es marca registrada de The Singing Machine Co Inc The Singing Machin...

Page 2: ...constitute a risk of electric shock to persons ATTENTION The exclamation point within an equilateral triangle is intended to alert the user to the presence of important operating and maintenance serv...

Page 3: ...E2 Included Please make sure that the following items are included Cradle with mic holders Detachable Extendable Mic stand AC Adapter Manual Wired Microphone Main Unit...

Page 4: ...dle pole cap pull up on the cradle pole Retighten cap to keep in place 3 Insert then rotate to tighten the Cradle with Mic holders on the mic stand 4 Untighten height adjustment cap to adjust to a sui...

Page 5: ...on 9 VOCALS OFF Button 10 BACK Button 11 MIC VOLUME Control 12 HOME Button 13 Display 14 Handles 15 DC In Jack 16 HDMI Jack 17 Mic 1 Jack 18 Mic 2 Jack 19 Cradle 20 Mic Holders 21 Cradle pole adjustme...

Page 6: ...io to your TV perform the following steps Plug the HDMI cable not included into the HDMI Jack on the back of the unit Plug the other end of the HDMI cable into the HDMI input on your TV Notes This uni...

Page 7: ...ne into Mic jack 1 u as well as Mic jack 2 v when desired Note Do not drop or tap the Mic as damage to the Mic or speakers may occur Do not twirl the microphone cord as it will cause damage to the enc...

Page 8: ...mobile device to scan the step 2 QR code and allow it to load The WiFI list will pop up on your mobile device Search for and select your home WiFi and input your WiFi password to complete the login p...

Page 9: ...an go to the main menu and select SETTINGS WiFi setting DISCONNECT to disconnect from the WiFi network in order to connect to another WiFi network 6 Press the BACK button to go back to the previous sc...

Page 10: ...date to update the software of the unit 4 Select Software info to check the latest software version of this unit 5 Select Factory setting to delete all data stored in the unit Settings BLUETOOTH OPEN...

Page 11: ...from your mobile device to your TV make sure your mobile device and the unit are connected to the same WiFi network 4 Adjust the volume to a comfortable level using the MASTER VOLUME control 5 Adjust...

Page 12: ...atically after 5 minutes and REC will turn off NOTE Please note that new recordings will cause previous recordings to be deleted 8 PLAYBACK YOUR SINGING PERFORMANCE To playback your singing performanc...

Page 13: ...t will start to flash on the display 3 Use the NAV ENTER control to select BLUETOOTH OPEN in the main menu the unit should be connected to a TV 4 The unit automatically searches and pairs a previously...

Page 14: ...on this unit as well as the volume on your Bluetooth device NOTE Bluetooth music and your singing performance are only played on the unit 8 Adjust the MIC VOLUME control as desired Increasing this co...

Page 15: ...ess the RECORD button to record your singing and the music REC will appear solid on the display Press the RECORD button again to stop recording REC will turn off It will also stop recording automatica...

Page 16: ...inger on the recording press the VOCALS OFF button To resume the lead singer press again NOTE Lead vocal removal might work better on some songs than others 14Toggle the VOICE EFFECTS control to selec...

Page 17: ...ake sure the mic s ON OFF switch is set to the ON position Make sure the MIC VOLUME control is not set too low MASTER VOLUME is set to minimum raise volume Microphone input cannot output to the TV The...

Page 18: ...ith WPA2 or lower security standard you are recommended to factory reset your router Make sure you have written down your existing customized SSID name and password This will help in reconnecting your...

Page 19: ...6 Lbs 2 1 kgs Main unit Mic stand 5 4 Lbs 2 5 kgs Microphone 74 dB 600 Ohms impedance with 6 3 mm Dynamic Microphone Specifications are subject to change without notice The Bluetooth word mark and log...

Page 20: ...bater as al calor excesivo como al rayo del sol fuego u otras fuentes de calor Advertencias PRECAUCI N PARA REDUCIR EL RIESGO DE DESCARGAS EL CTRICAS NO QUITE LA CUBIERTA NI LA TAPA POSTERIOR NO HAY P...

Page 21: ...ezas incluidas Aseg rese de que est n incluidos las siguientes piezas Micr fono con cable Manual Unidad Principal Adaptador de CA Cuna con soportes para micr fono Desmontable Soporte de micr fono exte...

Page 22: ...el poste hacia arriba Vuelva a apretar la tapa para mantener en su lugar 3 Inserte y luego gire para apretar la cuna con soportes para micr fono en el poste 4 Afloje la tapa de ajuste de altura para...

Page 23: ...R BACK 11 Control de VOLUMEN DEL MICR FONO 12 Bouton INICIO HOME 13 Pantalla 14 Manija 15 Conector de entrada de CC 16 Conector para HDMI 17 Entrada para MICR FONO 1 18 Entrada para MICR FONO 2 19 Sop...

Page 24: ...dor de CA al tomacorriente NOTAS Esta unidad puede utilizarse con o sin televisor pero es altamente recomendable usar uno para aprovechar todas las funciones Tambi n consulte la Gu a de usuario del te...

Page 25: ...1 u y el otro enchufe de micr fono en la entrada para micr fono 2 v si lo desea NOTA No arroje o d golpecitos al micr fono puede da ar el micr fono o los parlantes No gire el micr fono por el cable p...

Page 26: ...tivo m vil para escanear el c digo QR del paso 2 y permita que se cargue La lista de WiFI aparecer en su dispositivo m vil Busque y seleccione el WiFi de su hogar e introduzca su contrase a de WiFi pa...

Page 27: ...ACI N Configuraci n WiFi DESCONECTAR para desconectarse de la red WiFi y conectarse a otra red WiFi 6 Presione el bot n BACK en el panel de control para volver a la pantalla anterior 7 Presione el bot...

Page 28: ...oftware para actualice el software de la unidad 4 Seleccione Informaci n del software para comprobar la ltima versi n de software de esta unidad 5 Seleccione la configuraci n de f brica para eliminar...

Page 29: ...deos de karaoke favoritos desde su dispositivo m vil a su televisor aseg rese de que su dispositivo m vil y la unidad est n conectados a la misma red WiFi 4 Ajuste el volumen a un nivel conveniente us...

Page 30: ...har n que se eliminen las grabaciones anteriores 8 REPRODUCIR SU GRABACI N DE VOZ Para reproducir su grabaci n de voz puede oprimir el bot n PLAYBACK PB aparecer s lido en la pantalla Opr malo nuevame...

Page 31: ...en la pantalla 3 Utilice el control NAV ENTER para seleccionar BLUETOOTH OPEN en el men principal la unidad debe estar conectada a un televisor 4 La unidad busca y empareja autom ticamente un disposit...

Page 32: ...MEN PRINCIPAL de esta unidad as como tambi n el Volumen de su dispositivo Bluetooth NOTA La m sica Bluetooth y su canto las interpretaciones solo se reproducen en la unidad 8 Ajuste el control MIC VOL...

Page 33: ...presione el bot n RECORD para grabar su canto y la m sica REC aparecer s lido en la pantalla Presione el bot n RECORD nuevamente para detener la grabaci n REC se apagar Tambi n dejar de grabar autom...

Page 34: ...nuevamente NOTA La eliminaci n de la voz principal podr a funcionar mejor en algunas canciones que en otras 14 Mueva el control EFECTOS DE VOZ VOICE EFFECTS para seleccionar un efecto de voz 15Manteng...

Page 35: ...osici n ENCENDIDO ON Aseg rese de que los controles de MIC VOLUME no est n muy bajos El MASTER VOLUME est fijado en m nimo suba el volumen La entrada de micr fono no puede salir al televisor El dispos...

Page 36: ...e f brica de su enrutador Aseg rese de haber anotado su nombre y contrase a de SSID personalizados existentes Esto ayudar a volver a conectar sus dispositivos previamente conectados y volver a su conf...

Page 37: ...2 1 kgs Unidad principal y soporte de micr fono 5 4 libras 2 5 kgs MICR FONO Impedancia Con Micr fono Din mico 74 Db 600 Ohm Con 6 3 Mm Las especificaciones est n sujetas a cambios sin previo aviso E...

Page 38: ...z l appareil uniquement avec un chiffon sec 7 Ne bloquez pas les ouvertures d a ration Installez conform ment selon les consignes du fabricant 8 N installez pas proximit de sources de chaleur telles q...

Page 39: ...ents compris Veuillez vous assurer que les l ments suivants sont inclus Microphone avec cable Unit Principal Adapteur CA Manual D Emploi Support avec supports de micro d tachable Support de micro exte...

Page 40: ...le poteau Resserrez le capuchon pour le maintenir en place 3 Ins rez puis tournez pour fixer le berceau avec les supports de microphone au poteau 4 Desserrez le capuchon de r glage de la hauteur pour...

Page 41: ...ton VOCALS OFF 10 Bouton RETOUR BACK 11 Contr le des MICRO VOLUME 12 Bouton de ACCUEIL HOME 13 Affichage 14 Poignee de transport 15 Prise de sortie DC 16 Prise HDMI 17 Prise MIC 1 18 Prise MIC 2 19 Su...

Page 42: ...our sortir la vid o de casting et diffuser de l audio sur votre t l viseur effectuer les tapes suivantes Connectez le c ble HDMI non inclus dans la prise HDMI l arri re de l appareil Connectez l autre...

Page 43: ...jack Mic 2 v si vous le souhaitez REMARQUE Ne pas chapper le microphone car cela peut causer des dommages ainsi qu aux haut parleurs Ne pas faire virevolter le microphone par la cordon car cela peut e...

Page 44: ...e code QR de l tape 2 et laissez le se charger La liste WiFI appara tra sur votre appareil mobile Recherchez et s lectionnez votre r seau WiFi domestique et saisissez votre mot de passe WiFi pour term...

Page 45: ...votre WiFi connect s affichera l cran Vous pouvez t l charger l application Singing Machine Karaoke pour couter votre musique de karaok pr f r e et projeter la vid o de karaok HD sur votre t l viseur...

Page 46: ...le bouton HOME pour acc der au menu principal l aide de la commande NAV ENTER s lectionnez l ic ne R GLAGES SEt appara tra l cran 2 S lectionnez le param tre WiFi pour vous connecter ou se d connecte...

Page 47: ...ok pr f r es de votre appareil mobile vers votre t l viseur assurez vous que votre appareil mobile et l appareil sont connect s au m me r seau WiFi 4 Ajustez le volume un niveau confortable en utilisa...

Page 48: ...indra REMARQUE Veuillez noter que les nouveaux enregistrements entra neront la suppression des enregistrements pr c dents 8 LISEZ VOTRE PERFORMANCE DE CHANT Pour commencer la lecture de votre enregist...

Page 49: ...n 3 Utilisez la commande NAV ENTER pour s lectionner BLUETOOTH OPEN dans le menu principal l appareil doit tre connect un t l viseur 4 L appareil recherche et associe automatiquement un appareil Bluet...

Page 50: ...ur votre dispositif Bluetooth REMARQUE La musique Bluetooth et votre chant les performances ne sont jou es que sur l appareil 8 R glez la commande MIC VOLUME comme vous le souhaitez Augmenter cette co...

Page 51: ...re chant et la musique REC appara tra en continu sur l affichage Appuyez nouveau sur le bouton RECORD pour arr ter l enregistrement REC s teindra Il arr tera galement l enregistrement automatiquement...

Page 52: ...VOCALS OFF Pour reprendre le chanteur principal appuyez nouveau REMARQUE La suppression de la voix principale peut mieux fonctionner sur certaines chansons que sur d autres 14 Faites glisser le comma...

Page 53: ...ommutateur ON OFF du microphone soit en position MARCHE ON Assurez vous que le niveau du MIC VOLUME n est pas trop faible Le volume ma tre MASTER VOLUME est r gl au minimum augmentez le volume L entr...

Page 54: ...initialiser votre routeur aux param tres d usine Assurez vous d avoir not votre nom et votre mot de passe SSID personnalis s existants Cela vous aidera reconnecter vos appareils pr c demment connect s...

Page 55: ...iFi 2 4GHz G N RALIT S Alimentation 100 240V 50 60Hz Sortie 16 1V CC 3 5A centre positif Dimensions Unit principale uniquement 10 3 x 10 3 x 12 6 pouces 26 2 x 26 2 x 32cm Unit principale et pied de m...

Page 56: ...Ontario CA 91761 1413 USA PRINTED IN CHINA IMPRESO EN CHINA Imprim en Chine 2035 2202 ESF01 US U S Representative Company Name The Singing Machine Company Inc Address 6301 NW 5th Way Suite 2900 Fort L...

Reviews: