


User’s Guide
SWRU321A
– May 2013
Page 8/32
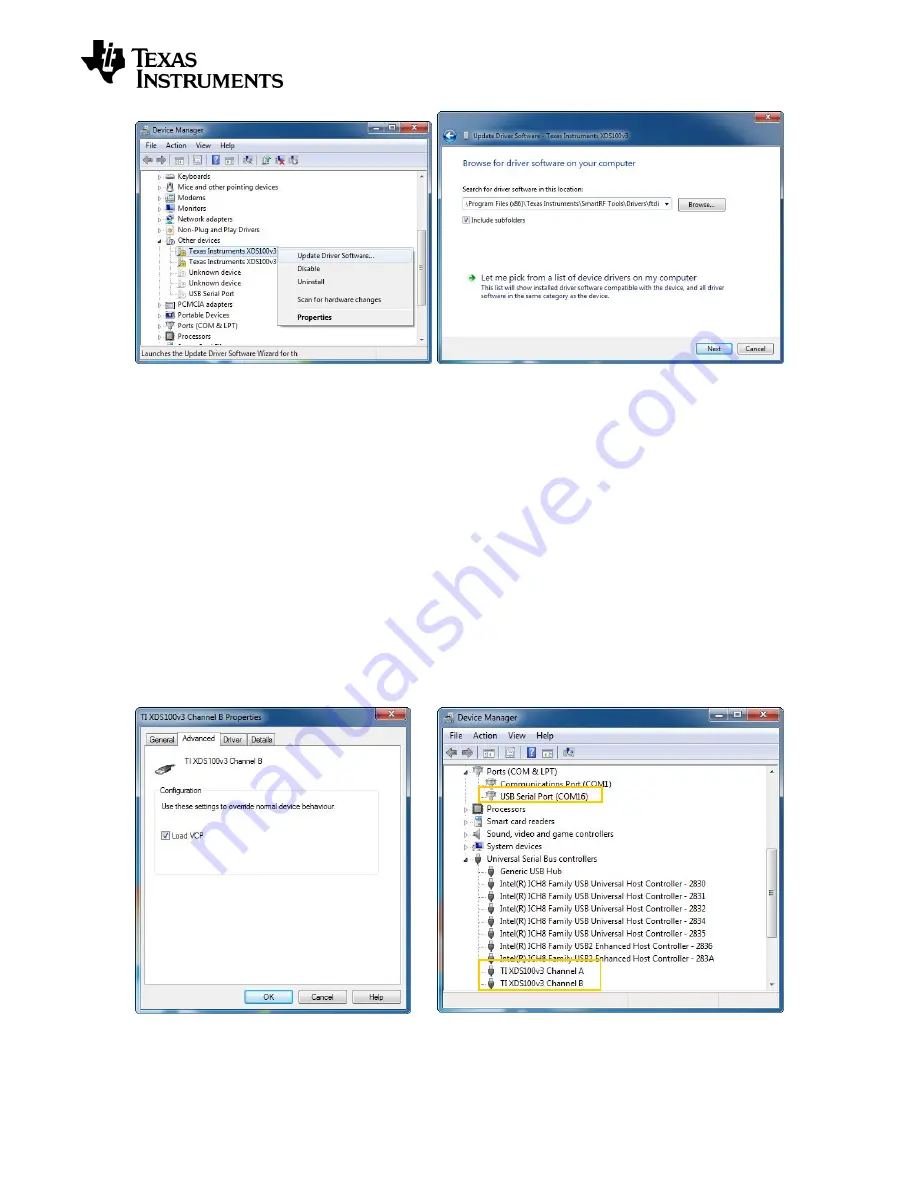
a)
b)
Figure 1
– Driver install: a) Update driver, b) Specify path to FTDI drivers
Press Next and wait for the driver to be installed. The selected device should now appear in the
Device Manager as “TI XDS100v3 Channel x” (x = A or B) as seen in Figure 2b. Repeat the
above steps for the second
“Texas Instruments XDS100v3” listed under “Other devices”.
4.1.2.1.1 Enable XDS100v3 UART back channel on Windows
If you have both “TI XDS100v3 Channel A” and “TI XDS100v3 Channel B” listed under Universal
Serial Bus Controllers, you can proceed. Right click on
“TI XDS100v3 Channel B” and select
Properties. Under the Advanced tab, make sure “Load VCP” is checked as shown in Figure 2a.
A
“USB Serial Port” may be listed under “Other devices”, as seen in Figure 1a. Follow the same
steps as for the “Texas Instruments XDS100v3” devices to install the VCP driver. When the
drivers from
<Studio install dir>\Drivers\ftdi
is properly installed, you should see the USB Serial
Port
device be listed under “Ports (COM & LPT)” as shown in Figure 2b.
The SmartRF06EB drivers are now installed correctly.
Figure 2
– Driver install: a) VCP loaded and b) drivers successfully installed