


Additional Hardware Modes
8
SLOU435B – December 2015 – Revised February 2019
Copyright © 2015–2019, Texas Instruments Incorporated
DRV2624 ERM, LRA haptic driver evaluation kit
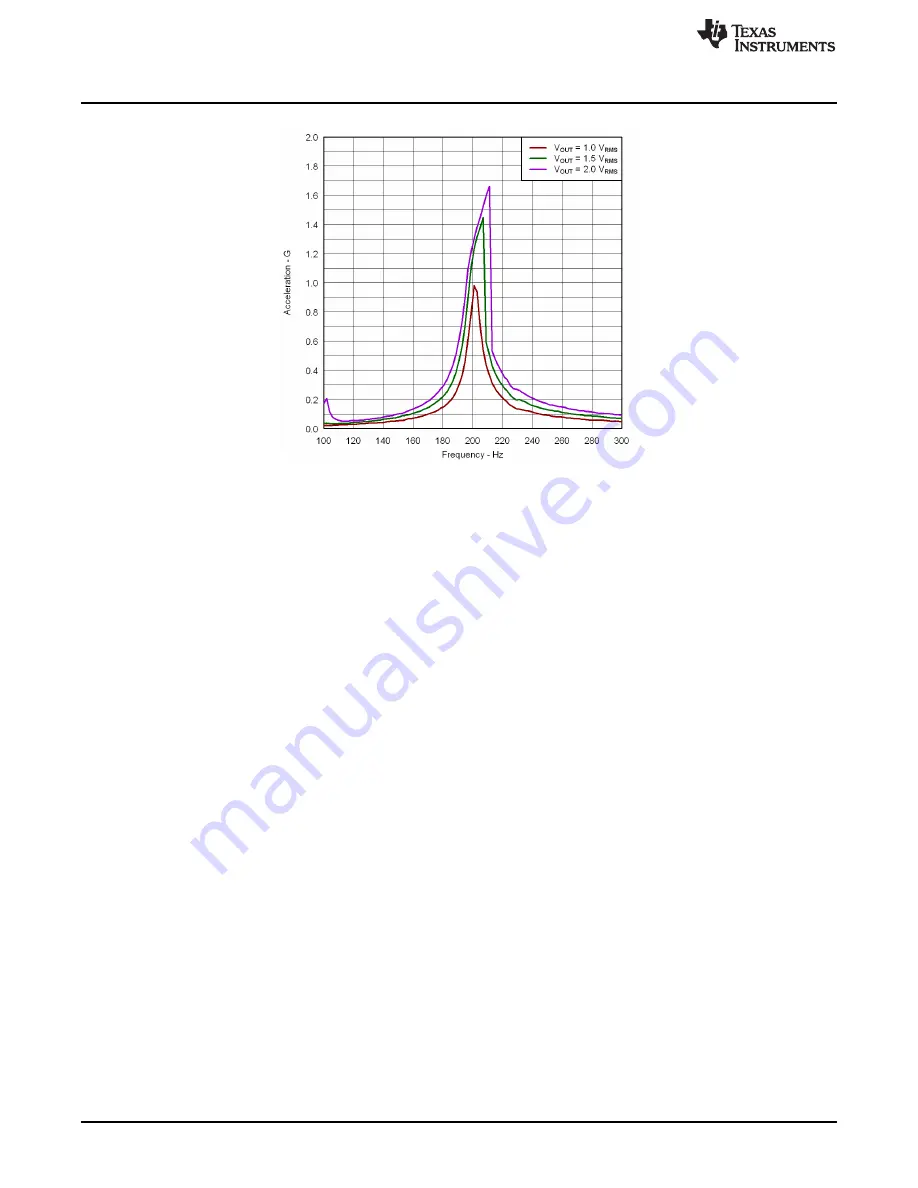
Figure 11. Acceleration Versus Frequency
3
Additional Hardware Modes
Additional modes are available on the DRV2624EVM-CT providing increased board control and
functionality.
3.1
Accessing GUI Mode
The DRV2624EVM-CT has the ability to be controlled via Haptics Control Console. In order to place the
EVM into ‘GUI Mode’, hold down the (+) for approximately 3 seconds. The LED indicators blink, and the
right half of the LEDs remain on, indicating that the EVM is in GUI Mode.
3.2
Haptics Control Console GUI
Haptics Control Console (HCC) allows the user to have control over the DRV2624 driver through a
number of controls and features.
To control the DRV2624EVM-CT via HCC, connect the EVM to an available port on a computer using the
included micro USB cable. Once the EVM is powered on, access GUI Mode by holding down the (+) for
approximately 3 seconds as described in
.
Open up the latest version of Haptics Control Console, and on the tool bar the USB tab will read out
'2.Haptics DRV2624 EVM [version]'. Once the GUI has recognized the DRV2624EVM-CT, press 'Connect'
to access the device Console.
Once connected the HCC provides the user flexibility to control the EVM functions through a GUI
‘Console’, and the ability to read and write to and from the DRV2624 through the ‘Register Map’ window
as seen below in
below.