background image

Helpline No. UK/Northern Ireland 01270 508538 Rep.Ireland 1800 995 036
Web Support www.quesh.co.uk
Model No: 44159

14

Audio Connections

10

Stereo Audio

Use a pair of audio cables (red for right, white for left) to connect the stereo 
audio output of  this player to other stereo audio input.

Coaxial Digital Audio

Use a coaxial cable to connect the coaxial output of this player to the coaxial 
input of a power amplifier. 

Speaker Output

Use the speaker cables to connect to the speaker connection ports on the back 
of the unit making note of the correct ports for each speaker. The subwoofer 
goes into the SW port, the centre speaker which is the only speaker which lies 
flat goes into the CR port, the two rear speakers have the longest wires and go 
into the SR and SL ports which leaves the two remaining speakers with shorter 
wires to go into the FR and FL ports.

Audio Input

This player has a group of audio input terminals. 
You can input the analogue stereo audio signals 
from extra devices such as DVD, VCD, CD player, 
etc. Use the audio cable (red for right, white for 
left) to connect the stereo audio output 
terminals of a DVD, VCD, CD player etc to the 
stereo input terminals of this player. After the 
connections have been correctly made, press 
the “SOURCE SELECT” button to switch to the 
corresponding signal source line to enjoy the 
audio from the connected extra device.

Summary of Contents for 44159

Page 1: ...assured in the knowledge that as well as your 3 year parts and labour warranty you have the added peace of mind of dedicated helplines and web support AFTER SALES SUPPORT UK N IRELAND HELPLINE NO 012...

Page 2: ...ng To Your TV 10 Audio Connections 11 Playing a DVD 12 Playing an MP3 Image Video CD 13 Using a USB Flash Device or Memory Card 14 Using the Radio 15 System Setup 16 Technical Specification 17 Trouble...

Page 3: ...and peace of mind that comes with purchasing a product made by one of Europe s leading manufacturers All products brought to you by Tevion are manufactured to the highest standards of performance and...

Page 4: ...other heat sources Keep this appliance away from strong magnets Never cover the ventilation slots on the underside or back of the unit Avoid placing heavy objects on top of the appliance Always disco...

Page 5: ...its life span the unit in its entirety should be taken to a recycling centre Please contact your local authority for details of recycling schemes in your area Disposal of Your Old Product Do not dispo...

Page 6: ...hould any of these be missing please contact the customer support team on the number below Helpline No UK Northern Ireland 01270 508538 Rep Ireland 1800 995 036 Web Support www quesh co uk Model No 44...

Page 7: ...in Dolby Digital LPCM MPEG etc Digital audio decoder HiFi 96kHz 24bit audio digital processor COAXIAL digital audio output Compatible with DVD VCD CD CD R CD RW DVD R RW DVD R RW MP3 MPEG4 JPEG Full f...

Page 8: ...ophone Sockets 2 Disc Tray 3 Memory Card Slot 4 USB Slot 5 Display Screen 6 Open Close 7 Play Pause 8 Standby 9 Stop 10 Volume Dial Rear Display 1 Power Switch 2 Speaker Output 3 HDMI Output 4 Line In...

Page 9: ...3 Go To 4 Setup 5 A Mode 6 Program 7 Volume 8 Forward Rewind 9 Title 10 Arrow Keys 11 Audio 12 Sound Effect 13 Step 14 USB 15 Repeat 16 Open Close 17 Play Pause 18 Mute 19 V Mode 20 Angle 21 Source Se...

Page 10: ...t be in the same title track Mute Press to temporarily switch off the sound Press it again to restore the sound Vol Increase Decrease Press the VOL VOL to turn up down the volume Sound Effect Press re...

Page 11: ...dly to select the audio languages provided by the disc for DVD Press repeatedly to switch the audio channels LEFT MONO RIGHT MONO MIX MONO and STEREO provided by the disc for VCD Angles Press to switc...

Page 12: ...to save it as a preset station The system can store up to 80 preset channels 40 in FM mode and 40 AM mode Auto Press to begin an auto scan for the broadcasting radio channels from 87 50Mhz to 108Mhz...

Page 13: ...the yellow plug of an AV cable to connect the composite video output of this player to the video input of a TV monitor Component Video Use a 3 core AV cable to connect the component outputs of this pl...

Page 14: ...fer goes into the SW port the centre speaker which is the only speaker which lies flat goes into the CR port the two rear speakers have the longest wires and go into the SR and SL ports which leaves t...

Page 15: ...1 Press the OPEN CLOSE button either on the remote or on the front of the unit to open the disc tray 2 Place the CD onto the tray making sure that it is the correct way up 3 Press the OPEN CLOSE butto...

Page 16: ...ve found your station you can store this by pressing the memory button followed by the number you wish to store it to For example 103 00Mhz press memory press 04 on the numeric pad This will now be sa...

Page 17: ...ratio with black bands on the upper and lower sections of the screen If this unit is connected to a wide screen TV set select 16 9 16 9 The wide screen image will be displayed in full screen in its na...

Page 18: ...nutes a screen saver will appear on the screen You can press any key or button except STANDBY to wake it The unit will go into the standby mode after about 20 minutes being in the screen saver mode Yo...

Page 19: ...audio contents 5 1CH Turn off the DOWNMIX mode If this unit is connected to a 5 1 channel amplifier this item should be selected NOTE This function only applies to the Dolby AC 3 encoded 5 1 channel...

Page 20: ...tal audio output There are two options 48KHz and 96KHz NOTE Some amplifiers don t support 96KHz sampling which will affect the coaxial output Channel delay This item is used to set the delay time for...

Page 21: ...ic II MUSIC The surround experience is tailored for multi channel music playback MOVIE Emphasis is given to the centre channel as two channel audio is decoded and played back into your 5 1 system PRO...

Page 22: ...oward the left and right speakers EQUALIZER Sound mode Select a sound mode from either Normal Rock Pop Live Dance Techno Classic or soft Bass boost Set it to ON to boost the bass sound Super bass Set...

Page 23: ...Dolby digital Setup DUAL MONO Stereo The player outputs the left channel audio and right channel audio via the FL and FR speaker only L Mono The player outputs the left channel audio only via both the...

Page 24: ...image on the TV In such case you need to reset this setting item for an appropriate video output mode or press V MODE until the output image becomes normal Resolution Select a resolution in this sett...

Page 25: ...make HDMI much more desirable than its predecessors component video S Video and composite video HDMI is an uncompressed all digital signal while the aforementioned interfaces are all analogue With an...

Page 26: ...Line television broadcasting standards PAL If the connected TV is a PAL system which is used in China Hong Kong and Europe etc select this mode It will change the video signal of an NTSC disc and outp...

Page 27: ...g the AUDIO button and the subtitle language with the SUBTITLE button on the remote control Parental This item allows the user to set a maximum rating of the movies that can be viewed Movies rated hig...

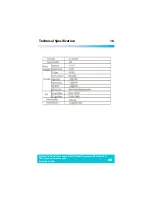
Page 28: ...Helpline No UK Northern Ireland 01270 508538 Rep Ireland 1800 995 036 Web Support www quesh co uk Model No 44159 28 Technical Specification 16...

Page 29: ...mode Press V Mode repeatedly until the picture becomes normal again Connect the video cable securely There is no sound or the sound is distorted The audio cables aren t connected securely The volume l...

Page 30: ...Keep your purchase receipt safe as proof of date of purchase The guarantee can only be extended for the duration of any repair required Should your item become defective during the warranty period in...

Page 31: ...___________________ Contact Tel No ______________________________________ Model Number 44159 Fault Description ____________________________________ ___________________________________________________...

Reviews: