12
• IP 3000 BR Mk 2
Main menu
You can set most receiver functions via the main menu.
You can control the menu with the remote control. The
menu is displayed on the connected television set.
Important
The menu functions are only available if “DISC”
is selected as the source.
Both devices must be activated, the image signal of the
receiver must appear on the television set.
Quick Setup
You can make basic settings here.
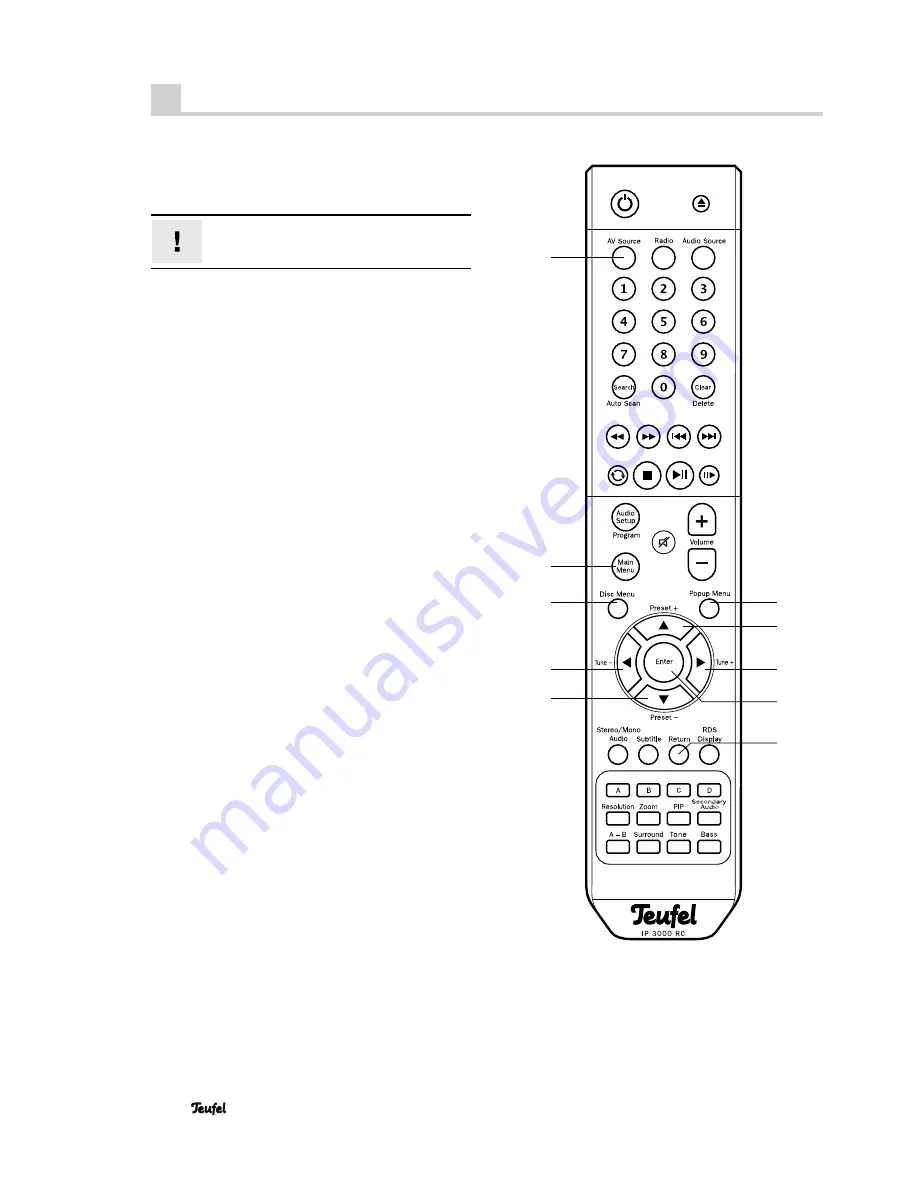
1. Push the button
68
“AV Source” and open the main menu
with the button
61
“Main Menu”.
2. With the navigation buttons
42
“
▲
” and
58
“
▼
”, select
the item “Quick Setup” and
push
the Enter button
44
twice.
The menu “OSD language settings” will open.
3. Select “English” as the language and confi rm with the
enter button
44
.
The “Resolution” menu will open.
You can make the following settings here:
HDMI Auto = the highest possible resolution is auto-
matically set
1080p
= 1920 × 1080 Pixels
1080i
= 1920 × 1080 Pixels
720p
=
1280 × 720 Pixels
576p
=
720 x 576 Pixels
576i
=
720 x 576 Pixels
p = Full screen mode
i = Half-screen mode (interlaced)
4. Select the resolution that your television set is able to
render and confi rm with the enter button
44
.
The “Image format” menu will open.
You can make the following settings here:
16:9 Widescreen
– 4:3 movies are shown with full
height and extended width on a 16:9 television set.
16:9 Pillarbox
– 4:3 movies are shown with full height
and black bars on the left and right on a 16:9 televi-
sion set.
4:3 Pan and Scan
– 16:9 movies are shown with full
height, but are cut off on the sides on a 4:3 television
set.
4:3 Letterbox
– 16:9 movies are shown with full width
and with black bars on the top and bottom on a 4:3
television set.
5. Select the image format that corresponds to your televi-
sion set and confi rm with the enter button
44
.
The button “Exit” will appear.
6. Confi rm “Exit” with the enter button
44
.
This applies and saves the basic settings.
68
58
59
60
61
41
42
43
44
45


