Terratek TTRTK User Manual Download Page 21

20


Application 

This rotary tool can be used for drilling, grinding, sanding and polishing, as well as engraving, 
cutting and removing rust in tight spaces or inaccessible places. The tool can be used on most 
metals, glass, wood and ceramics. For best performance and results keep the speed as even as 
possible without exercising too much pressure. As a guideline, use the tool at low speed for all 
large accessories, such as polishing for example, and at high speed for smaller accessories such
as those used for engraving. For grinding and engraving, hold the tool as if it were a pen.

Installing and Removing Accessories 

(Fig.2)

Always switch the tool off first and unplug. Hold the locking button at the front of the tool down 
and undo the collet chuck  (anti-clockwise). Insert the collet that matches the shaft size of the 
accessory to be used. Place the collet nut over the collet and then insert the accessory shaft 
into the collet chuck ensuring maximum shaft contact then tighten up the collet nut. (DO NOT 
USE PLIERS).

Switching On/Off 

The tool is switched "ON" by the slide switch located on the motor housing.(Fig.1-1)                      
TO TURN THE TOOL "ON" slide the switch button forward.                                                            
TO TURN THE TOOL "OFF" slide the switch button backward.
 
Warning! Hold the tool with both hands while starting the tool, since torque from the motor 
can cause the tool to twist.

Variable speed control dial 

This tool is equipped with a variable speed control dial, adjustment from 10000 to 32000 rpm.
(Fig.1-2).

Functional Description 

(Fig.1)

WARNING: Disconnect the plug from the power source before making any assembly, 
adjustments or changing accessories. 
Such preventive safety measures reduce the risk 
of starting the tool accidentally.

Operation

CAUTION! Always be sure that the tool is switched off before assembly or adjustments

Summary of Contents for TTRTK

Page 1: ...Rotary Mini Grinder TTRTK User Manual Please read and retain for future reference IMPORTANT Read all instructions before use...

Page 2: ...cal Information Using your tool Maintenance Warranty 1 No Description 1 Plug 2 Cord sleeve 3 Screw 4 PCB board 5 Switch 6 Screw 7 Left body 8 Stator 9 Carbon brush 10 Right body 11 Rotor 12 Spindle lo...

Page 3: ...2 Exploded Assembly Diagram NOTICE Actual product may vary from pictures shown...

Page 4: ...3 1 2 3 4 5 Fig 1 Fig 2 1 ON OFF switch 2 Speed controller 3 Collet chuck nut 4 Locking knob for collet chuck 5 cover...

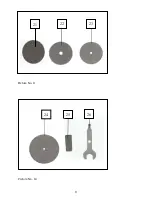
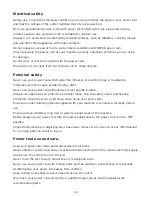
Page 5: ...Grinding head for grinding belt 1 4 1 2 11 1 Cutting wheel with arbor 12 10 Grinding pin 13 5 Wire Brush 14 1 Polishing paste 15 2 Felt polishing Wheels 1 x 1 4 16 1 Fabric polishing wheel 1 x 1 8 17...

Page 6: ...5 Picture No 1 3 2 1 Picture No 2 4 6 5...

Page 7: ...6 Picture No 4 Picture No 3 7 9 8 11 10...

Page 8: ...7 Picture No 6 Picture No 5 12 13...

Page 9: ...8 Picture No 8 Picture No 7 14 15 16 19 18 17 20...

Page 10: ...9 Picture No 10 Picture No 9 21 22 23 26 25 24...

Page 11: ...Failure to do so can result in serious injury Save this manual for future reference Copyright 2013 by ACL Group Intl Ltd All rights reserved This manual or any artwork contained herein must not be re...

Page 12: ...Keep work area clean and well lit Cluttered or dark areas invite accidents Do not operate power tools in explosive atmospheres such as in the presence of flammable liquids gases or dust Power tools c...

Page 13: ...ed surfaces such as radiators cooking ranges and any other fixed appliance with metal surfaces Do not expose your power tool to wet or damp conditions and NEVER use in rain Check regularly the power c...

Page 14: ...USE IN A DANGEROUS ENVIRONMENT Don t use power tools in damp or wet locations or expose them to rain Keep work area well lit 6 KEEP CHILDREN AWAY All visitors should remain at a safe distance from wor...

Page 15: ...imes 16 MAINTAIN TOOLS WITH CARE Keep tools clean and in good working condition for maximum safety performance Follow instructions for lubricating and changing accessories 17 DISCONNECT TOOLS BEFORE S...

Page 16: ...g NEVER remove the grounding prong from the power tool or extension cord Rotary Mini grinder Hold power tool by the insulated gripping surfaces when performing an operation where the cutting tool may...

Page 17: ...k area Work area should be sealed by plastic sheeting and persons not protected should be kept out until work area is thoroughly cleaned Always wait until the machine has come to a complete stop befor...

Page 18: ...ign objects can cause the bit to jump Never start the tool when the bit is engaged in the material Avoid bouncing and snagging the wheel especially when working corners sharp edges etc This can cause...

Page 19: ...se control of the tool This product is not intended for use as a dental drill in human or veterinary medical applications Serious personal injury may result WARNING Some dust created by power sanding...

Page 20: ...that this tool is always in an operating condition since it does not have to be plugged into an electrical outlet 4 If the bit becomes jammed immediately turn the trigger switch off to prevent an over...

Page 21: ...he shaft size of the accessory to be used Place the collet nut over the collet and then insert the accessory shaft into the collet chuck ensuring maximum shaft contact then tighten up the collet nut D...

Page 22: ...sent a risk of injury to persons Only use accessory or attachment for its stated purpose General Maintenance 1 Keep the air vents free from obstruction and clean regularly 2 Check regularly for any du...

Page 23: ...and RoHS directives EN55014 1 2006 A1 2009 EN55014 2 1997 A1 2001 A2 2008 EN61000 3 2 2006 A1 2009 A2 2009 EN61000 3 3 2008 All provisions of Annex 1 of Council Directive 2004 108 EC EMC directive EN...

Page 24: ...do any repairs or replace any parts of this product ACL Group Intl Ltd and its distributor expressly state that all repairs or parts replacement should be done by certified or licensed technicians The...

Reviews: