TerraMaster D5-300C User Manual Download Page 3

2

2.  Hard Drive Installation

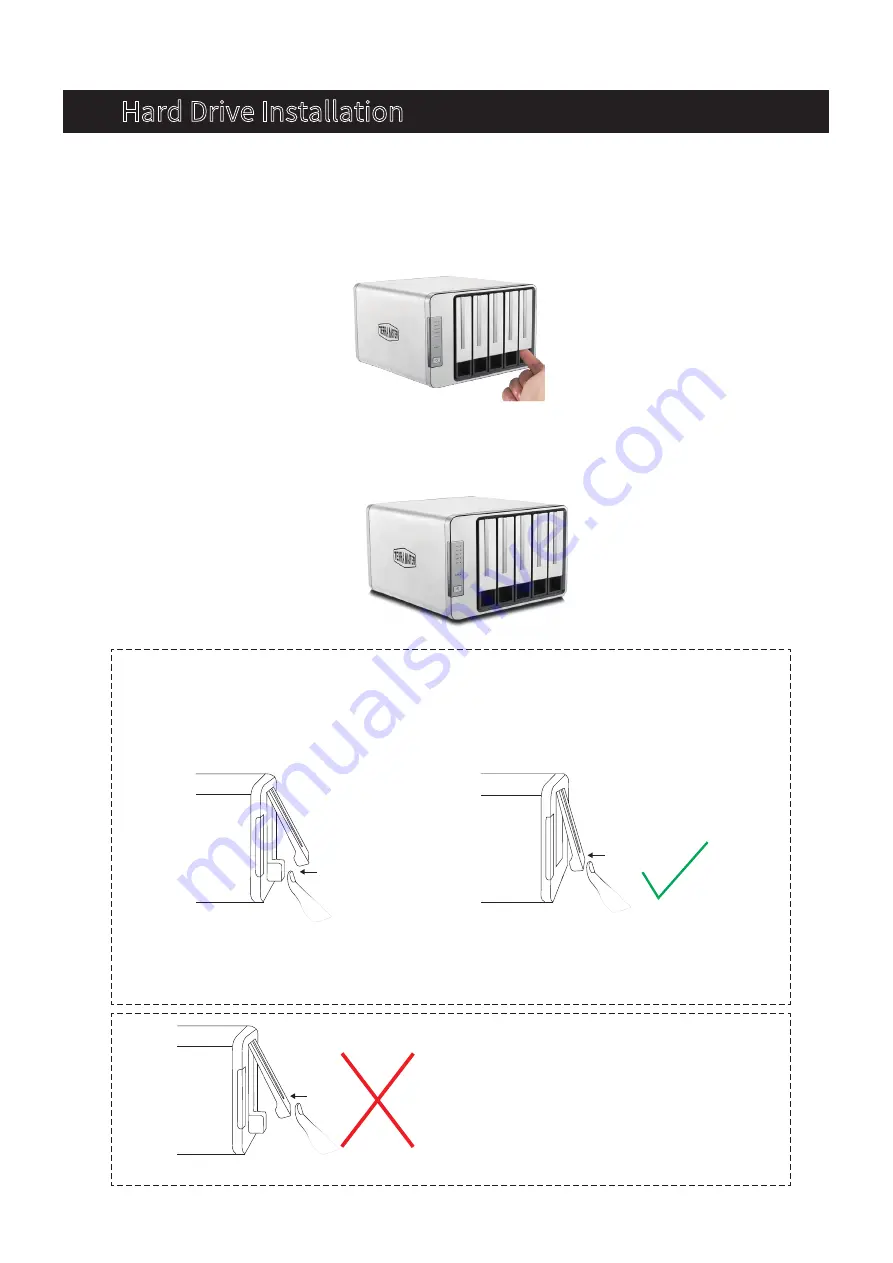
1. Pull the handle out of the hard drive tray, grasp it, and draw the hard drive tray from the 
device. Fix the hard drive and the tray in place using the screws provided, and insert the tray into 
the device along the track. When inserting the tray, open the handle and keep the handle in this 
position. Otherwise, the tray may not be inserted into the device correctly.

2. Once the tray is fully inserted, close the handle. Hard drive installation is now complete. 
To install additional hard drives, repeat steps 1 and 2.

Push the lower part of the hard drive tray 

to insert the hard drive fully.

Please take extra care to complete hard drive installation correctly.

Step 1

Step 2

Lock the tray by pressing the handle after 

the hard drive has been fully inserted into 

the device.

If  the  hard  drive  tray  locks  without  fully 

inserting it into the device, taking out fails 

or read/write is unstable.

Warning! 

Summary of Contents for D5-300C

Page 1: ...User Manual Copyright 2017 TerraMaster All Rights Reserved Model D5 300C TerraMaster RAID Storage Data Storage Master...

Page 2: ...drive in sleep mode Green Hard drive is ready Flashing Green Reading writing Flashing Red Hard drive fault or array damage Note During the process of data recovery on RAID 1 mode one hard drive indica...

Page 3: ...erted into the device correctly 2 Once the tray is fully inserted close the handle Hard drive installation is now complete To install additional hard drives repeat steps 1 and 2 Push the lower part of...

Page 4: ...ault setting for HDD1 and HDD2 is single disk mode Using single disk mode each drive displays and operates independently HDD3 4 and 5 can only operate in single disk mode They work as independent driv...

Page 5: ...t apply to you 1 Open Computer Management and navigate to Storage Disk Management 2 Find an unallocated disk in the menu right click the disk and select Initialise Disk from the drop down menu 3 Compl...

Page 6: ...5...

Page 7: ...rnal 2 Use the menu to nd an unallocated disk 3 Select the unallocated disk and click Erase 4 Select the relevant Name Format and Scheme from the menu and click Erase 5 Once the Erase process is nishe...

Page 8: ...d drive please refer to Section 2 of the user manual 4 Wait for approximately 1 minute until a the indicator of the newly inserted hard disk ashes orange and b the indicator of the original hard disk...

Page 9: ...hard drive is greater than or equal to the capacity of the faulty hard drive 3 The data recovery process can last anywhere from several hours to tens of hours The length of time taken depends on the...

Reviews: