


11
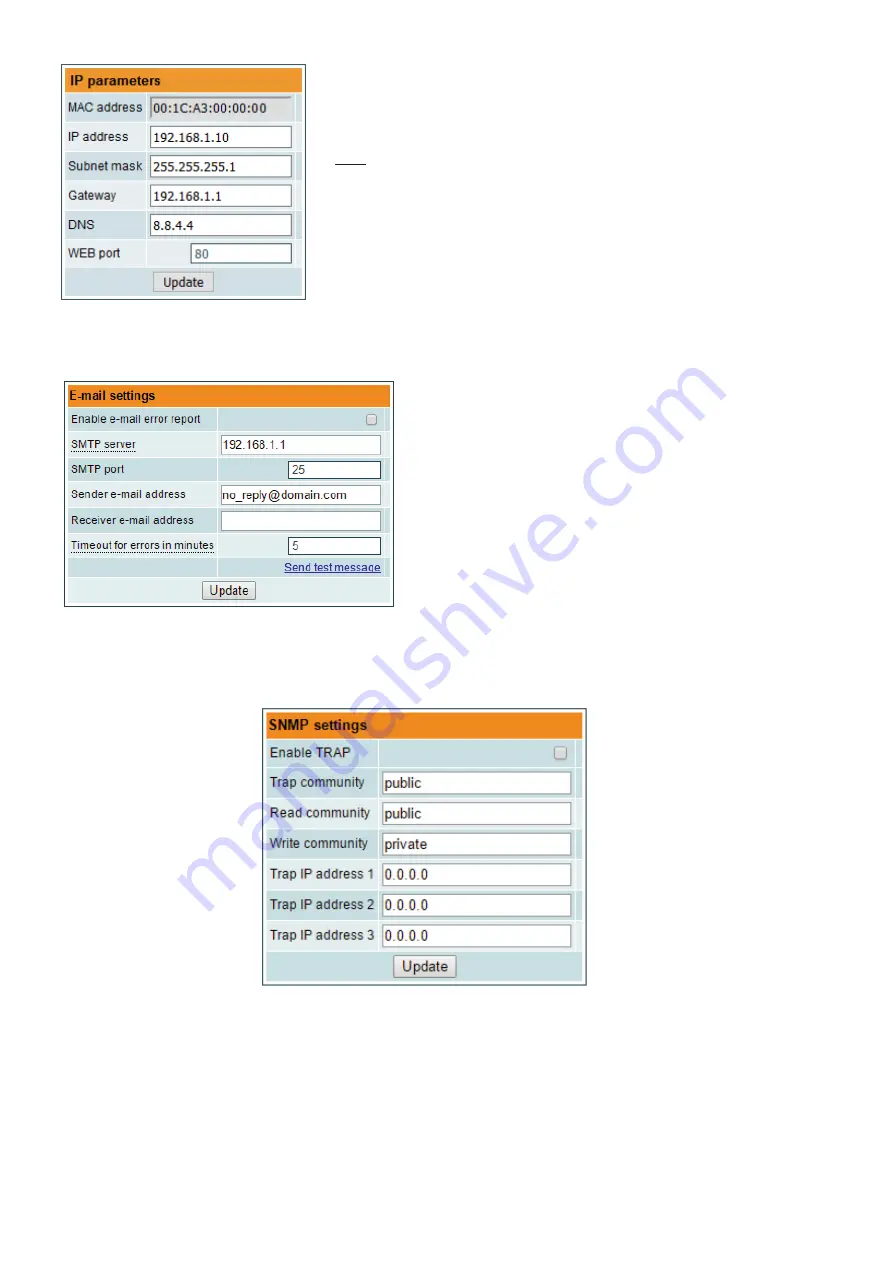
6.7 IP settings
All device IP settings can be configured here – "IP address", "Subnet mask",
"Gateway", "DNS" (Domain Name System), see Figure 20. Starting with software
version 1.32, the “WEB port” number can be customized. Default is 80. You must
restart the device for the port change to take effect. All other IP parameters will be
updated immediately after pressing „Update“ button and redirected to new location.
Note
: IP address can be reset to default (192.168.1.10) by pressing "RESET"
button for at least 3 seconds. Ethernet led indicators "activity" [3] and "link" [4] will
start to toggle to inform, that the reset IP address request has been accepted. Device
will be restarted with default IP address.
To restore all parameters to default values (including password), keep pressing the
button for additional 4 seconds. The green (link) indicator will start blinking after
that time indicating, that a “restore defaults” command has been accepted. Now
the button can be released. Yellow (activity) indicator will light on while resetting
parameters. After that device will restart with all default values.
Figure 20. IP settings table
6.8 E-mail-settings
The device can send e-mail reports if errors were detected. SMTP
protocol is used for that. Figure 21 “E-mail settings table” shows
parameters related to this feature. “Enable e-mail error report”
checkbox enables error monitoring. All errors within “timeout”
period will be gathered, and send to the e-mail address, provided
in “Receiver e-mail address” input box. Comma separated e-mail
addresses can be used to send report to multiple addresses. The
timer will be started as soon, as the first error is detected, and stopped
when e-mail is sent. The timer will be restarted again if a new error
will appear.
“Sender e-mail address” can be used as authentication in the SMTP
server side.
SSL (SMTPS) protocol is not supported.
Figure 21. E-mail-settings table
6.9 SNMP settings
Figure 22 "SNMP settings table" is located in “IP parameters” tab.
Figure 22. SNMP settings table
The description of the SNMP configuration parameters:
"Read Community" - community name acts as a password that is shared by multiple SNMP agents and one or more SNMP
managers. "Read Community" password is used for read-only access to the modules parameters.
"Write Community" - is the password used for read-write access to the modules parameters.


