background image


7.


Installation  

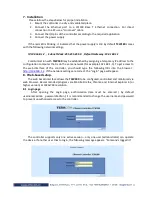
 Please follow the steps below for proper installation : 

1.


Mount the controller in a dry and ventilated place. 

2.


Connect  the  Ethernet  port  to  a  10/100  Base  T  Ethernet  connection.  For  direct 
connection to a PC use a “crossover” cable. 

3.


Connect the I/O pins of the controller according to the required application. 

4.


Connect the power supply. 
 

If the red LED is blinking, it indicates that the power supply is OK. By default 

TCW180 

comes 

with the following network settings: 


IP:192.168.1.2  ,   Subnet Mask: 255.255.255.0  , Default Gateway: 192.168.1.1 


Communication with 

TCW180

 may be established by assigning a temporary IP address to the 

configuration computer that is on the same network (for example 192.168.1.3). To get access to 
the  web  interface  of  the  controller,  you  should  type  the  following  URL  into  the  browser  : 

http://192.168.1 2

 . If the network settings are correct, the “Login” page will appear. 


8.


Web-based setup.  

The web based interface allows the 

TCW180

 to be configured, controlled and monitored via 

web browser. Recommended programs are Mozilla Firefox, Chrome and Internet Explorer 6 (or 
higher version) at 1024x768 resolution. 

8.1


 Login page


After  opening  the  Login  page,  authorization  data  must  be  entered  (  by  default 

username=admin , password=admin). It is recommended to change the username and password 
to prevent unauthorized access to the controller. 


The controller supports only one active session – only one user (administrator) can operate 

the device. If another user tries to login, the following message appears: “Someone’s logged in” 


Summary of Contents for TCW180

Page 1: ...s suitable for solving specific problems in various fields such as remote control process automation home automation and others 2 Features 10 Mbit Ethernet connectivity Password protected web based co...

Page 2: ...ltage V 2 5 Maximum low level input voltage V 0 8 Maximum input voltage for digital input V 5 5 Max switchable current at 220 VAC 3 Max switchable voltage VAC VDC 250 110 4 Connectors Inputs and outpu...

Page 3: ...ller through web interface Link green this LED is located on the Ethernet connector It indicates that the device is connected to the network Act yellow this LED is located on the Ethernet connector It...

Page 4: ...on the same network for example 192 168 1 3 To get access to the web interface of the controller you should type the following URL into the browser http 192 168 1 2 If the network settings are correc...

Page 5: ...tton is pressed the relay will change its state for the time specified in the Pulse Duration field in the I O Setup page Three buttons are located on the bottom of the page All ON clicking this button...

Page 6: ...s at the same time It may be necessary to clear the arp cache each time you connect new device to the network This is done by typing arp d in the command prompt of a Windows computer In order to reduc...

Page 7: ...ient authentication SNMP trap messages are sent for the following conditions if event occurs on Digital Input the signal changes its state device restart The following parameters can be changed SNMP T...

Page 8: ...Pulse button on Monitoring page This setting applies to all 8 relays TCW180 can be set to send e mail alerts if an event occurs onthe digital input The following fields should be filled Mail to recip...

Page 9: ...Access Description Syntax x 3 1 digitalInput read only Digital input state INTEGER High 1 Low 0 x 3 2 Relay1 read write Relay 1 state INTEGER ON 1 OFF 0 x 3 3 Relay2 read write Relay 2 state INTEGER O...

Page 10: ...d write SMTP Sender e mail address String SIZE 0 39 9 5 I O Setup OID Name Access Description Syntax x 5 1 0 relayPulseDuration read write Global Pulse duration INTEGER 0 255 x 5 2 0 Relay1description...

Page 11: ...e the power supply from the unit press and hold the RESET button then turn on the power supply wait about 5 seconds and release the RESET button The factory default settings are shown in the table bel...

Page 12: ...ension C ftp 212 73 154 53 FTP connection to the controller is made Connected to 212 73 154 53 220 Ready User 212 73 154 53 none admin enter username 331 Password required Password enter password 230...

Reviews: