Page 9 of 16
KIT NO. 9014091
9014108 Rev. 01 (11- 2017)
Tennant Company
www.tennantco.com
INSTALL ec-H2O WATER CONDITIONING
CARTRIDGE:
1. Check the manufacture date on the Water
Conditioning Cartridge before installing. The shelf-life
of an un-installed cartridge is one year from
manufacture date. Discard cartridge if shelf-life has
expired. For replacement Cartridge, order p/n
9013646.
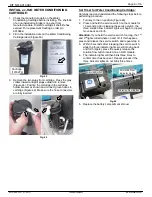
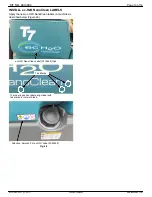
2. Fill in the installation date on the Water Conditioning
Cartridge label (Figure 43).
Cartridge
[1215274]
Fig. 43
3. Remove the two plugs from cartridge. Press the gray
collars inward and pull plugs outward to remove
(Figure 44). Position the cartridge in the cartridge
holder bracket as shown and connect green hoses to
cartridge (Figure 44). Make sure the hose connectors
are fully inserted.
Fig. 44
Set Timer for Water Conditioning Cartridge:
Carefully read and understand the following steps before
performing procedure.
1. Turn key to the on position (Figure 45).
2. Press and hold the service switch on the module for
10 seconds. After releasing the service switch, the
three solution flow indicator lights will begin to (ripple)
move back and forth.
Attention:
If you hold the service switch too long, the 1
st
and 3
rd
lights will alternate on and off. If this happens,
press and release the service switch and repeat step 2.
3. Within 5 seconds after releasing the service switch,
while the three indicator lights are still moving back
and forth (ripple), press the quickly release the
solution flow button located on ec-H2O module.
4. The indicator lights will then blink three times to
confirm timer has been set. Repeat process if the
three indicator lights do not blink three times.
Service Switch
3 Solution Flow
Indicator Lights
Solution Flow Button
Fig. 45
5. Replace the battery compartment shroud.


