12
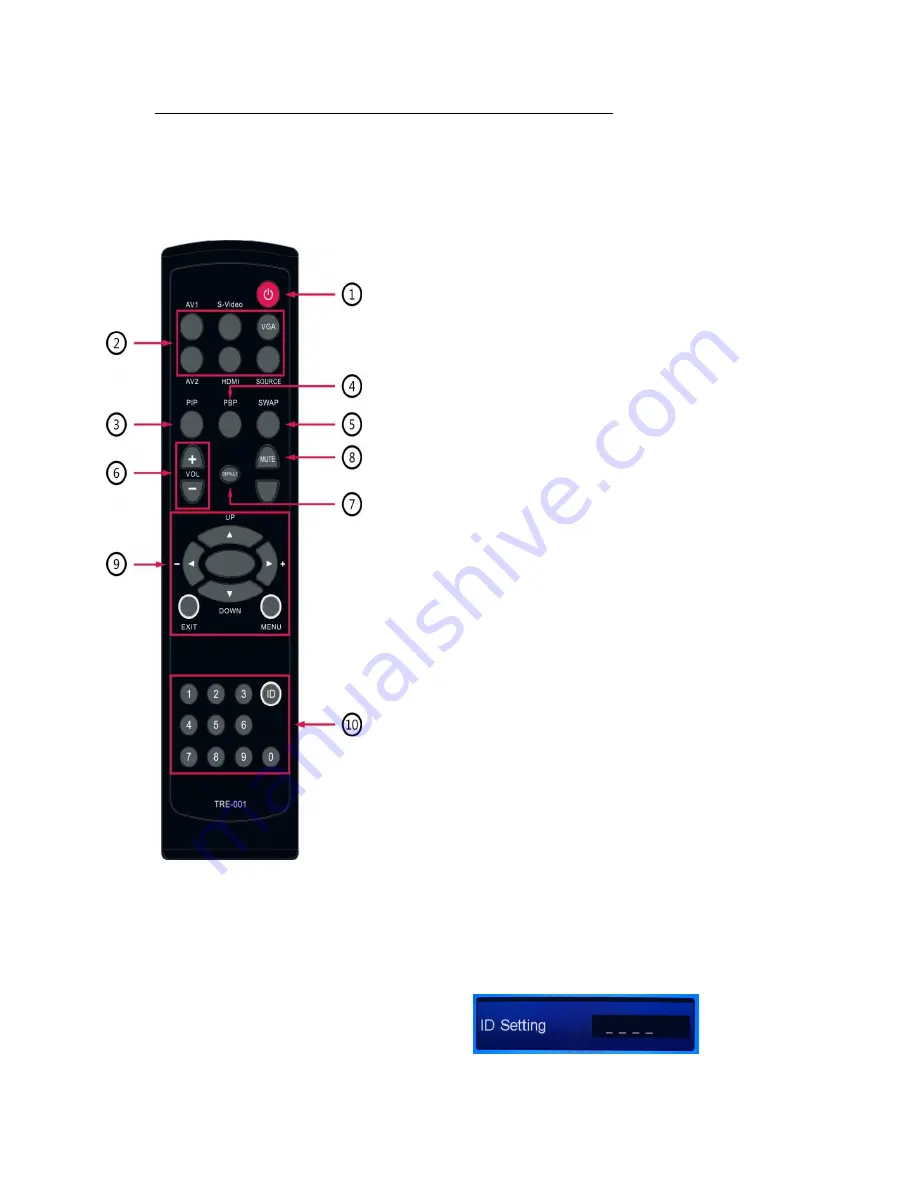
6. ID Remote Controller
(
The ID function is only applicable for some specific models )
. POWER switch.
Press to turn ON or turn OFF the LCD Monitor.
.
VIDEO SIGNAL Selection:
Press th
e “AV1” ,“AV2”, “S-Video”, “VGA”, “HDMI” button
to
enter the selected video source or press the “SOURCE”
button to have the cycle video selection.
. PIP Hot Key:
Press PIP button to enter
“PIP” setup and press
to
select the items you want to change.
.
PBP Hot Key
:
Press PBP button to enter the PBP setup
.
SWAP Hot Key
:
Press SWAP button to exchange the main and sub screen.
.
VOL:
Press “+” to increase volume and press “-“ to decrease volume.
. DEFAULT :
Press “Default” to clear all the setting and return to factory default.
. MUTE :
Press “MUTE” to mute the sound
.
OSD setup:
a.
Press the “MENU” to enter the OSD menu and press “
▲
UP”
or “
▼
DOWN” to select setting item and press “
” RIGHT” to
increase or “
”
LEFT” to decrease the “blue bar” to adjust the
setting.
b. Press the “EXIT” to exit the menu and confirm the setting.
c. Press the “ENTER” to confirm the ID number setting.
.
ID and Number Key:
Step 1: Setup the Monitor ID No.
Press “MENU“ to enter the OSD menu and press “
/+
“ button to select the “Function“ menu and press “
▼
DOWN” to
choose “ID “ setup.
To press 4 digit (0001~9999) as the monitor ID No. and press
“ENTER” to confirm the input. When you press the “ID” button,
the screen will
show “ ID : 0001 (when you input ” 0001”)
.
10


