18
ID
The ID function is only applicable for some specific models, if the model you brought has the ID function,
Please check the ID setup procedure on page 12.
Default
If you want to back to factory default, press
“
▲/+” or “▼/-“
key to
select “ Default”
“
and press
“Enter” key to
activate
“OK”
Exit
Press the “Menu” key and press “
▲/+” or “▼/-“
to select
“Exit” to exit the OSD menu.
Picture (PC/HDMI Mode)
1.
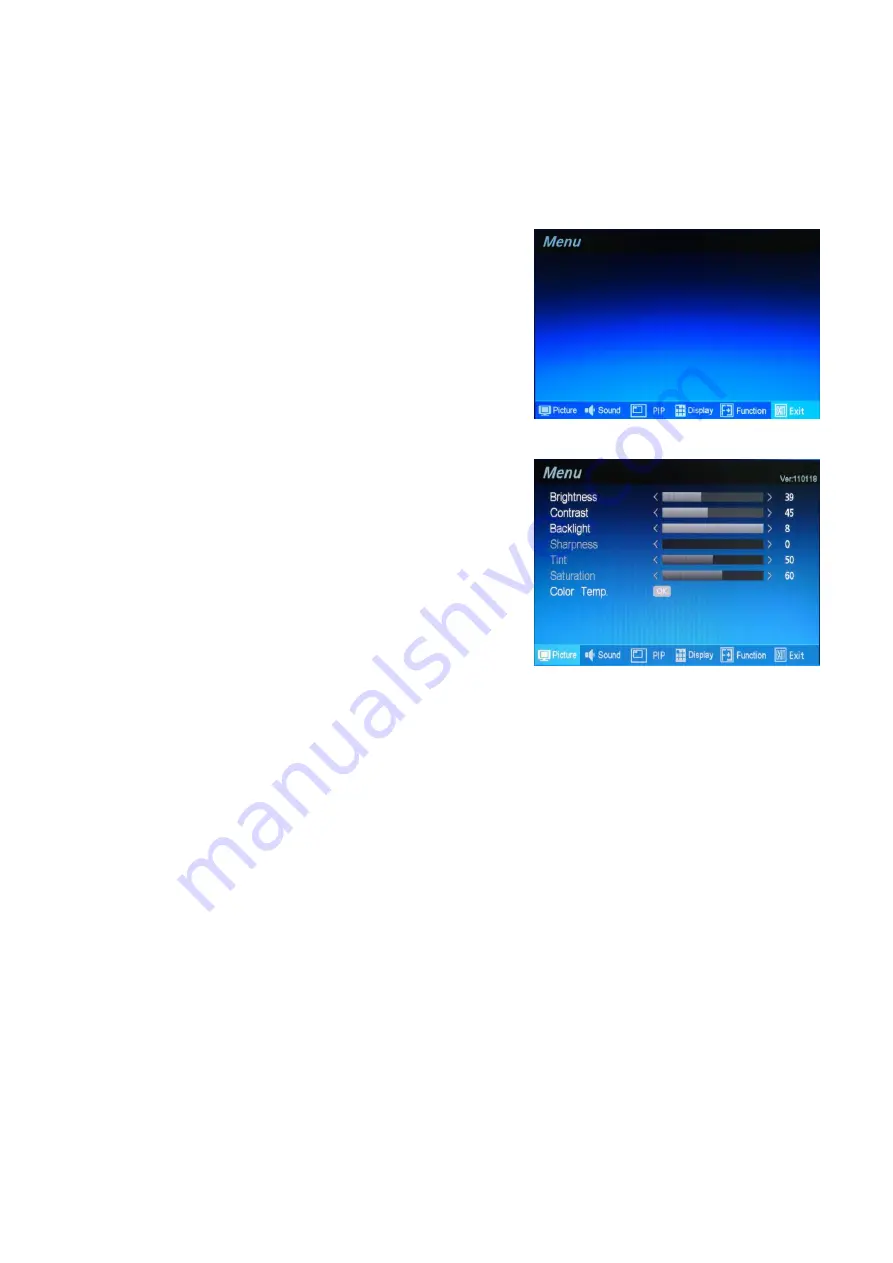
Press the “Menu” key on the buttons to call out the
OSD
“Menu” . Press “
▲/+” or “▼/-“
to select
“Picture” Mode
and press
“Menu” key again to select
the “Picture” option.
2. Various picture settings are available from the
“Picture”
menu. Use
“
▲/+” or “▼/-“
to select item that you want
to adjust and press
“Menu” key again until grey bar
changes to blue color and press
“
▲/+” or “▼/-“
increase or decrease the figure that you wish . Press
“Exit” key to return to menu and confirm the setting.
Press two times of “Exit” to exit the menu.
Brightness
Press
“
▲/+” or “▼/-“
to increase/decrease the “Blue bar” to adjust brightness. Adjusting brightness to enhance
the level of dark area in the video picture such as night scenes and shadow scenes. Increasing brightness
will make dark areas more visible.
Contrast
Press
“
▲/+” or “▼/-“
to increase/decrease the “Blue bar” to adjust contrast. Increasing contrast will make
white area of the video picture brighter. Contrast works in conjunction with
“Brightness”.
Backlight
Press
“
▲/+” or “▼/-“
to increase/decrease the
“Blue bar” to adjust backlight. Increasing the figure will enhance
the backlight. Decreasing the figure will reduce backlight.
Color Temp.
Select the Color Temp.
” for white balance. Press “Menu” to enter “OK” mode. There are 4 settings to choose
from (1)Standard (2). Cold (3).Warm (4) User. To select
“User” you may press “
▲/+” or “▼/-“
to
increase/decrease the “Blue bar” to adjust color of Red, Green and Blue.
16


