background image

У

правление ус

тройс

твом

Управление устройством

22

Основные операции

Включение/Выключение 

•   Включение: Нажмите и удерживайте 

кнопку питания до появления логотипа. За-
тем появятся заставка и главный экран. За-
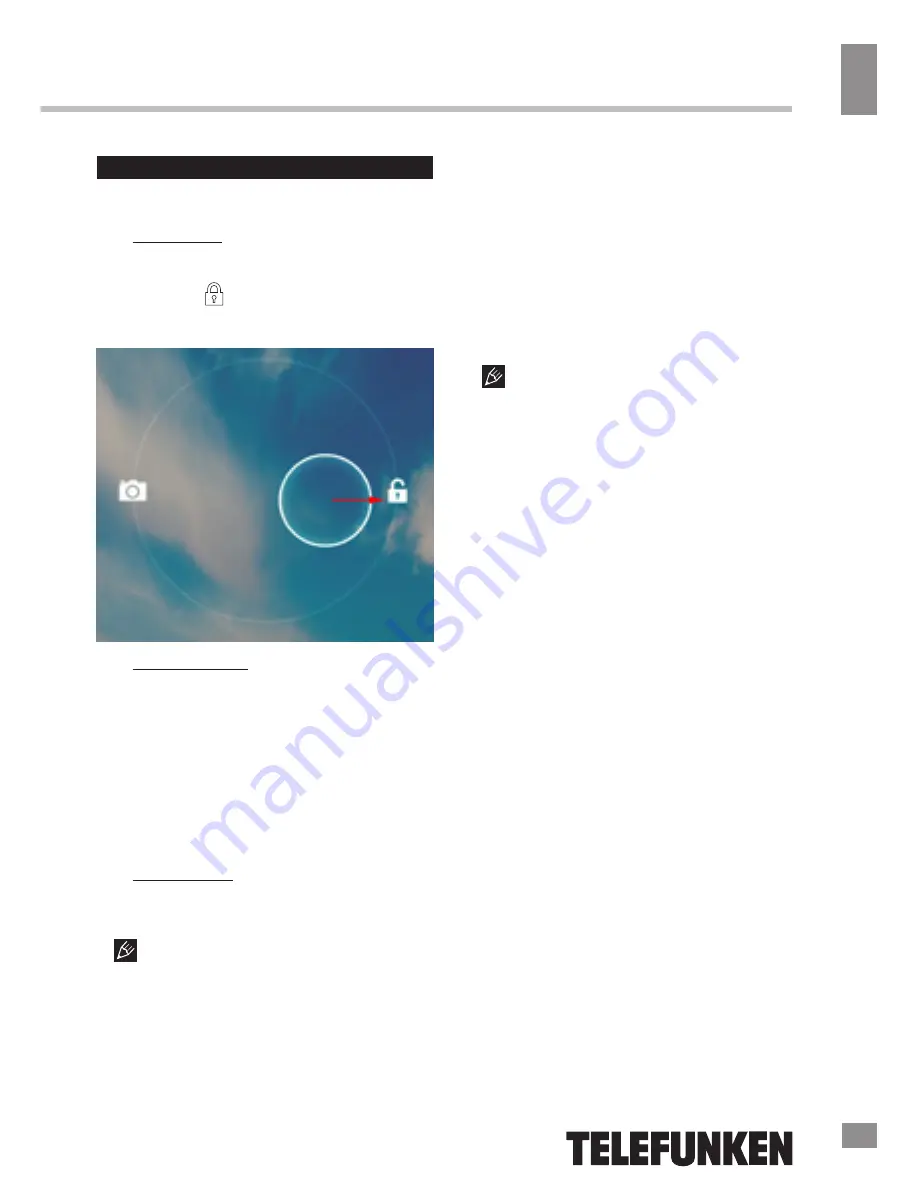
жмите иконку   и переместите ее вправо 
на иконку, изображающую открытый замок, 
для разблокирования устройства.

•   Спящий режим: Спящий режим удобен 

при регулярном использовании устройства. 
В этом режиме устройство находится в 
активном состоянии, но дисплей при этом 
выключен, а главный экран заблокирован. 
Это позволяет мгновенно получить доступ 
к операционной системе, в то же время ис-
ключаются случайные нажатия на дисплей, 
и экономится энергия. Для перехода в 
спящий режим или выхода из него кратков-
ременно нажмите кнопку питания.

•   Выключение: Нажмите и удерживайте 

кнопку питания до появления предложения 
выключить устройство. Кликните «ОК» для 
выключения.

  В случае низкой зарядки аккумуля-

тора устройство может быть отключено 
автоматически после уведомления поль-
зователя о существующей проблеме. При 
этом все несохраненные данные могут быть 

утеряны. Во избежание этого сохраните от-
крытые документы, закройте все активные 
приложения и подключите компьютер к 
источнику питания.

Перезагрузка устройства

Если устройство не включается и не 

реагирует на зарядку, перезагрузите его, 
нажав тонким остроконечным предметом 
кнопку (отверстие) RESET, и дождитесь 
перезагрузки.


  После перезагрузки выключите, а 

затем снова включите устройство, чтобы 
сделать доступными обе языковые раслад-
ки клавиатуры.

Главный экран

После разблокировки откроется главный 

экран, обеспечивающий доступ к работе с 
устройством.

На экране расположены строка состоя-

ния (внизу), рабочий стол, который можно 
продлить нажатием пальца на экран и дви-
жением его влево или вправо, и значки для 
доступа к приложениям. Элементы главного 
экрана (рис. 1):

1. Поиск Google. Нажмите для перехода к 

поисковой странице Google.

2. Голосовой поиск.

3. Будильник

4. Нажмите для отображения списка всех 

установленных приложений.

5. Кнопка «Назад». Нажмите для возвра-

та к предыдущей странице/экрану.

6. Кнопка «Домой». Нажмите для пере-

хода к домашней странице.

7. Нажмите для быстрого переключения 

между активными приложениями.

8. Кнопка быстрого доступа к приложе-

ниям, настройкам и заставкам рабочего 

стола.

9. Значки приложений

10. Подключения Bluetooth

11. Часы

12. Состояние подключения по Wi-Fi

13. Индикатор заряда аккумулятора.

21

23

Summary of Contents for TF-MID9704G

Page 1: ...9 7 TABLET PC 9 7 TF MID9704G Instruction manual...

Page 2: ...panel Rear panel General operation Power on off Rebooting the device The main screen Status bar Adding Removing objects to the desktop Wallpaper Upgrade basic software OS Connections Connecting to Wi...

Page 3: ...an be dangerous if used improperly so if children use this device they should always be supervised by adults Do not allow children to touch the internal components and cables of this device To ensure...

Page 4: ...oper treatment recovery and recycling Please contact your local authorities for the correct method of disposal By doing so you will ensure that your disposed product undergoes the necessary treatment...

Page 5: ...2 1 Rear panel 6 3 4 5 7 8 9 10 11 12 13 14 1 Display 2 Front camera 3 Main camera 4 Reset button hole 5 Speaker 6 Power button 7 Volume button 8 Micro SD card slot 9 HDMI output 10 Micro USB port 11...

Page 6: ...ing the RESET button hole with a thin pointed object and then wait for the tablet to restart After the reboot please turn the device off and on again to activate both keyboard language presets The mai...

Page 7: ...op of the screen Without taking your finger off the screen drag and drop it on the X when it turns red Deleting an object from the desktop will not delete it from your system Any object can be restore...

Page 8: ...More Click on Mobile networks put a tick next to Modem power and enter the PIN code In the Mobile network settings select Access Point Select your access point from the list or adjust manually When a...

Page 9: ...ile the device is detected as a removable USB drive and you will have access to the internal memory of the tablet and the memory card To turn off the tablet connected in USB drive mode click Turn off...

Page 10: ...on your own Copy the setup file with apk extension on a memory card flash drive or internal memory Locate the file in the Explorer Open the file and confirm the installation For safety reasons instal...

Page 11: ...o call hide the menu of operations with books change the font size style add bookmarks etc click on the screen while displaying a book 16 Explorer an application that implements a GUI user access to f...

Page 12: ...ge installed applications view information about installed programs and if necessary uninstall them The Running section will show a list of running applications and services The PERSONAL menu Menu Set...

Page 13: ...play user configured time If the tick is put the network time will be displayed Set date If the date and time of the network is disabled set the current date Set time If the date and time of the netwo...

Page 14: ...penditure of power The largest power draining operation is video playback Try to set screen brightness lower Install the latest firmware The battery is discharged quicker when operating at low tempera...

Page 15: ...s feature is enabled Put a tick next to Auto Rotate Screen section of the settings see System Setup Accessories 1 Tablet PC 1 pc 2 Power adaptor 1 pc 3 Consumer Information 1 pc 4 Warranty Card 1 pc 5...

Page 16: ...Ah 3 7 V Battery operation time up to 7 hours Operation temperature range 50 400 Storage temperature range 50 500 Specifications are subject to change without notice Dimensions are approximate This de...

Page 17: ...Table of contents 17...

Page 18: ...17 OS Wi Fi 3G USB USB HDMI 18 19 19 19 19 19 20 20 20 21 22 22 22 22 22 23 23 23 23 23 24 24 25 25 25 25 25 26 26 26 26 27 27 27 27 29 29 29 30 30 31 32 33 34 34 16 18...

Page 19: ...18 17 19...

Page 20: ...19 18 20...

Page 21: ...20 1 5 20 15 C 25 C 10 5 40 19 21 100 0...

Page 22: ...21 2 1 6 3 4 5 7 8 9 10 11 12 13 14 1 2 3 4 RESET 5 6 Power 7 Volume 8 Micro SD 9 HDMI 10 Micro USB 11 3G SIM 12 13 14 20 22...

Page 23: ...22 RESET 1 1 Google Google 2 3 4 5 6 7 8 9 10 Bluetooth 11 12 Wi Fi 13 21 23...

Page 24: ...23 4 3 3 2 22 24 1 2 3 4 5 6 7 9 10 11 12 13 8 13 1...

Page 25: ...24 3 4 OS OS OS OS OS OS Wi Fi WiFi 4 Wi Fi Wi Fi Wi Fi 10 Wi Fi Wi Fi 3G SIM 3G 4 Modem power PIN APN SIM 3G 3G 3G 23 25...

Page 26: ...25 USB USB microUSB MicroUSB USB Host Explorer USB USB USB 1 1 2 0 USB 500 USB USB USB USB BIN microSD 32 4 SD MicroSD SDHC USB USB microUSB MicroUSB USB USB USB USB HDMI HDMI HDMI HDMI HDMI 24 26...

Page 27: ...Android Market Android Market Play Market Google Google Google Android Market Android Market Android Market apk Android Market 4 1 Google Google Maps Google 2 Gmail Google Mail Google 3 Email 3 Chrome...

Page 28: ...droid 6 7 8 9 Play 10 11 Google talk Google 12 13 Google Current 14 Google Drive Google 15 Google Translate 16 Kingsoft office 17 18 19 20 1 2 3 4 6 7 8 5 21 22 Google search Google 23 26 28 1 2 3 4 5...

Page 29: ...28 24 Video 2 25 26 27 Gogle Reader 28 Explorer 29 ApkInstaller Install uninstall launch export 2 2 27 29...

Page 30: ...29 WiFi 2 4 Wi Fi Wi Fi Bluetooth Bluetooth VPN WiFi Ethernet 28 HDMI HDMI Google PIN 30...

Page 31: ...30 Android Market Google speech to text Android Wi Fi Android Market 24 12 Google IP 29 31...

Page 32: ...31 5 RESET 5 30 32...

Page 33: ...32 USB USB 31 33 1 1 2 1 3 USB 1 4 OTG 1 5 1 6 1 7 1 8 1...

Page 34: ...7 IPS 10 1024x768 2 2 MP3 WMA WAV APE FLAC AAC OGG AVI MP4 RM RMVB FLV MOV 3GP JPEG BMP GIF PNG PDF TXT EPub 16 MicroSD 32 DDR III 1 Wi Fi 2400 2483 5 40 802 11 b g n Bluetooth 4 0 2400 2483 5 10 802...

Page 35: ...2010 2019 R31982101 01792 2011 TF MID9704G_IM_04 35 1 500...

Reviews: