background image

English   

- 32 -

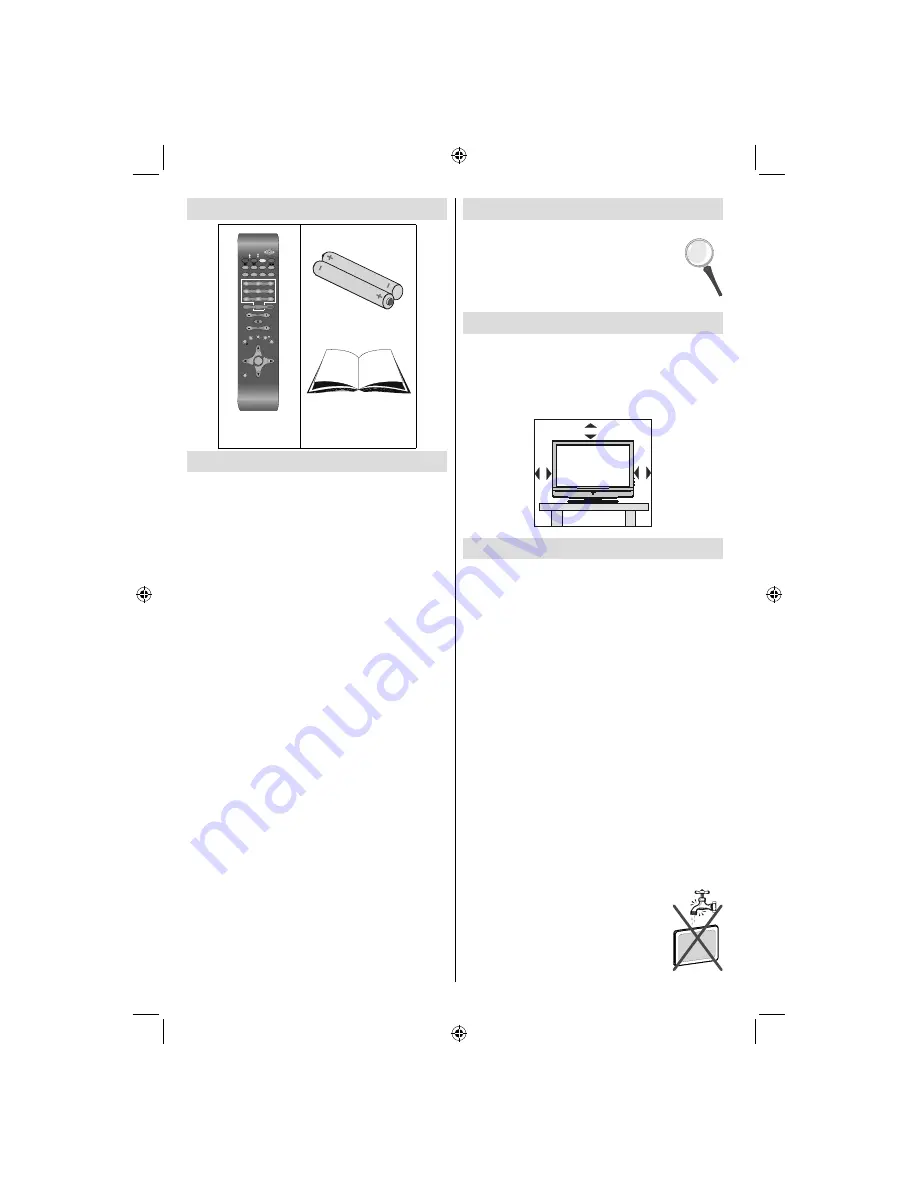
 Accessories 


SUBTITLE

SLEEP

F

IN

O/

P E

S T

R

E

RE

TURN

V

P

1

4

7

2

5

8

3

6

9

JKL

STU

DEF

MNO

VWX

PQR

YZ

M

OK

GHI

SOURCE

ABC

EPG

0

SCREEN

LANG

FAV

TV

  DTV

S

AP

W


 Remote 

Controller 

Batterien: 2 X AAA

 Instruction Book 

  Features 

  • Remote controlled colour LCD TV.

• Fully integrated digital TV (DVB-T).

 • HDMI connectors for digital video and audio. This 

connection is also designed to accept high defi nition 
signals. 

  •


200 programmes from VHF, UHF(analogue).

• 500 programmes for digital mode (IDTV).

• OSD menu system.

 • Scart socket for external devices (such as video, 

video games, audio set, etc.). 

 • Stereo sound system.  

• Teletext, fastext, TOP text.

• Headphone connection.

• Automatic programming system.

• Forward or backward manual tuning.

• Sleep timer.

• Child lock.

• Automatic sound mute when no transmission.

• NTSC playback. 

• AVL (Automatic Volume Limiting).

• When no valid signal is detected, after 5 minutes the 

TV switches automatically to standby mode.

• PLL (Frequency Search).

 • PC input.  

 • Plug&Play for Windows 98,ME,2000,XP, Vista, 

Windows 7. 

 • Game Mode 

 Introduction 

 Thank you for choosing this product. This manual will 
guide  you for the proper operation of your 
TV. Before operating the TV, please read 
this manual thoroughly. 

Please do keep this manual in a safe place 
for future references. 

 Preparation 

 For ventilation, leave a free space of at least 10 cm 
all around the set. To prevent any fault and unsafe 
situations, please do not place any objects on top 
of the set.

Use this device in moderate climates. 


10 cm

10
cm

10

cm


 Safety Precautions 

 Please read the following recommended 
safety precautions carefully for your 
safety. 

 Power Source 

 The TV set should be operated only from a  220-240 
V AC, 50 Hz  outlet. Ensure that you select the correct 
voltage setting for your convenience. 

 Power Cord 

 Do not place the set, a piece of furniture, etc. on the 
power cord (mains lead) or pinch the cord. Handle the 
power cord by the plug. Do not unplug the appliance 
by pulling from the power cord and never touch the 
power cord with wet hands as this could cause a short 
circuit or electric shock. Never make a knot in the cord 
or tie it with other cords. The power cords should be 
placed in such a way that they are not likely to be 
stepped on. A damaged power cord can cause fi re or 
give you an electric shock. When it is damaged and 
needs to be replaced, it should be done by qualifi ed 
personnel. 

 Moisture and Water 

 Do not use this device in a humid and 
damp place (avoid the bathroom, the 
sink in the kitchen, and near the washing 
machine). Do not expose this device to 
rain or water, as this may be dangerous 
and do not place objects fi lled with liquids, 

02_MB45M_[GB]_1810UK_IDTV_BRONZE14_26875W_10066977_50162051.indd   2

02_MB45M_[GB]_1810UK_IDTV_BRONZE14_26875W_10066977_50162051.indd   2

26.02.2010   19:33:13

26.02.2010   19:33:13

Summary of Contents for T26KWM875 DVB-T

Page 1: ...IENUNGSANLEITUNG INSTRUCTION MANUAL T26KWM875 DVB T TELEFUNKEN COVER_ T26KWM875 DVB T _10066977_50162051 indd 1 TELEFUNKEN COVER_ T26KWM875 DVB T _10066977_50162051 indd 1 26 02 2010 19 37 47 26 02 20...

Page 2: ...10 Bedienung mit den Tasten am TV Ger t 10 Bedienung mit den Tasten der Fernbedienung 10 Erste Einstellungen 10 Allgemeine Bedienung 11 Elektronischer Programmf hrer EPG 11 Anzeigen von Untertiteln 12...

Page 3: ...sicher auf Vorbereitung Halten Sie um das Fernsehger t mindestens 10 cm Abstand zu M beln etc ein um eine ausreichende Luftzirkulation zu gew hrleisten Vermeiden Sie gef hrliche Situationen und Defekt...

Page 4: ...nicht in feuchter oder dunstiger Umgebung vermeiden Sie das Badezimmer die Sp le in der K che oder die Umgebung der Waschmaschine Achten Sie darauf dass dieses Ger t niemals Regen oder Wasser ausgeset...

Page 5: ...l als unver nderlich blaue gr ne oder rote Punkte erscheinen Wir m chten ausdr cklich darauf hinweisen dass dies die Leistung oder Funktionsf higkeit Ihres Produkts aber in keiner Weise beeintr chtigt...

Page 6: ...n Aus 19 Cursor nach links 20 Vorhergehendes Programm 21 Auswahl Bildmodus 22 Programm zur ck Programm weiter im DTV 23 Modus Stummschaltung 24 Lautst rke 25 Favoritenmodus im DTV Modus 26 Mono Stereo...

Page 7: ...mit Component Ausgabe herzustellen Schlie en Sie das YPbPr PC Kabel zwischen dem PC EINGANG am TV Ger t PC INPUT und den Component Videoausg ngen des Ger ts an ber den 3 koaxialen Ausgang S PDIF wird...

Page 8: ...nschlie en Hinweis Wenn Sie ein Ger t ber ein VIDEO oder PC YPbPr Kabel an das TV Ger t anschlie en sollten Sie das Ger t auch mit einem Audiokabel an die AUDIOEING NGE des TV Ger ts anschlie en um da...

Page 9: ...halten Sie das TV Ger t und das Zusatzger t aus bevor Sie die Anschl sse vornehmen Hinweis Die in der Abbildung gezeigten Kabel sind nicht im Lieferumfang enthalten Hat Ihr DVD Player eine HDMI Buchse...

Page 10: ...ein Legen Sie die Batterien in der richtigen Orientierung ein und setzen Sie die Batteriefachabdeckung wieder ein Hinweis Nehmen Sie die Batterien aus der Fernbedienung heraus wenn das Ger t l ngere Z...

Page 11: ...ienung Ihres TV Ger ts k nnen Sie s mtliche Funktionen des von Ihnen gew hlten Modells steuern Die Funktionen werden in bereinstimmung mit dem Men system Ihres TV Ger ts beschrieben Beschreibungen der...

Page 12: ...teren Ende des Bildschirms angezeigt nur im DTV Modus verf gbar Dieses Bild wird f r einige Sekunden auf dem Bildschirm angezeigt Die Informationszeile kann au erdem beim Fernsehen jederzeit angezeigt...

Page 13: ...lten auch solche die nur digitalen Teletext ausstrahlen Das Bildseitenverh ltnis beim Ansehen eines Kanals der nur ber digitalen Teletext verf gt entspricht dem Bildseitenverh ltnis des zuletzt betrac...

Page 14: ...m den in der Kanalliste markierten Kanal zu l schen Der folgende Hinweis erscheint auf dem Bildschirm Dr cken Sie die Tasten oder um die gew nschte Option zu markieren Wenn Sie die Taste OK dr cken w...

Page 15: ...Aus Hilfe am Bildschirm In allen Men s k nnen Sie einfach die Taste INFO dr cken um Hilfeinformationen zu den Men funktionen anzuzeigen Programmf hrer Dieser Abschnitt entspricht den Hinweisen auf der...

Page 16: ...tal TV Setup Dr cken Sie die Taste MENU um das Hauptmen aufzurufen Markieren Sie mit den Tasten oder die Option TV Setup und dr cken Sie die Taste OK um das Men aufzurufen Im Abschnitt Men system Anal...

Page 17: ...bei der Ersteinstellung UK als L nderoption ausw hlen wird die Option Alterssperre nicht angezeigt Diese Einstellung ist nur f r EU L nder verf gbar Ist diese Option eingestellt bezieht sie vom Sender...

Page 18: ...t W hlen Sie mit den Tasten oder die Einstellung Standby Suche und setzen Sie sie auf Ein oder Aus Wenn Sie die Standby Suche auf Aus stellen ist diese Funktion nicht verf gbar Um die Standby Suche zu...

Page 19: ...schirm wird folgender Hinweis eingeblendet Markieren Sie ber die Tasten oder Ja oder Nein und dr cken Sie zur Best tigung die Taste OK Wenn Ja ausgew hlt wird beginnt die automatische Suche Wenn Nein...

Page 20: ...anach wird das Men Erstinstallation auf dem Bildschirm angezeigt W hlen Sie durch Dr cken der Tasten oder das gew nschte Land und dr cken Sie die Taste OK f r EU L nder Dr cken Sie die Taste OK um die...

Page 21: ...Equalizer Dr cken Sie die Taste oder um den Equalizer auszuw hlen Dr cken Sie die Taste um in das Men Equalizer zu gelangen Dr cken Sie die Taste oder um die Einstellungen zu ndern Im Equalizer Men k...

Page 22: ...Sprache auszuw hlen Dr cken Sie die Taste oder um die Sprache auszuw hlen Standard Bildformat Wenn der Zoommodus auf AUTO gestellt ist stellt das TV Ger t den Zoommodus automatisch in Abh ngigkeit vom...

Page 23: ...nnen au erdem eine Nummer eingeben in dem Sie die Zifferntasten auf der Fernbedienung verwenden Sie k nnen 200 Programme zwischen 0 und 199 speichern Band F r Band k nnen Sie entweder C oder S ausw hl...

Page 24: ...n Sie das Programm das Sie verschieben wollen ber die Navigationstasten aus Dr cken Sie die Taste GR N Verschieben Sie das ausgew hlte Programm mit Hilfe der Navigationstasten zum gew nschten Programm...

Page 25: ...Sie mit dieser Option das Bild automatisch in die richtige Position verschieben Mit dieser Einstellung wird daher automatisch die Anzeige optimiert W hlen Sie die Option Autoposition mit den Tasten o...

Page 26: ...OK um das Bild festzuhalten Dr cken Sie nochmals diese Taste um den Standbildmodus zu verlassen Hinweis Diese Funktion ist nicht verf gbar im PC Modus oder wenn ein Film ber eine DVI Quelle angesehen...

Page 27: ...en W hlt Unterseiten aus sofern verf gbar wenn der Teletext aktiv ist INFO Anzeigen Zeigt verborgene Informationen an z B L sungen von R tseln oder Spielen SCREEN Vergr ern Dr cken Sie einmal diese Ta...

Page 28: ...werden Trennen Sie in diesem Fall eines der Zusatzger te wieder ab Kein Bild Ist die Antenne richtig angeschlossen Sind die Stecker fest mit der Antennenbuchse verbunden Ist das Antennenkabel besch d...

Page 29: ...5 VESA 2 640 480 72 37 9 VESA 3 640 480 75 37 5 VESA 4 800 600 56 35 2 VESA 5 800 600 60 37 9 VESA 6 800 600 70 43 8 7 800 600 72 48 1 VESA 8 800 600 75 46 9 VESA 9 832 624 75 49 7 MAC 10 1024 768 60...

Page 30: ...1080I 60Hz O 1080P 24Hz O 1080P 25Hz O 1080P 30HZ O 1080P 50HZ O 1080P 60HZ O X Nicht m glich O M glich Hinweis In einigen F llen kann unter Umst nden ein Signal nicht richtig auf dem LCD Schirm ange...

Page 31: ...Video MP ML PAL 4 3 16 9 Audio MPEG Layer I II 32 44 148kHz ANZAHL DER VOREINGESTELLTEN KAN LE 200 KANALANZEIGE Bildschirmanzeige RF ANTENNENEINGANG 75 Ohm nicht geregelt BETRIEBSSPANNUNG 220 240V AC...

Page 32: ...er nach 4 unserer Wahl die Instandsetzung Ihres Ger tes oder den Austausch gegen ein gleichwertiges Ger t die bei uns anfallenden Arbeitsl hne Material kosten und die Transportkosten des Ger tes inner...

Page 33: ...lung des Ger tes in Feuchtr umen oder im Freien bei Sch den die auf h here Gewalt Wasser Blitzschlag berspannung zur ckzuf hren sind bei berm iger Nutzung insbesondere bei anderer als privater Nutzung...

Page 34: ...phone Volume 33 Installation 33 LCD Screen 33 Warning 33 Overview of the Remote Control 34 LCD TV and Operating Buttons 35 Viewing the Connections Back Connectors 35 Viewing the Connections Side Conne...

Page 35: ...ree space of at least 10 cm all around the set To prevent any fault and unsafe situations please do not place any objects on top of the set Use this device in moderate climates 10 cm 10 cm 10 cm Safet...

Page 36: ...ry cloth Ventilation The slots and openings on the TV set are intended for ventilation and to ensure reliable operation To prevent overheating these openings must not be blocked or covered in anyway H...

Page 37: ...mode Index page in 14 TXT mode Cursor up 15 Cursor right Subpage in TXT mode 16 OK Select Freeze picture Hold in TXT 17 mode Cursor down 18 Menu on off 19 Cursor left 20 Previous Programme 21 Picture...

Page 38: ...put Connect the YPbPr to PC cable between the PC INPUT on the TV and the component video outputs of your device S PDIF Coaxial Out 3 outputs digital audio signals of the currently watched source RF In...

Page 39: ...the TV s audio inputs Note If you connect a device to the TV via the VIDEO or PC YPbPr cable you should also connect your device with an audio cable to the AUDIO INPUTS of the TV to enable audio Headp...

Page 40: ...ional information Power off both the TV and the device before making any connections Note Cables shown in the illustration are not supplied If your DVD player has an HDMI socket you can connect via HD...

Page 41: ...tteries inside Place the batteries in the right directions and replace the battery cover Note Remove the battery from remote control handset when it is not to be used for a long period Otherwise it ca...

Page 42: ...ng sections Volume Setting Press V button to increase the volume Press V button to decrease the volume A volume level scale slider will be displayed on the screen Programme Selection Previous or Next...

Page 43: ...the current and next events Press EPG button to view the EPG menu EPG appears on the screen It is able to get Information of the channel programs weekly by means of 7 DAY EPG All programs of channels...

Page 44: ...u size changes depending on the chosen image size Notice AC3 audio type is not supported In this case Tv sound will be muted If the broadcast includes AC3 stream the following warning message will be...

Page 45: ...aracter with the characters printed above the button one by one as the button is pressed Press the M button to cancel the editing or OK button to save the new name Adding Locks to Channels Channel loc...

Page 46: ...menu and use the or button to highlight the Conditional Access line and press the OK button Some Digital Terrestrial channels operate on a Pay Per View basis These require a subscription and a hardwar...

Page 47: ...automatically and searches for new information automatically and searches for new information when available Note that this setting is inactive to be when available Note that this setting is inactive...

Page 48: ...can use this feature only if the broadcaster supports that additional narration track Use or buttons to select an item Then use or buttons to set Audio Description Optional This function enables or di...

Page 49: ...t available Installation The Installation menu is mainly intended to help you for creating a Channel Table in the most efficient way Select Installation from the Configuration menu by pressing or butt...

Page 50: ...eting all channels and settings By selecting Yes and pressing the OK button the existing channel table will be deleted After factory settings are loaded First Time Installation menu will be displayed...

Page 51: ...or button to select Volume Press or button to change the level of the Volume Equalizer Press or button to select Equalizer Press button to view equalizer menu Press or button to change the preset In...

Page 52: ...nd to On By pressing or button select Blue Background Press or button to set Blue Background as On or Off Menu Background Press or button to select Menu Background You can set menu background level by...

Page 53: ...or OK button to store the settings Stored will be displayed on the screen Install Menu in AV Modes The following screen appears in the install menu when the TV is in AV modes Note that limited option...

Page 54: ...d Program Table appears on the screen If you wait until the end of APS Program Table will be displayed with the programmes found and located Source Menu Press or button and select the sixth icon Then...

Page 55: ...e Number Programme Name Sound Indicator and Zoom Mode information is displayed on the screen when a new programme is entered or INFO button is pressed Mute Function Press button to disable sound Mute...

Page 56: ...r displaying the current channel Pressing again will quit the teletext mode RETURN Index Selects the teletext index page Subcode Pages Selects subcode pages if available when the teletext is activated...

Page 57: ...isconnect one of the peripherals No Picture Is the aerial connected properly Are the plugs connected tightly to the aerial socket Is the aerial cable damaged Are suitable plugs used to connect the aer...

Page 58: ...2 37 9 VESA 3 640 480 75 37 5 VESA 4 800 600 56 35 2 VESA 5 800 600 60 37 9 VESA 6 800 600 70 43 8 7 800 600 72 48 1 VESA 8 800 600 75 46 9 VESA 9 832 624 75 49 7 MAC 10 1024 768 60 48 4 VESA 11 1024...

Page 59: ...P 60Hz O 1080I 50Hz O 1080I 60Hz O 1080P 24Hz O 1080P 25Hz O 1080P 30HZ O 1080P 50HZ O 1080P 60HZ O X Not Available O Available Note In some cases a signal on the LCD TV may not be displayed properly...

Page 60: ...odes Video MP ML PAL 4 3 16 9 Audio MPEG Layer I II 32 44 148kHz NUMBER OF PRESET CHANNELS 200 CHANNEL INDICATOR On Screen Display RF AERIAL INPUT 75 Ohm unbalanced OPERATING VOLTAGE 220 240V AC 50 Hz...

Page 61: ...LEFUNKEN ist eine eingetragene Marke der TELEFUNKEN Licenses GmbH 1 TELEFUNKEN licensed by TELEFUNKEN Licenses GmbH Imported by Vestel Germany GmbH D 85748 Garching Munich TELEFUNKEN COVER_ T26KWM875...

Reviews: