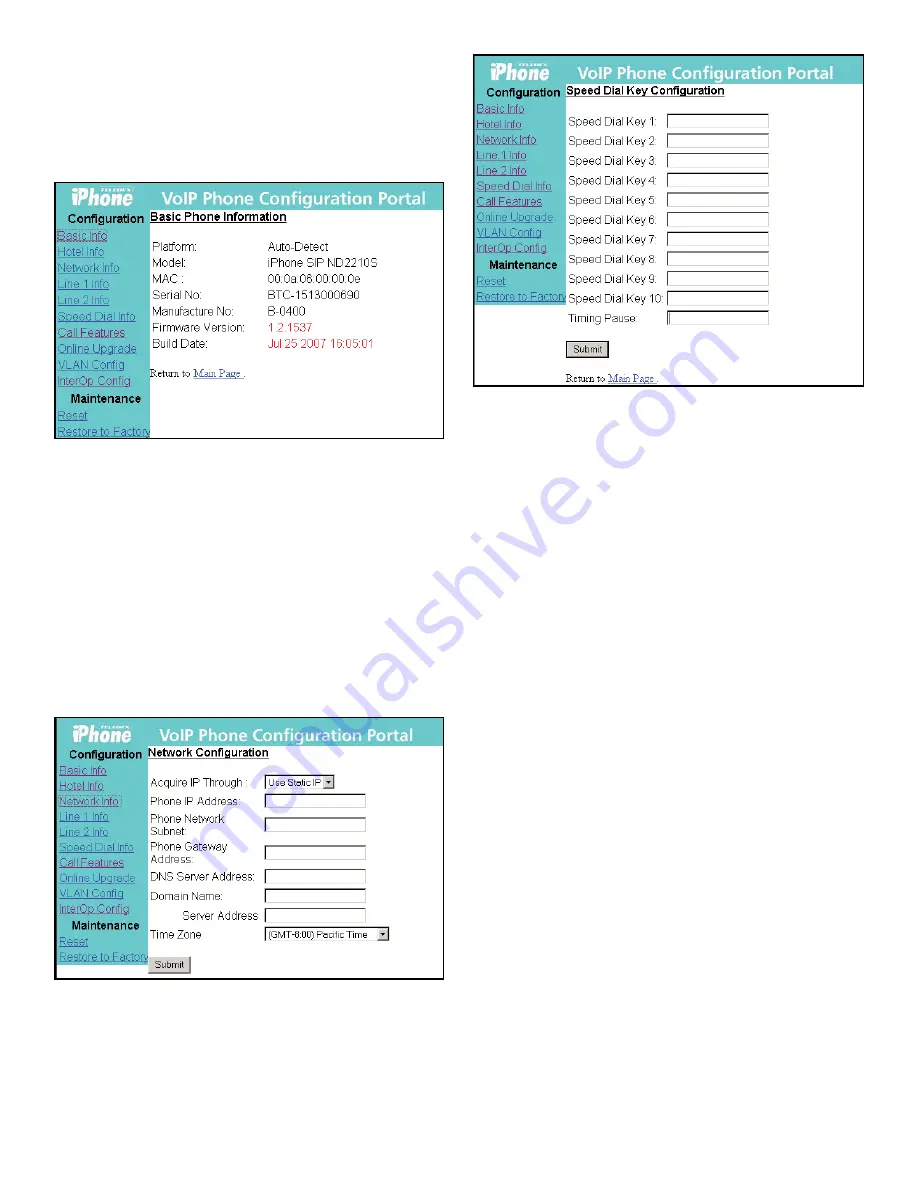
Figure 2 shows the welcome page of the configuration portal.
The phone can be configured through the main menu
provided by this portal.
NOTE:
Except for upgrading the software online (decribed in
subsection 3.2.7), the configuration for the SIP ND2100 series
will not be activated until the phone has been reset.
Fig 2: Teledex iPhone Configuration Portal
3.2.2 Change Network Configurations (Fig.3)
To change network configurations via the configuration
portal, follow these steps:
1. Click “Network Info” on the left side menu.
2. There are two options for the item “Acquire IP Through”.
Select “Use DHCP” if you want to use DHCP to get an IP
address automatically. Otherwise, select “Use Static IP”.
3. Input the phone’s IP address and subnet mask if using
static IP address. Input the gateway address, DNS server
address, SMTP server address and time zone.
4. Click “Submit”.
Fig 3: Network Configuration
3.2.3 Configure the Auto Dial Keys (Fig. 4)
To change auto dial configuration follow these steps:
1. Click “AutoDial Keys” on the left side menu.
2. Input the number associated with each auto dial keys.
3. Click “Submit” to save changes.
Fig 4: Configuration of Speed Dial Keys
3.2.4 Configure the Call Features (Fig. 5)
The configurable call features include Do Not Disturb, Call
Transfer, Call Forward No Answer, Call Forward Busy, Call
Waiting, and Call Forward All. A call forward extension
number can be pre-configured. A description of each
feature is below:
Do Not Disturb:
The phone will not ring upon any
incoming call.
Call Transfer:
Transfers the incoming call to another
number or extension.
Call Forward No Answer:
The incoming call will be
forwarded if there is no answer for 18 (eighteen) seconds.
Call Forward busy:
Incoming calls will be immediately
forwarded if the phone is off hook.
Call Forward All:
All incoming calls will be
forwarded automatically.
Call Waiting:
Answers one incoming call, while placing
the existing call on hold.
To enable or disable call features through the
configuration portal, follow these steps:
1. Click “Call Features” on the left side menu.
2. Check the box of the feature you wish to enable,
or uncheck a box to disable it.
3. Fill in the call forwarding number, if the Call Forward
feature is enabled.
4. Click “Submit”.
5
SMTP


