background image

NOTE: 

THIS INSTRUCTION 

BOOKLET CONTAINS 

IMPORTANT


SAFETY INFORMATION.

PLEASE READ AND KEEP FOR 
FUTURE REFERENCE. 

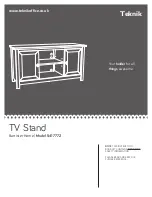
TV Stand

Barrister Home

 | 

Model 

5

417772

Your 

holder

 for all 

things

 awesome.

Teknik 

www.teknikoffice.co.uk

Summary of Contents for Barrister Home 5417772

Page 1: ...THIS INSTRUCTION BOOKLET CONTAINS IMPORTANT SAFETY INFORMATION PLEASE READ AND KEEP FOR FUTURE REFERENCE TV Stand Barrister Home Model 5417772 Your holder for all things awesome Teknik www teknikoffice co uk ...

Page 2: ...to tip over Check the size and weight of your TV Compare it to the diagram below before you begin assembly This Sauder unit is designed for use with televisions weighing less than 70 pounds Never use with a TV that weighs more The size of the television front to back and side to side must fit within the space defined in the diagram Never place the front edge of the TV past the front edge of the TV s...

Page 3: ...h other Use this part identification to help identify similar parts Now you know our ABCs A RIGHT END 1 B LEFT END 1 C RIGHT UPRIGHT 1 D LEFT UPRIGHT 1 E2 TOP 1 F BOTTOM 1 G BACK 1 H DOOR 2 I ADJUSTABLE SHELF 1 J SMALL ADJUSTABLE SHELF 2 K FRONT LEG 2 L BACK LEG 2 M TOP MOLDING 1 N BOTTOM MOLDING 1 O2 STOP MOLDING 1 Page 3 A B C D E2 F G H I J K L M N O2 J K L H ...

Page 4: ...tely on this shelf Refer to instruction book for complete safety information Note This is a permanent label Do not try to remove Surface will be damaged 02 02 269224 ADJUSTABLE FOOT 1 25E FOOT BASE 1 24E GOLD 1 MACHINE SCREW 2 50S ANGLE BRACKET 4 27G BLACK 9 16 LARGE HEAD SCREW 8 1S BLACK 1 7 8 FLAT HEAD SCREW 4 2S BLACK 2 1 4 FLAT HEAD SCREW 6 26S RUBBER SLEEVE 12 2R METAL PIN 12 1R SILVER 5 8 FL...

Page 5: ...t or the floor å Using your hammer carefully tap four HIDDEN CONNECTORS 9F with SCREWS into the TOP E2 Step 2 å Insert a CONNECTOR SCREW 8S into each HIDDEN CONNECTOR 9F 8S 9F 9F E2 Page 5 Scan this QR code or go to this address http qr sauder com ID 2278 to watch a video on how to assemble your unit ...

Page 6: ...n insert the metal end of a CAM DOWEL 2F into each HIDDEN CAM å NOTE Use the exact holes shown 12 used Arrow 1F 2F Insert the metal end of the CAM DOWEL into the HIDDEN CAM Arrow Do not tighten the HIDDEN CAMS in this step A B C D F Just think The sooner you do this the sooner you do something else ...

Page 7: ...å Push six HIDDEN CAMS 1F into the ENDS A and B Step 4 Page 7 A B Arrow The arrow in the HIDDEN CAM must point toward the hole in the edge of the board Hole 1F Arrow Arrow 1F 6 used ...

Page 8: ...Step 5 å Turn six CAM SCREWS 8F into the FRONT LEGS K Page 8 8F 6 used K K ...

Page 9: ...HIDDEN CONNECTORS E2 O2 The holes are closer to this surface How to use the HIDDEN CONNECTOR To fasten two parts together using the HIDDEN CONNECTORS insert your screwdriver at an angle into the slot in the HIDDEN CONNECTOR While pushing the screw into the hole of the adjoining part turn the screwdriver clockwise to tighten ...

Page 10: ... three HIDDEN CAMS å Fasten a BACK LEG L to the RIGHT END A Use three BLACK 2 1 4 FLAT HEAD SCREWS 26S A K L Surface with HIDDEN CAMS BLACK 2 1 4 FLAT HEAD SCREW 3 used in this step 26S These surfaces should be even The LEGS will overhang this edge Edge with CAM DOWELS ...

Page 11: ...a BACK LEG L to the LEFT END B Use three BLACK 2 1 4 FLAT HEAD SCREWS 26S B K L Surface with HIDDEN CAMS BLACK 2 1 4 FLAT HEAD SCREW 3 used in this step 26S These surfaces should be even The LEGS will overhang this edge Edge with CAM DOWELS Don t worry It isn t Rome This can be built in a day ...

Page 12: ...t be completely tightened HIDDEN CAMS that are not completely tightened may loosen and parts may separate To completely tighten Arrow Maximum 210 degrees B K O2 E2 S u r f a c e w i t h H I D D E N C O N N E C T O R S Surface with HIDDEN CAMS å Fasten the LEFT END B to the TOP E2 Tighten two HIDDEN CAMS ...

Page 13: ...tep 10 Page 13 å Fasten the UPRIGHTS C and D to the TOP E2 Tighten four HIDDEN CAMS E2 D C Surface with HIDDEN CAMS Surface without HIDDEN CAMS Arrow Minimum 190 degrees Maximum 210 degrees Finished edge ...

Page 14: ...REWS 2S å Slide the BOTTOM MOLDING N onto the notched edge of the BOTTOM F å U S Patent No 5 499 886 Notched edge N F S u r f a c e w i t h H I D D E N C A M S Arrow Minimum 190 degrees Maximum 210 degrees BLACK 1 7 8 FLAT HEAD SCREW 4 used in this step 2S B D C Page 14 Slide the BOTTOM MOLDING N onto the notched edge The groove is closer to this edge ...

Page 15: ... TOP E2 Use four BLACK 9 16 LARGE HEAD SCREWS 1S through the ANGLE BRACKETS on the TOP and into the TOP MOLDING å NOTE There are no pre drilled holes in the TOP MOLDING The SCREWS will tighten into the groove Step 12 Arrow Minimum 190 degrees Maximum 210 degrees E2 F A K Surface without HIDDEN CAMS M BLACK 9 16 LARGE HEAD SCREW 8 used in this step 1S Page 15 The groove is closer to this edge 27G 4...

Page 16: ...urn the adjustable end of the ADJUSTABLE FOOT completely in Final adjustments will be made after the unit is standing upright å Using your hammer carefully tap four TACK GLIDES 13E into the LEGS K and L 25E 24E F Turn completely in 13E L L K K If you re doing this to help a friend don t leave without a bite 13E SILVER 5 8 FLAT HEAD SCREW 4 used in this step 23S ...

Page 17: ...te corners of your unit if needed to make it square å Fasten the BACK G to your unit using the NAILS 1N å NOTE Be sure to tap NAILS into the holes that line up over the UPRIGHTS C and D å NOTE Perforations have been provided for access through the BACK Carefully cut out the holes needed U n fi n i s h e d s u r f a c e These holes must line up over the UPRIGHTS C and D G Step 14 NAIL 44 used in thi...

Page 18: ...Step Step 15 Page 18 å Fasten two HINGES 14H to each DOOR H Use eight BLACK 1 2 FLAT HEAD SCREWS 11S 14H BLACK 1 2 FLAT HEAD SCREW 8 used in this step 11S H H 14H ...

Page 19: ... it against the stops Then tighten the mounting screw å Fasten the DOOR H to the RIGHT END A as shown in the lower diagram Use the screws in the HINGES You should start each SCREW a few turns before completely tightening any of them å Fasten a KNOB 69K to the DOOR H Use a GOLD 1 MACHINE SCREW 50S å Peel two BUMPERS from the BUMPER CARD 29M and stick them on the DOOR H where they will come into con...

Page 20: ...l turn the adjusting screw in or out å To adjust the DOORS up and down vertical loosen both vertical adjustment screws Move the DOORS up or down to the desired location Tighten the screws after making adjustments å To adjust the DOORS in or out depth loosen the mounting screw one turn and move the DOORS in or out as needed Tighten the mounting screw after making adjustments vertical adjustment Adj...

Page 21: ...in the diagram å NOTE This is a permanent label intended to last for the life of the product Once applied do not try to remove it å NOTE Please read the back pages of the instruction booklet for important safety information å This completes assembly Clean with your favorite furniture polish or a damp cloth Wipe dry 2L WARNING Never use this furniture with a TV that is too large or too heavy Severe...

Page 22: ... and or video equipment may result in death or serious injury due to furniture collapse or over turning onto a child NEVER place a TV on furniture that is not intended to support a TV NEVER exceed the maximum size and weight of the TV shown in the instructions Be sure to apply the TV warning label as shown in the instructions Overloading drawers and shelves may result in furniture that can break o...

Reviews: