


144
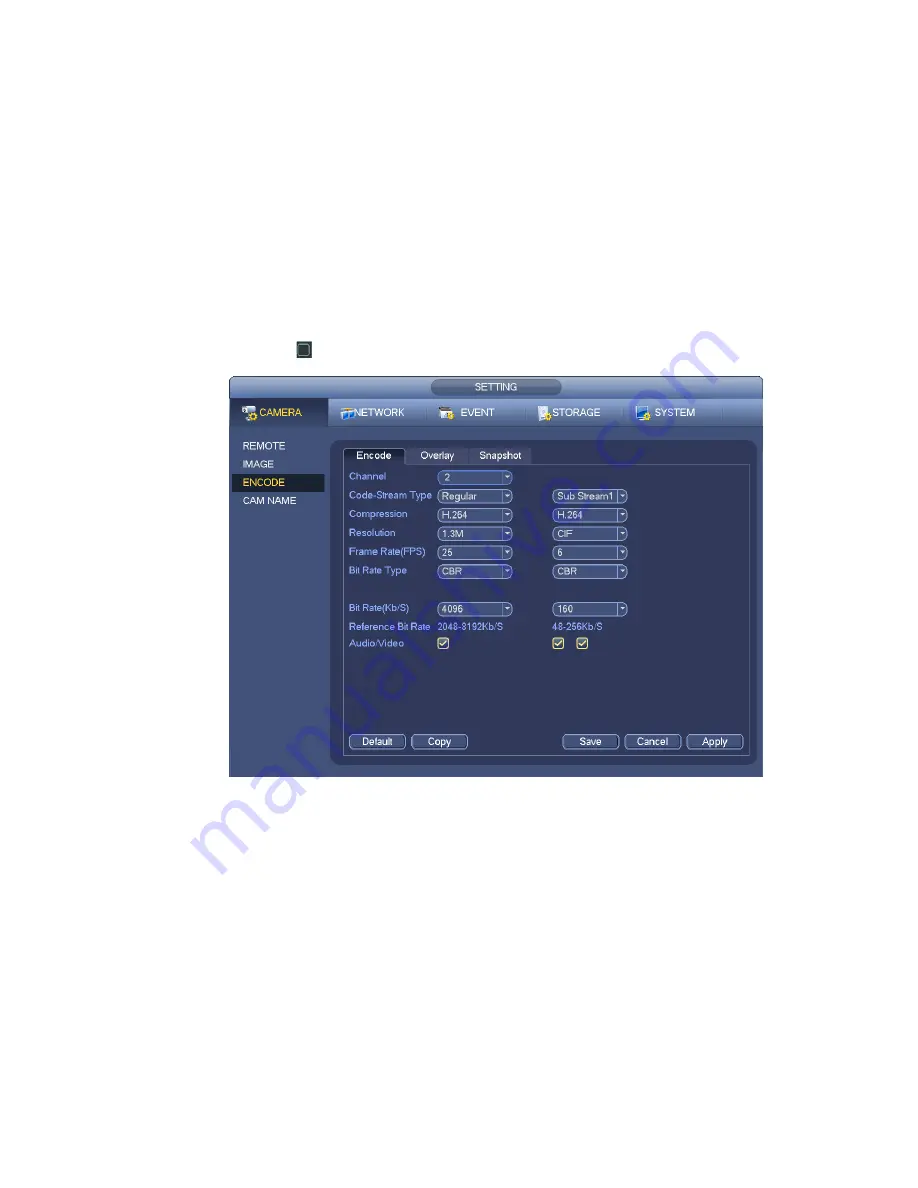
Frame rate: It ranges from 1f/s to 25f/s in NTSC mode and 1f/s to 30f/s in PAL mode.
Bit rate type: System supports two types: CBR and VBR. In VBR mode, you can set video quality.
Quality: There are six levels ranging from 1 to 6. The sixth level has the highest image quality.
Video/audio: You can enable or disable the video/audio. Please note, once you enable audio
function for one channel, system may enable audio function of the rest channels by default.
Copy
:
After you complete the setup, you can click Copy button to copy current setup to other
channel(s). You can see an interface is shown as in Figure 4-51. You can see current channel
number is grey. Please check the number to select the channel or you can check the box ALL.
Please click the OK button in Figure 4-51 and Figure 4-49 respectively to complete the setup. Please
note, once you check the All box, you set same encode setup for all channels. Audio/video enable
box, overlay button and the copy button is shield.
Please highlight icon
to select the corresponding function.
Figure 4-48
4.8.1.2 Overlay
Click overlay button, you can see an interface is shown in Figure 4-49.
Cover area: Here is for you to cover area section. You can drag you mouse to set proper section size.
In one channel video, system max supports 4 zones in one channel. You can set with Fn button or
direction buttons.
Preview/monitor: The cover area has two types. Preview and Monitor. Preview means the privacy
mask zone can not be viewed by user when system is in preview status. Monitor means the privacy
mask zone can not be view by the user when system is in monitor status.
Time display: You can select system displays time or not when you playback. Please click set button
and then drag the title to the corresponding position in the screen.
Channel display: You can select system displays channel number or not when you playback. Please
click set button and then drag the title to the corresponding position in the screen.
Summary of Contents for NVR-ELE8M-4K
Page 16: ...2 Front Panel and Rear Panel 2 1 Front Panel 2 1 1 The front panel is shown as in Figure...
Page 28: ...100 3 5 6 Please refer to Figure 3 6 for connection sample Figure 3 6...
Page 87: ...172 Figure 4 81 Figure 4 82...
Page 88: ...173 Figure 4 83 Figure 4 84...
Page 94: ...179 Figure 4 89 Figure 4 90...
Page 95: ...180 Figure 4 91 Figure 4 92...
Page 96: ...181 Figure 4 93 Figure 4 94...
Page 98: ...183 Figure 4 96 Figure 4 97...
Page 185: ...270 The motion detect interface is shown as in Figure 5 54 Figure 5 54 Figure 5 55...
Page 186: ...271 Figure 5 56 Figure 5 57 Figure 5 58...
Page 190: ...275 Figure 5 62 Figure 5 63...


