EN 07
Connecting to computer/notebook
The device is able to synchronize with computers.
Connect the USB to mini USB cable to the Mini USB Port of the device and
connect the other end of the cable to the USB port of your computer. Once the device
is connected to the computer, power ON the device; the LED indicator will turn
blue. A “Disk Drive icon” will appear on the LCD display , to indicate successful
connection. The device will now appear in the list of connected devices on your
computer.
Please note:
• The device will start charging once connected to your computer (see chapter:
Main menu
Sub-menu
Description
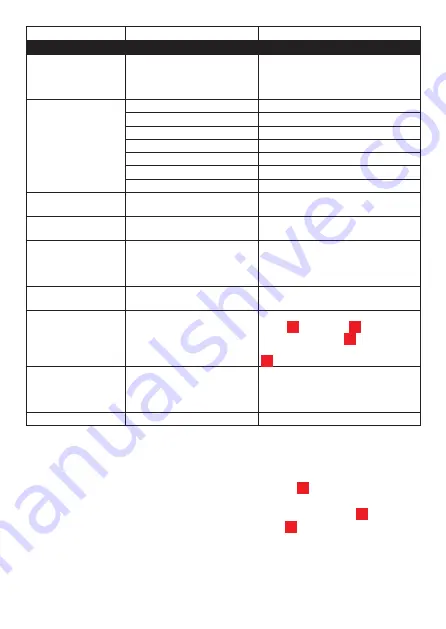
MAIN SETUP
Format
Next Menu
Cancel = back to main menu
WARNING!!! Selecting “Execute” will
DELETE all data stored on the Micro
SD card.
Language
English
English
French
Français
German
Deutsch
Dutch
Nederlands
Italian
Italiano
Portuguese
Portuguės
Spanish
Español
LCD AUTO OFF
OFF, 1,3,5Min
Automatically switch off the LCD in 1,3
or 5 minutes or OFF = Always ON.
AUTO OFF
OFF, 1,3,5Min
Automatically switch off the device in
1,3 or 5 minutes or OFF = Always ON.
Default setting
(System reset)
Cancel = back to main menu
WARNING!!! Selecting “Execute” will
RESET all system settings to factory
mode.
Frequency
50Hz / 60Hz
Select 50Hz or 60Hz (50Hz
recommended for EU)
Date Input
Next menu
Select the desired value using the
LEFT
and
RIGHT
buttons.
Press the
OK
button to go to the
next item and press the
MENU
button
again to go back to the setup menu.
USB
Next menu
Select disk drive to connect the unit
directly to the computer as a USB flash
drive. Select PC cam to use the unit as
a PC camera.
Version
VIEW
Firmware version information
11
13
10
9
15
16
2
Summary of Contents for TS-SV-CAM02
Page 1: ...User Manual Model TS SV CAM02 ...
Page 2: ......
Page 59: ......
Page 61: ......
Page 62: ...Version 2019 3 20 ...


