TechniSat DIGIDISH 33, Installation Manual
The TechniSat DIGIDISH 33 is a cutting-edge satellite dish system that delivers exceptional performance. Ensure a hassle-free setup with the detailed Installation Manual provided by manualshive.com. Download the manual for free in PDF format, offering step-by-step instructions and troubleshooting tips. Get ready to enjoy exceptional broadcasting quality right at your fingertips.
Share
Download


Reviews:
No comments
Related manuals for DIGIDISH 33

AirMax AMY-9M16
Brand: Ubiquiti Pages: 16

TW5350
Brand: Tallymatics Pages: 9

THOMSON ANT537
Brand: Hama Pages: 16

DB4e
Brand: Antennas Direct Pages: 2
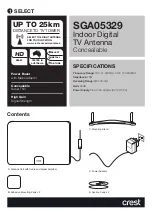
SGA05329
Brand: Crest Audio Pages: 4

M6060060O1D41202L
Brand: Ventev Pages: 2

AT-601B
Brand: Antop Pages: 9

OmPlecs TOP 200 AMR
Brand: ANTONICS Pages: 2

LA800
Brand: AOR Pages: 16

CX 4m series
Brand: Sirio Antenne Pages: 2

J275D-*-K
Brand: WADE Antenna, Inc. Pages: 2

H21D
Brand: SELFSAT Pages: 49

650
Brand: Televes Pages: 24

NA103
Brand: Novus Pages: 5

N60XVD
Brand: Plantec Pages: 3

SC2 Series
Brand: RFS Pages: 3

Wayfarer
Brand: Norsat Pages: 59

V-4R
Brand: Hy-Gain Pages: 8


