background image

26

DVD ProGraMMaBLe PLayBacK

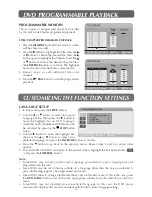
PROGRAMMABLE MEMORy

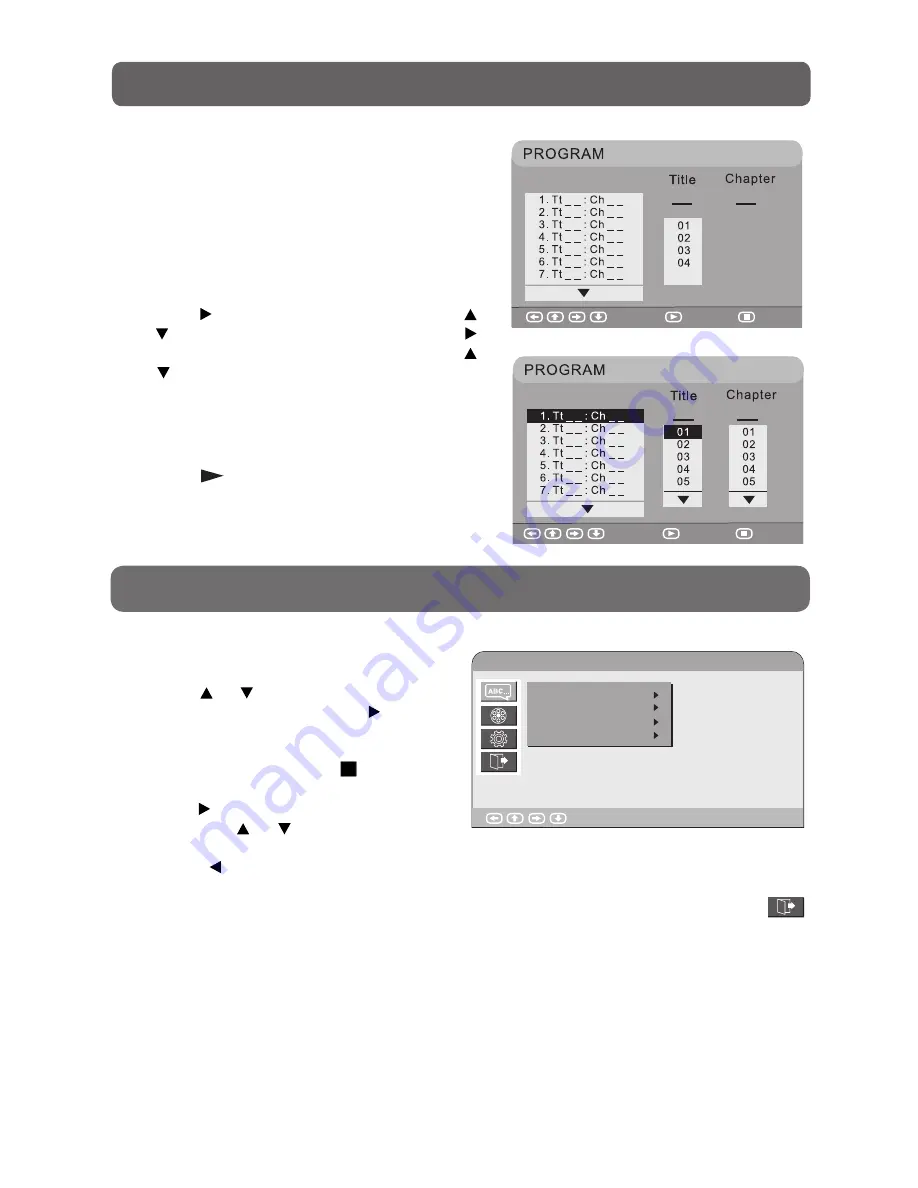
The  two  types  of  programmed  playback  provided 

by this unit is title/chapter programmed playback.

TITLE/CHAPTER PROGRAMMED PLAyBACK

1.  Press the 

MEMORy

 button in PLAY mode. A screen 

will be shown as right.

2.  Press the   button to highlight the Title. Press the   

or   button to choose the desired title. Press the   
button again to highlight the Chapter. Press the   
or   button to choose the desired Chapter. Press 
the 

ENTER/OK

 button to confirm. The highlight 

bar will move to the next item automatically.

3.  Repeat  step  2  to  add  additional  titles  and 

chapters.

4.  Press the 


PLAy

 button to start the programmed 

playback.

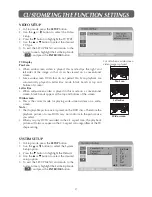
LANGUAGE SETUP

1. In Stop mode, press the 

SETUP

 button.

2.  Use  the    or    button  to  select  the  option 

Language  Setup,  then  press  the    button  to 
move  the  highlight  bar  on  OSD  Language. 
(Note that Audio, Subtitle and DVD Menu can 
be activated by pressing the   

STOP

 button 

twice.)

3.  Use the   button to move the highlight bar, 

then  use  the    or    button  to  select  your 
preferred language, and press the 

ENTER/OK

 button to confirm.

4.  Press  the 

  button  to  go  back  to  the  previous  menu.  Repeat  steps  2  and  3  to  adjust  other 

options.

5.  To exit the SETUP MENU and return to the normal screen, highlight the Exit Setup Mode ( 


) and press the 

ENTER/OK

 button.

Note :

•  Some  DVDs  may  not  play  in  the  audio  language  you  selected. A  prior  language  may  be 

programmed on the disc.

•  Some DVDs may be set to display subtitles in a language other than the one you selected. A 

prior subtitle language may be programmed on the disc.

•  Some DVDs allow to change subtitle selections only via the disc menu. If this is the case, press 

the 

DVD  MENU

  button  and  choose  the  appropriate  subtitle  from  the  selection  on  the  disc 

menu.

•  Some  DVDs  may  not  included  your  pre-selected  language.  In  this  case,  the  DVD  player 

automatically displays disc menus consistent with the disc’s initial language setting.

cuStoMiZinG tHe function SettinGS

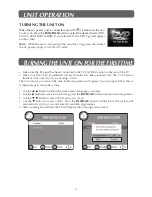
Language Setup

Enter  :  Select

OSD Language
Audio
Subtitle
DVD Menu

Select

Play

Clear

Select

Play

Clear

Summary of Contents for DVDID-501

Page 1: ...DVDID 501 15 4 LCD TV DVD ...

Page 2: ...should not be obstructed during intended use To be completely disconnected from the supply mains the mains plug of the apparatus should be disconnected from the mains socket outlet completely The apparatus should not be exposed to dripping or splashing and that no objects filled with liquids such as vases should be placed on apparatus To be completely disconnect the power input the mains plug of a...

Page 3: ...ment is not to be used for a day or more disconnect it at the wall outlet This symbol means that the unit is double insulated No connection to earth is necessary SAFE USE OF YOUR EQUIPMENT This equipment has been designed and manufactured to meet UK safety standards but like any electrical equipment care must be taken to obtain the best results from the equipment and assure your own safety Here ar...

Page 4: ...T 20 USING HEADPHONES 21 SOUND SYSTEM 21 CD DVD OPERATION 22 23 Playing a disc 22 Playing a picture file disc 22 Pausing playback still mode 22 Stopping playback 22 Skipping to a different track 22 Fast forward fast reverse 23 Slow motion play DVD 23 Audio selection DVD 23 Subtitle selection DVD 23 Angle Selection DVD 23 SPECIAL FUNCTIONS 24 Display function DVD 24 Locating a specific title DVD 24...

Page 5: ... You may not be able to play some DVD discs on this unit if they were purchased from outside your geographic area or made for business purposes JPG CD picture viewer Disc Function or Operation that is Not Available When the symbol appears on the screen it indicates that the function or operation attempted is not available at that time This occurs because the DVD disc manufacturer determines the sp...

Page 6: ...ragile and must be protected at all times when removing the base stand Be sure that no hard or sharp object or anything that could scratch or damage the LCD display comes into contact with it Do NOT place pressure on the front of the unit at any time because the screen could crack 1 Disconnect any cables or cords connected to the unit 2 Lay the unit down on a flat surface so the back side is facin...

Page 7: ... weak the operating distance of the remote control will be greatly reduced and you will need to replace the batteries Note If the Remote Control is not going to be used for a long time remove the batteries to avoid damage caused by battery leakage corrosion Do not mix old and new batteries Do not mixALKALINE standard CARBON ZINC or rechargeable NICKEL CADMIUM batteries WARNING Do not dispose of ba...

Page 8: ... HOLD button Press to stop the automatic page change from Teletext PREV button Select previous chapters or tracks on a disc 10 SUBTITLE button Press to select one of the subtitle languages or turn off subtitle display in DTV mode if subtitle languages are broadcast Press to display the selected Teletext page Press to select one of the subtitle languages programmed on a DVD 11 ANGLE button Switch t...

Page 9: ... button Pause playback and single frame advance on DVD mode 23 AUDIO button Press to select audio sound tracks of a DVD or change the output mode of a CD CANCEL button Press to cancel the Teletext menu 24 SLOW button Press to play a DVD in slow motion INDEX button Press to select the page number of the index from Teletext 25 DVD MENU button Press to enter the main menu of the disc you are watching...

Page 10: ...utton Press to select next title chapter or track on a disc 7 VOLUME controls Adjust the volume level 8 Colour LCD Screen 9 Disc Door Push gently to close the disc door 10 button Press to open the disc door 11 Remote sensor Do not block this sensor or the remote control will not work Standby indicator Indicates whether the unit is ON or in STANDBY OFF mode Light On The unit is in STANDBY Light Off...

Page 11: ...trial broadcasting Fully insert the CAM Conditional Access Module into the CI Common Interface slot on the bottom of the unit with its label side facing you Important notes Switch off the TV and unplug from the AC power mains before insert or remove the CAM The CAM should be correctly inserted it is impossible to insert fully if reversed The CAM or the TV terminal may be damaged if the CAM is forc...

Page 12: ...e sure the CAM Conditional Access Module has been inserted into the CI Common Interface slot correctly if you are using a CAM The first time for you turn on the unit initial setup menu will appear You can simply follow the on screen prompt to set up the system 1 Use the button to select the screen menu language you prefer 2 Use the button to move to Auto Tuning press the ENTER OK button to enter A...

Page 13: ...n for other dates Press the ENTER OK button to watch the selected channel Press the EXIT button to exit the PROGRAMME GUIDE menu Note Guide information display may be different according to the DTV programmes current date and time current programme and time Use the or button to select an audio language or audio format if available press the or button to select soud track between L R Stereo L L Mon...

Page 14: ...V MENU button to confirm MOVE for ATV mode only Press the YELLOW button and use the or button to move the selected channel then press the TV MENU button to confirm SKIP Press the BLUE button to skip or not skip the selected channel FAV Favourite Press the FAV button to set or cancel the selected channel as one of the favourite programmes Programme Edit All channels stored are listed in the Program...

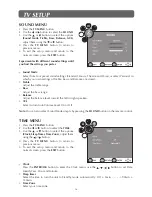
Page 15: ...cture Sharpness Adjust the sharpness level to improve detail in the picture Colour Temp Select the colour temperature of the picture Select Normal balanced Warm red white Cold blue white mode Note You can also select Picture Mode simply by pressing the PICTURE button on the remote control PICTURE MENU 1 Press the TV MENU button 2 Use the or button to select the PICTURE 3 Use the or button to selec...

Page 16: ...e range Bass Adjust the bass range Balance Adjust the balance level toward the left or right speakers AVL Select to turn Auto Volume Level On or Off Note You can also select Sound Mode simply by pressing the SOUND button on the remote control time MENU 1 Press the TV MENU button 2 Use the or button to select the TIME 3 Use the or button to select the options Clock Sleep Timer Time Zone adjust them...

Page 17: ...the TV MENU button 2 Use the or button to select the LOCK 3 Press the ENTER OKor buttontoenter enter password to proceed The default password is 0000 4 Usethe or buttontoselecttheoptions Lock System Change Password Block Programme Parental Guidance press the ENTER OK or or button to adjust 5 PresstheTVMENUbuttontoreturntoprevious menu 6 Toexitthesetupmenuandreturntothenormal screen press the EXIT ...

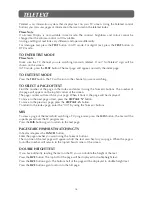
Page 18: ...the page will appear on the top left corner of the screen The page counter will search for your page When it finds it the page will be displayed To move to the next page of text press the CH PAGE button To move to the previous page press the CH PAGE button To return to the index page enter the 100 by using the Numeric buttons mix To view a page of the text whilst watching a TV programme press the ...

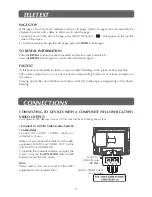
Page 19: ...te control has a row of colour buttons corresponding to the row of coloured subjects on the screen Pressing one of the colour buttons will take you directly to the page corresponding to the subject heading CONNECTIONS Connecting to Devices with a Composite yellow RCA type Video Output To connect to A V devices such as a VCR camcorder or video game system Connect to a VCR Video Game System Camcorde...

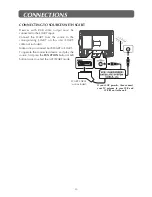
Page 20: ...to the corresponding SCART on this unit SCART cable not included Make sure you connect both SCART to SCART To operate the connected device and play the source first press the FUNCTION button or AV button twice to select the AV2 SCART mode SCART CABLE not included If your VCR permits then connect your TV antenna to your VCR and VCR RF out to the unit ...

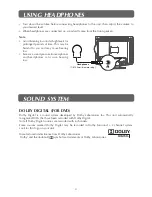
Page 21: ...hones can cause hearing loss DOLBY DIGITAL FOR DVD Dolby Digital is a sound system developed by Dolby Laboratories Inc This unit automatically recognizes DVDs that have been recorded with Dolby Digital Not all Dolby Digital sources are recorded with 6 channels Some sources marked Dolby Digital may be recorded in Dolby Surround a 2 channel system Look for this logo on your unit Manufactured under l...

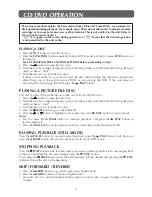
Page 22: ...yback Note You can press the PAUSE button to interrupt playback and press the PLAY button to resume playback Press the ANGLE button on the remote control to rotate the picture orientation by 90 PAUSING PLAYBACK STILL MODE Press the PAUSE button To resume normal playback press the PLAY button Each time you press the PAUSE button the picture advances one frame on DVD movie STOPPING PLAYBACK Press th...

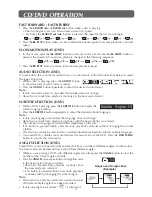
Page 23: ... desired subtitle language Note If only one language is recorded the language does not change About two seconds later playback continues with the new subtitle you selected The number of languages recorded differs depending on the disc If no button is pressed within a few seconds playback continues without changing the current subtitle This function can only be used for discs on which subtitles hav...

Page 24: ...corresponding number button s for the chapter track you want 3 Press the ENTER OK button to confirm Playback starts from the selected chapter track LOCATING A SPECIFIC TIME You can move to a specific location by entering its corresponding time hours minutes seconds 1 Press the GOTO button 2 Press the GOTO button again a screen shown as right will be displayed on the screen Enter the corresponding ...

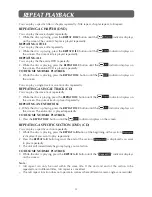
Page 25: ... 1 While the disc is playing press the REPEAT DISC button until the indicator displays on the screen The current track is played repeatedly Repeating AN ENTIRE DISC 2 While the disc is playing press the REPEAT DISC button until the indicator displays on the screen The entire disc is played repeatedly To resume normal playback 3 Press the REPEAT DISC button until the indicator displays on the scree...

Page 26: ...wice 3 Use the button to move the highlight bar then use the or button to select your preferred language and press the ENTER OK button to confirm 4 Press the button to go back to the previous menu Repeat steps 2 and 3 to adjust other options 5 To exit the SETUP MENU and return to the normal screen highlight the Exit Setup Mode and press the ENTER OK button Note Some DVDs may not play in the audio ...

Page 27: ...Ds recorded in the 4 3 aspect ratio the playback picture will always appear in the 4 3 aspect ratio regardless of the TV shape setting Cut off when a wide screen video image is played Pan Scan Letter Box Wide screen VIDEO SETUP 1 In Stop mode press the SETUP button 2 Use the or button to select the Video Setup 3 Press the button to highlight the TV TYPE 4 Use the or button to select the desired TV...

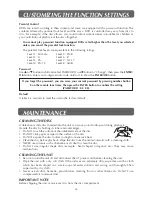
Page 28: ...r to remove dust IMPORTANT NOTE Before shipping the unit remove any disc from the disc compartment Password Use or button to shift and select PASSWORD use button to Change then press the ENTER OK button Enter your 4 digit security code until to OK Press the ENTER OK button Parental Control DVDs are rated according to their content and some are equipped with a password function The contents allowed...

Page 29: ...echua Rhaeto Romance Kirundi Romanian Russian Kinyarwanda Sanskrit Sindhi Sangho Serbo Croatian Singhalese Slovak Slovenian Samoan Shona Somali Albanian Serbian Siswat Sesotho Sundanese Swedish Swahili T amil T elugu T ajik Thai Tigrinya Turkmen T agalog Setswana T onga Turish Tsonga T atar Twi Ukrainian Urdu Uzbek Vietnamese Volapük Wolof Xhosa Y oruba Chinese Zulu MG MI MK ML MN MO MR MS MT MY N...

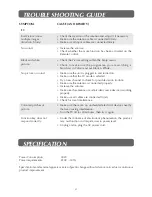
Page 30: ...ard The disc does not play Trouble Shooting Guide SYMPTOM CAUSE AND REMEDY Check that the AC power cord is connected Turn on the unit Remove any obstacles between the remote and the unit Use the remote near the unit Point the remote at the remote sensor on the unit Replace the batteries in the remote with a new ones No power The remote does not function Make sure that you have selected DVD mode Th...

Page 31: ...the antenna or audio video source device is working properly Make sure all cables are connected firmly Check for local interference Make sure there are no unshielded electrical devices nearby that are causing interference Turn the TV off for 30 minutes then try it again Under the influence of electrostatic phenomenon the product may malfunction and require user to power reset Unplug and re plug th...

Page 32: ...ty in no way affects your consumer rights UK Waste electrical products should not be disposed of with household waste Separate disposal facilities exist for your nearest facilities see www recycle more co uk or in store for details ROI Produced after 13th August 2005 Waste electrical products should not be disposed of with household waste Please recycle where facilities exist Check with your Local...

Reviews: