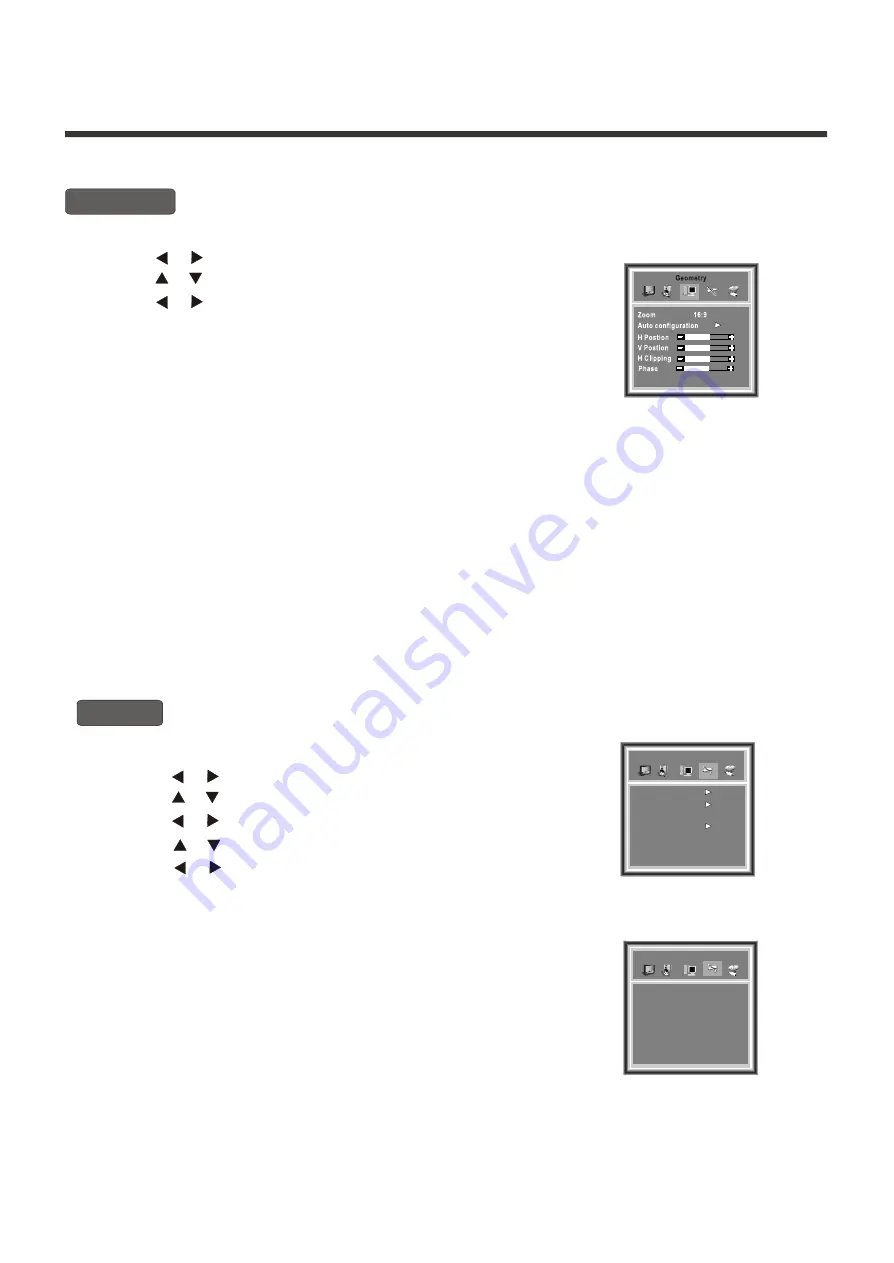
Teac LCHD2040 User Manual Download Page 18

Menu operation

H Clipping:

 The item allows you to adjust the width of  the image 

                    in the horizontal direction.

H Position: 

The item allows you to adjust  the TV image in the

                    horizontal direction.

V Position: 

The item allows you to move the TV image in the vertical direction.

Auto Configuration: 

When the image looks abnormal, you can try to choose the 

Auto Configuration

 item

                                   to correct the image automatically.

1) Some picture settings will not be shown unless applicable to the input signal type. For example: 


H CLIPPING

 and 

PHASE

 will only appear when the input signal are 

VGA

 or 

Component

.

             2) You can press 

WINDOW 

button on the remote control to enter 

Geometry

 menu directly.

NOTE: 

Geometry

[     or     ]

1) Press the 

MENU

 button to enter the main menu.

2) Press the                  button to highlight and select the item 

Geometry.

3) Press the                  button to highlight and select the item you want to adjust.
4) Press the                  button to change the value.  
5) Press OK button to confirm your selection. Press OK again to exit from the menu.

[     or     ]

[     or     ]

Using the Geometry  menu 

Using the General Settings  menu 

Timer

[     or     ]

1) Press the 

MENU

 button to enter the main menu.

4) Press the                  button to enter the 

Timer menu

.

5  

2) Press the                  button to highlight and select the item 

General Settings.

3) Press the                  button to highlight and select 

Timer

.

) Press the                  button to highlight and select the item you want to adjust.

6) Press the                  button to change the value.
7) Press OK button to confirm your selection. Press OK again to exit from the menu.  

[     or     ]

[     or     ]

[     or     ]

[     or     ]

Clock

: This item allows you to set the local time on the TV.

On/Off :

 The item allows the TV automatically to turn on 

              or jump to a preset channel or switch  to standby 
              mode when the preset time is reached.

Time: 

The item allows you to set  the preset  time, turn

           on time, standby time.

Program: 

The item allows you to preset the channel number that the TV will turn to at the preset time.

-18-

Clock        00:00       

On/Off      Time                 Program      
Off            00:00                   0       

Off            00:00                   PowerOff       

Off            00:00                   0       

Timer

General Settings

Timer
Option

Lowpower Mode            Standard

Channel Edit

Summary of Contents for LCHD2040

Page 1: ...IMPORTANT WARRANTY INFORMATION INSIDE PLEASE READ WWW TEAC COM AU Part No LCHD2040 20 LCDTV U S E R M A N U A L IES060215...

Page 2: ...turned to the owner The warranty does not cover freight or insurance In all cases of in transit damages or loss a claim must be filed against the carrier by the purchaser 7 In home service will only b...

Page 3: ...e Centre 3 Please have your purchase receipt as your proof of purchase and the following details completed for a valid Warranty Owner s Name Owner s Address Postcode Model Name No Serial No Dealer s N...

Page 4: ...ur new TV Selecting a location for your TV Connecting your TV Connecting the audio visual equipments Connecting to a Personal Computer or Notebook Connecting the Aerial Cable antenna Using the remote...

Page 5: ...age caused by the use of parts and accessories manufactured by other companies To avoid malfunction and overheating make sure that the vents on the main unit are not blocked when installing to ensure...

Page 6: ...must be provided to prevent heat build up inside unit Keep the inside of unit free from foreign objects such as hairpins nails paper etc Do not build the set into a bookcase or other enclosures in wh...

Page 7: ...ge that you want to use or or 1 Press the MENU button to enter the main menu 2 Press the button to highlight and select the Option menu 3 Press the button to select the Reset Menu 4 Press the button t...

Page 8: ...M U T E P M O D E S MODE R E C A L L VOL CH SLEEP DISPLAY YPBPR Select YPBPR input POWER Power on off SOURCE Select one of three input signal sources SETUP Window Setting LOCK Set child lock VGA Sele...

Page 9: ...ton to highlightand selectSearch menu and press the button to enterSearch menu 3 Press the button to highlightand select theColour System 4 Press the button to togglebetween Auto PAL and SECAM For Aus...

Page 10: ...side and therear panel provideall the connectionsyou will needto connect otherequipment to yourTV Side Controls Connections Note The above figures are for reference only Please refer to the actual con...

Page 11: ...input CATV antenna input AV Video input S Video input Y PB CB PR CR input Component VGA Component audio input Headphone jack 9 AC IN PC IN ANT IN L R AUDIO S VIDEOVIDEO Y PB CBPR CR CB CR VCD DVD STB...

Page 12: ...ng to an Aerial Cable antenna PC NB To VGA RGB line You can use yourTV as a monitor for connecting through the PC IN VGA connection jack your PC or Notebook by Connect the devices as shown below Conne...

Page 13: ...13 3 Close the battery cover Note 1 Dispose of your batteries in a designated disposal area Do not throw your batteries into fire 2 Do not mix battery types or combine used batteries with new ones 3 R...

Page 14: ...ied and switched ON Press the Power Standby button on the side of the LCD TV or on the remote control to turn on the LCD TV press again after 5 second will return the LCD TV to standby ON OFF Standby...

Page 15: ...press buttons from 0 9 successively to select the other two numbers For example to select channel 120 press the button 1 1 will appear on the screen then press the button 2 and the button 0 successive...

Page 16: ...the A2 Stereo feature Press the STEREO button on the remote control to switch between MONO and STEREO Menu operation Using the Picture Parameters menu 1 Press the MENU button to enter the main menu 2...

Page 17: ...he item HeadPhone 4 Press the button to enter 5 Audio Settings HeadPhone menu Press the button to highlight and select the item you want to adjust 6 Press the button to adjust the level 7 Press OK but...

Page 18: ...Press OK button to confirm your selection Press OK again to exit from the menu or or Using the Geometry menu Using the General Settings menu Timer or 1 Press the MENU button to enter the main menu 4...

Page 19: ...the button to highlight and select the item General Settings 3 Press the button to highlight and select Channel Edit Channel Edit Press the button to highlight and select the item you want to adjust...

Page 20: ...ng the button during fine tuning the present channel 5 Press OK button to confirm your selection Press OK again to exit from the menu Search 3 Press the button to highlight and select Fine Tune or or...

Page 21: ...clean dry cloth 4 Polish the cabinet with a quality furniture polish to maintain the finish and appearance of the cabinet Caution Never use strong solvents such as thinner benzene or other chemicals...

Page 22: ...station may have broadcast difficulties Try another channel Check the antenna connections The station may have broadcast difficulties Try another channel Adjust the picture from the menu The station m...

Page 23: ...Resolution 1366X768 Y PB CB PR CR mode Analog RGB mode 640X480 800X600 1024X768 1280X768 60Hz Brightness 2 450cd m Viewing angles o o 170 H 170 V OSD language English Chinese RF input Cable Antenna 1...

Page 24: ...ne VIC 3043 Phone 03 8336 6500 SERVICE DIVISION MELBOURNE VIC 30 Tullamarine Park Road Tullamarine VIC 3043 Phone 03 8336 6544 SYDNEY NSW Unit 8 20 22 Foundry Rd Seven Hills NSW 2147 Phone 02 8811 400...

Reviews: