background image

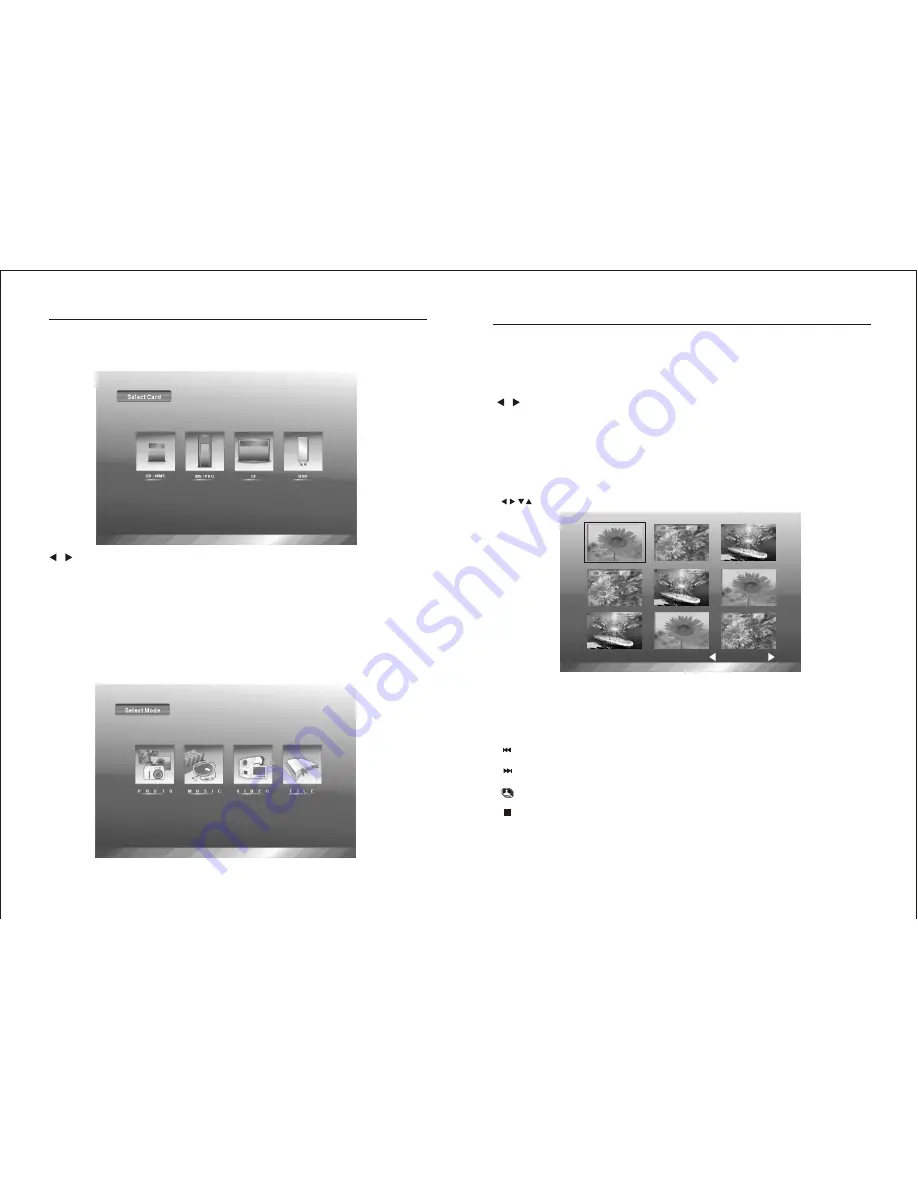
CARD SELECT MENU

At startup, a menu screen appears for selection of the memory card:


 : 

    Use the Right and Left Arrows on the Remote control or on the control panel to select the 

                      correct memory card type or USB Flash driver. 

MODE SELECTION MENU

The next menu allows Selection of the playback mode.

NOTE: 

1.   Some digital cameras save images in non-standard formats. Please refer to your camera’s
      instruction manual for details.
2.  The SD icon not highlight is during SD memory card not insert. The MS/PRO,CF,USB icon is 
     same too.


 ENTER:    

Press the Enter button to confirm.  

Control Functions Continue

14

15

Control Functions Continue.

                   Use  the Arrow Buttons on the Remote Control Panel to select an image.


ENTER  

     Press the ENTER Button from the Remote Control or the Control Panel to view the 

                   selected image at full screen size.

MENU

         Press "MENU" button return to main menu.

When viewing an image:


In PHOTO mode, a thumbnail screen will appear to enable easy selection of images. This mode 
displays a set of up to 9 thumbnail image on the screen at a time.

Previous: Press the Previous Button on the Remote Control or the Control Panel to return 

                   to the previous image.
                   NEXT: Press the NEXT Button on the Remote Control or the Control Panel to skip to the 
                   NEXT image.
                   Slide show: In the press the SLIDE SHOW Button on the Remote Control to begin a 
                   “slide show” style playback of all image on the selected memory card..
                   STOP: Press the STOP Button on the Remote Control or the Control Panel to stop image  
                   playback and return to the Thumbnail Screen

MENU

        Press "MENU" button to image fire browse menu. 

ROTATE 

   When viewing a full screen, Press direction button on the remote: UP(vertically  mirror); 

                   DOWN(horizontally mirror),LEFT(90 degree clockwise),RIGHT(90 degree anti-
                   clockwise)

THUMBNAIL SCREEN

IMAGE CONTROLS

Prev  Next

PHOTO: 

  JPEG still image viewing and slide show playback.

MUSIC:  

  WMA audio playback.

VIDEO:  

  Video file Playback.

FILE:  

      View the file structure on the memory card.


:  

  Use the Left and Right Arrows on the Remote Control or on the Control Panel to 

                  select a viewing mode.

MENU:

     Press"MENU" button return to main menu.

NOTE: 

    This menu only have to just appear is the memory card contain two kind of above 

                 the support document.

Summary of Contents for DPF100

Page 1: ...DPF100 Digital Picture Frame ...

Page 2: ...1 ...

Page 3: ...2 27 ...

Page 4: ...3 26 ...

Page 5: ...rt Guide Controls Connecting to a TV Set Remote Control Insert the memory card Control Functions System setup Glossary of Terms Appendix Troubleshooting Guide Technical Specifications Service Providers in Australia 1 5 8 9 10 11 12 13 14 14 20 21 22 23 Warranty registration 25 ...

Page 6: ... rug or similar surface that may block the ventilation opening or placed in a built in installation such as a book case or cabinet that may impede the plow of air through the ventilation openings HEAT Position the Digital Picture Frame away from sources of high heat such as radiators or stoves POWER SOURCE Connect the Digital Picture Frame to a power supply only of the type described in the operat...

Page 7: ...l be placed the apparatus DAMAGE REQUIRING SERVICE Seek service by qualified service personnel when The power supply has been damaged Liquid has been spilled onto the Digital Picture Frame The unit has been exposed to rain The unit does not operate normally or exhibits a marked change in performance The unit has been dropped or physically damaged SERVICING Do not attempt to service the Digital Pic...

Page 8: ...risk of electric shock to persons This symbol alerts the user of the presence of important operating and maintenance servicing instructions in the Digital Picture Frame user guide CAUTION TO REDUCE THE RISK OF ELECTRIC SHOCK DO NOT EXPOSE THIS UNIT TO RAIN OR MOISTURE CAUTION TO REDUCE THE RISK OF ELECTRIC SHOCK DO NOT REMOVE COVER OR BACK NO USER SERVICEABLE PARTS INSIDE REFER SERVICING TO QUALIF...

Page 9: ...tion manual for details Q Why is the picture display slower with some pictures and faster with others A Higher resolution pictures load more slowly Try using lower resolution pictures or down sample your images See your camera s operating manual for details on down sampling images Q Can I insert multiple memory cards A Yes Turn on the unit after inserting memory cards The first screen will display...

Page 10: ...e to another Flash Memory A type of non volatile memory that holds onto is contents even when an electrical charge is not applied Flash memory is used in many applications including PDAs hardware WMA players and some digital cameras JPEG Joint Photographic Experts Group the development group for a compressed 24 bit color image storage format that also bears its name Memory Card The system used to ...

Page 11: ... TV system Option include PAL and NTSC and multi AUDIO To select the Audio Language Option include English French Spanish Chinese Japanese Korean Russian Subtitle Select the Subtitle Language Option include English French Spanish Chinese Japanese Korean Russian Default Reset all the setting of DPF to init default state Exit setup menu Preference page System Setup Preference Page TV Type Audio Subt...

Page 12: ...MAL Use this mode for viewing standardpicture in unaltered proportions Which is the standard still image aspectratio from most DigitalCameras Black bars will appear on each side of the screen WIDE Use this mode to standard picture will stretch to fit the screen NOTE If enduser can not get full size of screen picture they can have the solution to go to setup TV wide 2 OSD Language Select the OSD On...

Page 13: ... view 21 23 Slide Show Press Slide Show to begin displaying picture in a slide show Volume Controls Adjust volume for audio and video file Play Pause Press Play Pause onceto Pause video playbackand press Play Pause again to resume Playback 17 Control Functions Continue System Setup ZOOM 1 Press ZOOM button repeatedly during playback then the size of image will change each press in the sequence as ...

Page 14: ...ng keys Then press ENTER the highlight WMA will be played instead of the previous one VOLUME Press VOL VOL keys to decrease increase sound volume MUSIC CONTROL 1 Use Keys to highlight MUSIC icon Press Enter Button enter music play menu 2 Use keys to highlight aWMA file then press PLAY button tostart to playback the WMA file Control Functions Continue 16 9 ZOOM Press ZOOM button repeatedly during p...

Page 15: ...o 9 thumbnail image on the screen at a time Previous Press the Previous Button on the Remote Control or the Control Panel to return to the previous image NEXT Press the NEXT Button on the Remote Control or the Control Panel to skip to the NEXT image Slide show In the press the SLIDE SHOW Button on the Remote Control to begin a slide show style playback of all image on the selected memory card STOP...

Reviews: