13
The Guardo 360 Cam records video’s & makes pictures from both lenses and combines
them into 1 single file using the Guardo 360 App or the Guardo 360 PC software.
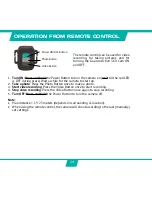
Start video recording:
Make sure the Guardo 360 Cam is turned on and in Video Mode.
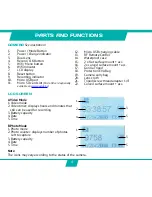
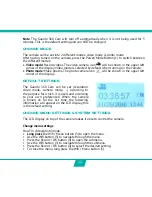
Press the Record Button (4) once. The red LED indicator (9) will start flashing slowly and a timer
will appear = start of recording.
Note:
Shooting view angles are slightly different in different working modes of the video camera.
Stop video recording:
Press the Record Button (4) once again to stop recording. The red LED indicator (9) and
the timer will turn off.
Note
:
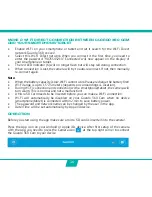
When the memory card is full, the Guardo 360 Cam will automatically stop recording.
Your recordings will be saved, before the camera turns off! When 0:00 shows on your
screen, this indicates your SD card is full and recording is no longer possible. You need
to empty or format your SD card (via App, computer or camera) again. This of course
after
having copied/saved your photos/footage from the card to another device such as your
computer’s hard disk. See ‘Format SD Card’.
When recording continuously over a longer period of time (e.g. 2 hours non-stop), the
footage saved on your Micro SD Card will be split in different sections, 1 section = approx.
4GB/45 minutes max.
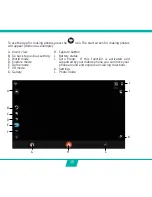
Make a photo:
Make sure the Guardo 360 Cam is turned on and in Photo Mode.
Press the Record Button (4) once. You will hear a beep and the red LED indicator (9) will
light up once = taking a photo
Note
: Only when you have heard the beep and the red LED Indicator (9) has flashed the
photo was really taken.
OPERATION
Summary of Contents for GUARDO 360 CAM
Page 1: ...1 USER S MANUAL GB NL D FR 360...
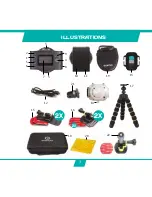
Page 3: ...3 ILLUSTRATIONS 2X 2X 2X 1 16 15 14 13 12 11 10 9 8 7 6 5 4 3 2 17 18 19 20 21 3 22...
Page 28: ...28 NL...
Page 29: ...29 ILLUSTRATIES 2X 2X 2X 1 16 15 14 13 12 11 10 9 8 7 6 5 4 3 2 17 18 19 20 21 3 22...
Page 54: ...54 FR...
Page 55: ...55 2X 2X 2X 1 16 15 14 13 12 11 10 9 8 7 6 5 4 3 2 17 18 19 20 21 3 22 ILLUSTRATIONS...
Page 80: ...80 D...
Page 81: ...81 2X 2X 2X 1 16 15 14 13 12 11 10 9 8 7 6 5 4 3 2 17 18 19 20 21 3 22 ABBILDUNGEN...


