408-9279
Rev F
3
of 7
3.1.
Installing Lower Die Assembly
1. Squeeze the tool handles together until they bottom. Then allow them to open fully.
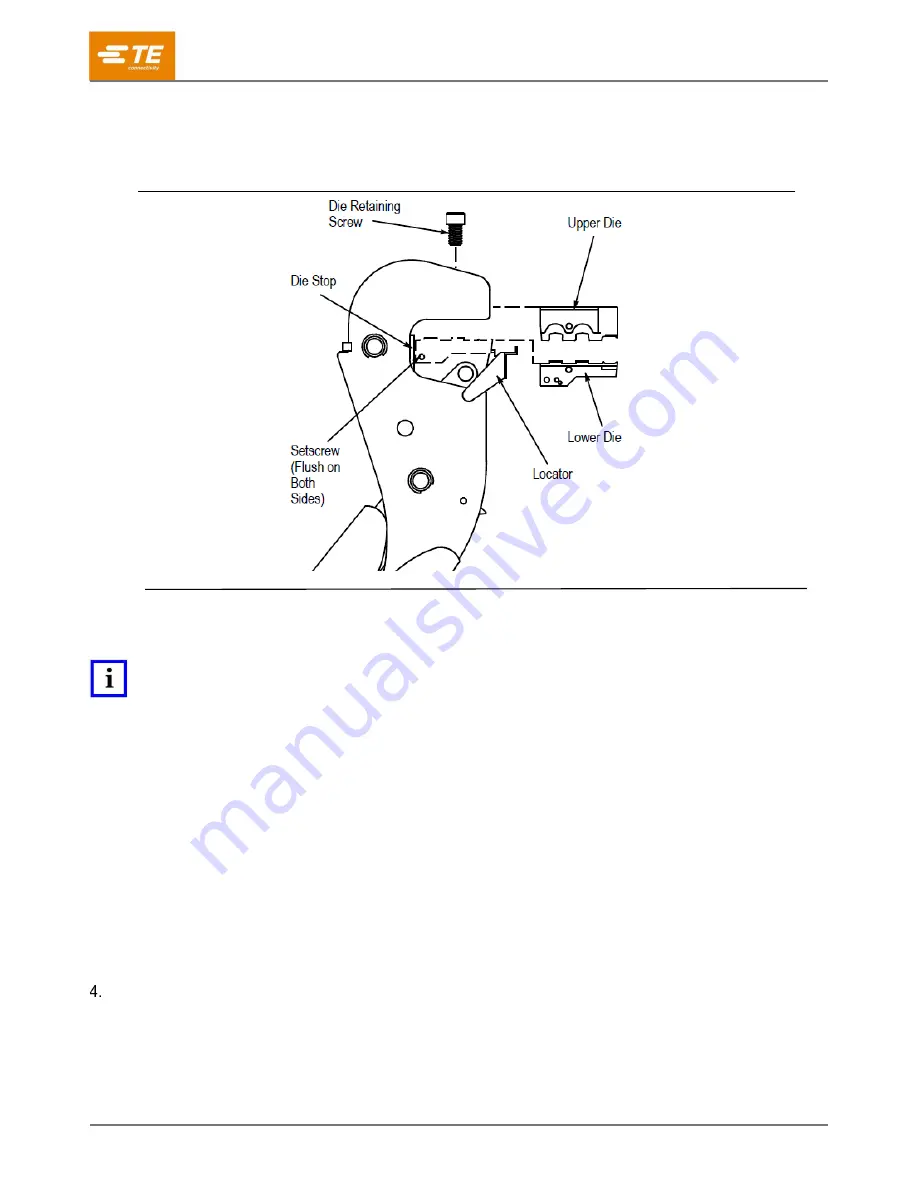
2. Hold the hand tool frame so that the back of the tool is facing you and note the socket head screw
located in the lower die platform (see Figure 3).
Figure 3
3. Slide the lower die onto the lower platform, ensuring that the drilled holes on the side of the lower die
line up with the socket head screw.
NOTE
If the lower die will not seat on the lower die platform with the drilled hole aligned with the socket head screw, use the hex wrench to turn
the screw either in or out until the set screw does not protrude from either side of the lower tool jaw.
4. With the lower die in place, turn the socket head screw (on the die platform) clockwise until snug. Do
NOT overtighten.
3.2.
Installing Upper Die Assembly
1. Remove the die retaining screw from the die assembly.
2. Position the upper die in upper die platform of the tool. Thread the die retaining screw through the
mounting hole in the top of tool and tighten the screw until it is snug but NOT secured.
3. While guiding the upper die into alignment with the lower die, slowly close the tool handles until the
dies bottom.
4. Tighten the upper die retaining screw until the die is secure.
5. Squeeze the tool handles together until the ratchet releases. Allow the tool handles to open fully. The
tool is now ready for use.
CRIMPING PROCEDURE
1. Refer to the table in Figure 2, select a wire of the specified size and strip the wire to the dimension
provided. Do NOT nick or cut the wire strands.
2. Select an applicable contact (see Figure 2).
3. Hold the tool so the front of the tool is facing you.


