9
V
ersa
s
afe
TM
I
nsTallaTIon
i
nstall
s
tandard
a
nCHors
b
olt
V
ersa
s
afe
™
to
f
loor
1
. Ensure the mounting location is free of all debris that might prevent cabinet from leveling.
2
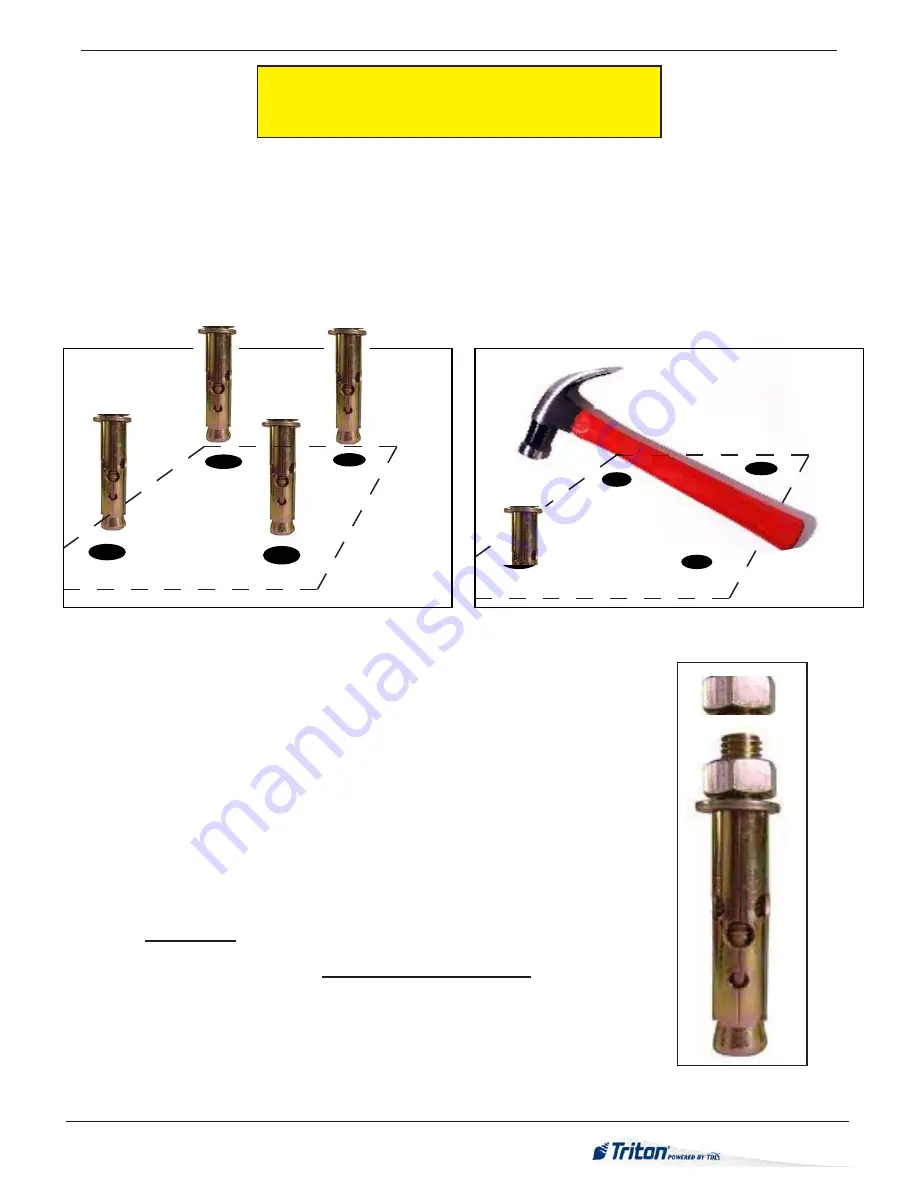
Move the unit into position for mounting by aligning the base over the four holes drilled in the previous procedure.
3
Place an anchor mount through the cabinet base and into one of the mounting holes. Use a hammer of sufficient weight to tap
the mount completely into the hole,
(see figure 3, 4)
IMPORTANT: If the anchor mount “falls” into the hole without needing to be tapped in, the hole is too large! The mounting-
hole pattern will have to be moved and redrilled using smaller holes as necessary to achieve a snug fit.
Place anchor mounts through cabinet base and into
mounting holes.
Tap anchor mounts into mounting holes.
4.
Place a bolt into mount, then place flat washer on the anchor bolt followed by
a 1/2” (13mm) nut on top to secure. Do not tighten fully, allow for leveling.
5.
Repeat Steps 2 and 3 for the remaining anchor bolts.
6
.
Ensure the cabinet is as level as possible, given the floor conditions. Use a bubble
level to verify this. Check the need for leveling by rocking the cabinet from side
to side..
7.
Use a torque wrench and 3/4” [19mm] socket to tighten each nut to a torque
setting of
60 foot-pounds (required to establish the maximum pull-out strength
of the anchors)
. If a torque wrench is not available, use a ratchet wrench and
3/4” [19mm] socket to tighten the nuts
three full turns beyond hand tight
. Do
Not overtighten.
8.
Once the nuts are tightened as specified in Step 7,
install a second nut on each
bolt, to act as a jam nut, and tighten down firmly
.
Figure 3
Figure 4
Figure 5
4 1/2 “ anchor bolt


