background image

20

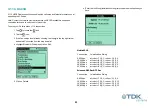
On the Palm

1 Tap 

 to locate the 

 icon.

2 Tap the 

 icon.

3 If the Connection is not already showing, tap the 

 in the top right corner

and select 

Connection 

from the drop down list.

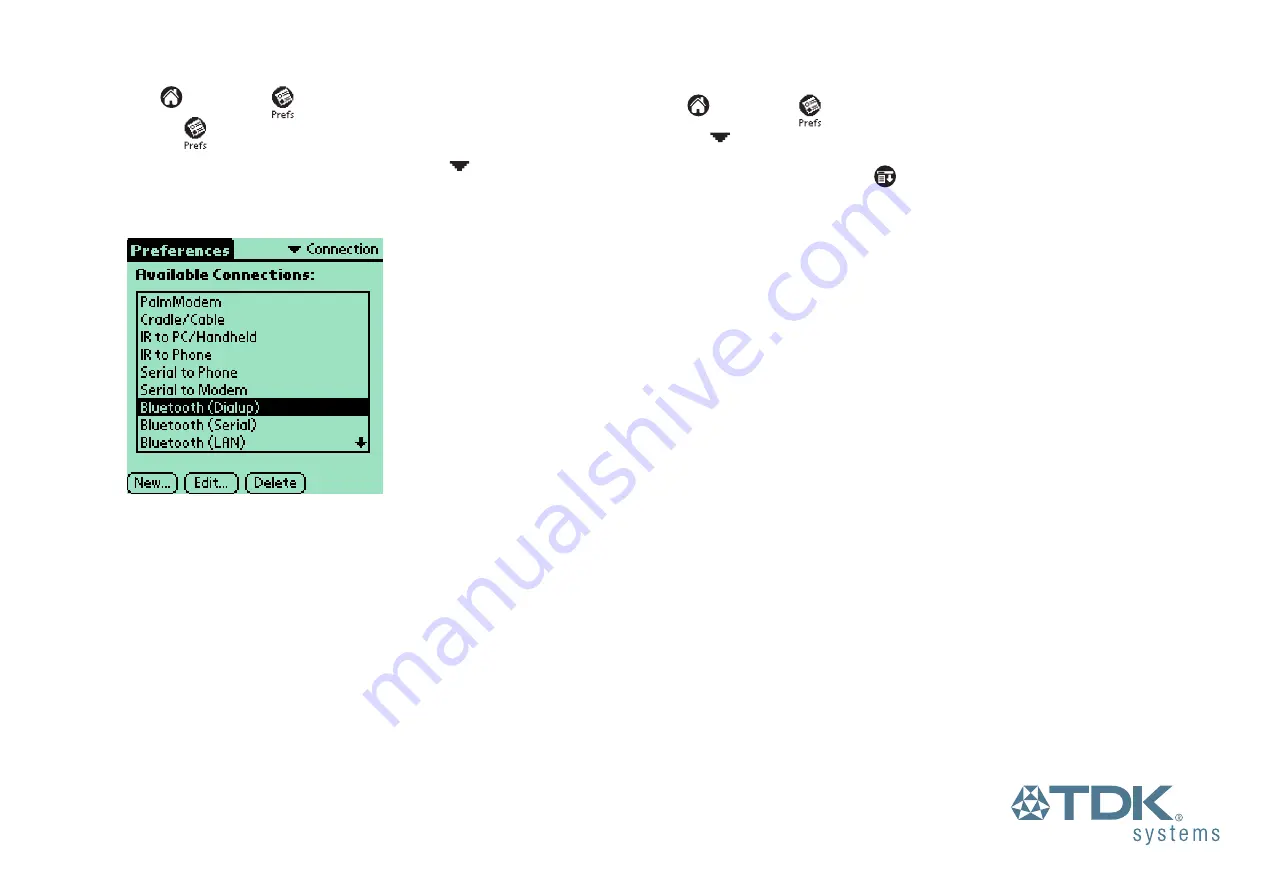
4 Select Bluetooth (Dialup).

5 Tap Edit and check that the connection is BT(DUN) to modem.

6  Tap details and set Speed to 115,200bps and flow control to Automatic.

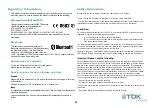
You now need to set up a Network Dial-Up Connection.

1. Tap 

 to locate the 

 icon.

2. Tap the 

 in the top right corner and select 

Network 

from the drop down list.

3. Create  a new service by tapping 

 and tapping New.

4. Enter a name for the Service, e.g. Orange GPRS.

5. Enter the  User Name assigned by your network operator. If there is no password,
enter dummy.

3. Enter a password supplied by your network operator. If there is no password, enter
dummy.

4. Select Bluetooth (Dialup) as the Connection

5. Enter the GPRS activation number supplied by your network operator.

Note: This is not a real number, but a code used to instruct the handset to start a
GPRS session. Most networks and handsets use the string *99#

6. Tap Details and ensure that Connection type is PPP, Query DNS is selected and
IP address is set to Automatic.

Start your application. The Service Connection Progress Box will display the following
messages:

Initializing Dialling “Orange GPRS” Signing On Established

During the end of the Dialling phase the handset may display a connection logo.
Otherwise the handset may not display any details about the connection.

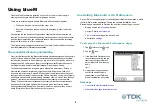
Summary of Contents for BlueM

Page 1: ...Bluetooth Enabler for Palm m500 and m505 ...

Page 2: ...vered by other devices 9 Pairing two Palm blueM devices 9 Viewing device properties 9 Removing Bluetooth devices from the list 9 Network Internet settings 10 HotSync over Bluetooth BlueSync 11 Bluetooth Profiles 12 The blueM button 13 The blue indicator 13 Menu Items 14 Settings 14 Troubleshooting and Information Pairing and Guides 15 Troubleshooting and Technical Information 23 Regulatory Informa...

Page 3: ... make a connection with any other Bluetooth device to share information and resources The TDK blueM is a sleek device that connects to the back of your Palm m125 m500 m505 or IBM WorkPad c500 series and provides a range of Bluetooth capabilities blueM uses small amounts of power from your Palm battery and adds only 29g to the overall weight Once the supplied software is loaded into your Palm you a...

Page 4: ...handheld before attaching the blueM 1 With the Palm switched off line up the black connector on the blueM with the socket at the base of your Palm 2 Slide the blueM onto your Palm until the connector fully mates with the socket and you feel it clipping into place Nextsteps Install the Software UsePalmPreferences ...

Page 5: ...4 Removing the blueM 1 With the Palm switched off gently lift the blueM away roughly half a centimetre from the back of the Palm 2 Slide the blueM towards the base of the Palm until it fully disengages ...

Page 6: ...ck Browse locate the CD ROM drive and choose the file setup exe 3 Follow the on screen instructions given in order to transfer the required applications from the CD ROM through the PC and onto the Palm 4 Once the application transfer is complete you can remove your Palm from the cradle and if not already done attach the blueM device Nextsteps UsePalmPreferences Connect with other Bluetooth devices...

Page 7: ...e to talk to among all the others So person A calls out if anyone is there discover Person B does not want to be discovered so they don t reply non discoverable However person C does want to be known discoverable and shouts out their name possibly along with many others Person A then chooses person C from a number of responses and asks them directly for more details Person C then asks for a secret...

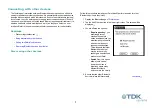
Page 8: ...vices Pairing two Palm blueM devices Removing Bluetooth devices from the list Discovering other devices continued Follow this procedure to make your Palm blueM perform a search for other Bluetooth devices in the vicinity 1 Display the Bluetooth page of Preferences 2 Tap the Add Device button in the lower right corner This screen will be displayed 3 You are offered two options Require passkey you a...

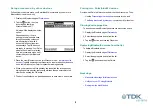
Page 9: ...could either check that this is the address of the required device or tap Cancel and then Add Device to start the search again 5 If the Found devices list con tains more than one Bluetooth device tap the required device name to select it and tap OK If there is only one device listed tap OK directly 6 You will be requested to enter a passkey at this point unless you deselected the Require passkey o...

Page 10: ...ching passkey 4 When you are requested for a passkey tap the dotted line in the passkey dialog and enter a passkey that exactly matches the one entered into the other device and tap the OK button 5 The devices should now be paired and added to each other s device lists Pairing two Palm blueM devices Decide which Palm will discover and which will be discovered Then Use the Discovering other devices...

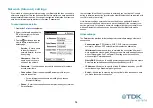
Page 11: ... can tap the Connect button to initiate a connection providing the other Bluetooth device is paired with your Palm and in the vicinity Note Network settings entered here are not tied to one particular Bluetooth device and could be used with various devices that support the necessary con nection protocols For example a network configuration that you create for use with one Bluetooth mobile phone ca...

Page 12: ... Bluetooth Neighborhood double click Local Device 2 Right click Bluetooth Serial Port and select Properties Make a note of the COM Port number for example COM5 3 Locate the HotSync Manager icon on the taskbar of your Windows desktop usually in the lower right hand corner of the screen 4 Right click on the icon and choose Setup 5 Select Local and change the Serial Port setting to match the Bluetoot...

Page 13: ...s and pairs with another Bluetooth device you will be presented with a list of profiles supported by that device The most likely choices that will be offered are as follows Serial One of the most basic yet most used profiles this mode emu lates a simple RS232 serial cable link between two devices This profile forms the basis of several other profiles Dial Up Network DUN Recreates the conditions un...

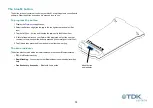
Page 14: ...en tap the next to the Modem item 4 A list of all applications on your Palm will be displayed select the one that you want to run whenever the button is pressed it is normally set to HotSync 5 Tap OK and then press the bluem button to test your new setting The blue indicator The button also contains a blue indicator that shows the current Bluetooth status Off No Bluetooth activity Rapid flashing C...

Page 15: ...the Settings dialog About Displays version information for the blueM device and also its fixed Bluetooth Device Address Incoming Discoverable mode Sets the blueM into discoverable mode so that it can be located by searching Bluetooth devices in the vicinity Settings The bluem Settings menu offers two options To access the settings 1 Select Bluetooth within Preferences 2 Tap the button and tap the ...

Page 16: ...arch 3 Select your Nokia phone from the list of devices found and tap OK 4 During the connection process you will be asked to type the preset pass key indicated on a label supplied with the Connectivity Battery Enter this passkey when requested by your Palm blueM 5 The next step is to select a Service On your Palm blueM select Dial up networking for Internet connections and tap OK Your Nokia phone...

Page 17: ...over options in the Bluetooth menu are greyed out and unselectable the Bluetooth option may be disabled Select 4 for Operation Mode and set the mode to On or Automatic Another method for discovering and pairing your Ericsson phone 1 From the standby screen press or to enter the menu 2 Press 5 to enter the Extras menu 3 Press 4 to select Bluetooth 4 Press 2 to select Paired Devices 5 Select Add Dev...

Page 18: ...nd Discover options in the Bluetooth menu are greyed out and unselectable the Bluetooth option may be disabled Select 4 for Operation Mode and set the mode to On or Automatic Another method for discovering and pairing your Ericsson phone 1 From the standby screen press or to enter the menu 2 Press 5 to enter the Extras menu 3 Press 5 to select Bluetooth 4 Press 2 to select Paired Devices 5 Select ...

Page 19: ...scribe to this service To set up your Palm to make HSCSD connections 1 Tap to locate the icon 2 Tap the icon 3 If the Connection is not already showing tap the in the top right corner and select Connection from the drop down list 4 Highlight Bluetooth Dialup and click on Edit Nokia 6210 Connection Initialisation String 9 600bps at chsn 1 0 0 0 14 400bps at chsn 2 0 0 0 19 200bps at chsn 3 0 0 0 28...

Page 20: ...comm 3 Select Data accounts then Add account GPRS data and give it a name You then need to enter the APN which is the Access Point Name supplied by the network This is case sensitive on most network 4 Do not enter a User id or Password this will be done on the Palm 5 Save the settings 6 Select Data accounts again select the accout you have just created and select Edit 7 Do not enter an IP address ...

Page 21: ...d by your network operator If there is no password enter dummy 3 Enter a password supplied by your network operator If there is no password enter dummy 4 Select Bluetooth Dialup as the Connection 5 Enter the GPRS activation number supplied by your network operator Note This is not a real number but a code used to instruct the handset to start a GPRS session Most networks and handsets use the strin...

Page 22: ...up your Palm to make V 110 connections 5 Click on Details 6 Enter the Init String initialisation string relevent to the mobile phone you have Nokia 6210 Connection Initialisation String 9 600bps at cbst 71 0 1 Ericsson R520m T39m Connection Initialisation String 9 600bps at cbst 71 0 1 1 Tap to locate the icon 2 Tap the icon 3 If the Connection is not already showing tap the in the top right corne...

Page 23: ...s at cbst 81 0 1 chsn 3 0 0 0 28 800bps at cbst 81 0 1 chsn 4 0 0 0 43 200bps at cbst 81 0 1 chsn 6 0 0 0 Ericsson R520m T39m Connection Initialisation String 9 600bps at cbst 71 0 1 chsn 1 1 0 4 14 400bps at cbst 75 0 1 chsn 2 1 0 12 19 200bps at cbst 78 0 1 chsn 3 2 0 12 28 800bps at cbst 79 0 1 chsn 4 2 0 12 6 Enter the Init String initialisation string relevent to the mobile phone you have 1 T...

Page 24: ...e installed Bluetooth adaptor Technical Support If after having tried the aforementioned guidelines you are still experiencing problems please contact your place of purchase or local distributor Alternatively for further guidance and up to date product information try Our website at www tdksys com or our helpdesk at support tdksys com TroubleshootingandInformation Technical Information Power consu...

Page 25: ...not been evaluated In addition This device complies with Part 15 of the FCC rules and with RSS 210 of Industry Canada Operation is subject to the following two conditions 1 This device may not cause harmful interference 2 This device must accept any interference received including interference that may cause undesired operation The radiated output power of the TDK blueM is far below the FCC Radio ...

Page 26: ... The relationship is established when the user enters a passkey with the explicit purpose of creating a bond between two devices This procedure is different from authenticating using a passkey in which the user is requested to enter a passkey during the establishment of a link Inquiry Discovery Process by which a Bluetooth unit transmits inquiry messages in order to discover the other Bluetooth un...

Page 27: ...ised repair performed by anyone other than a TDK designated repair facility Any non warranty repairs or maintenance shall be at TDK s standard rates in effect at the time This warranty is in lieu of all other warranties whether expressed implied or statutory including but not limited to implied warranties or merchantability and fitness for a particular purpose In no event shall TDK be liable wheth...

Reviews: