background image

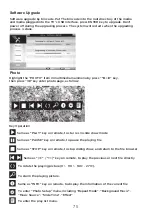
Same as "PLAY" key on remote, to start playing file, or resume the paused file.

Same as "PAUSE" key on remote, to pause the playing file

Same as "STOP" key on remote, to stop the playing file, and return to the file 
browser interface.

Same as "<<" / ">>" key on remote, to play fast backward or forward. 
The speed can switch to twice, four times, eight times and sixteen times, 
and displayed with “X2

X4

X8

X16” on screen

Same as "|<<" / ">>|" key on remote, to play the previous or next file directly.

To enter slow mode. The speed can switch to 1/2, 1/4, 1/8, 1/16, and displayed 
with “X1/2, X1/4, X1/8, X1/16” on screen.

To enter step mode

To set AB repeat, the first press sets A point, and the second press sets B point, 
and then play between A and B repeatedly.

To enter the play list menu.

Same as "INFO" key on remote, to display the information of the current file.

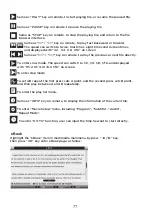
To enter “Movie Setup” menu, including “Program”, “Subtitle”, “Audio”, 
”Repeat Mode”.

To enter “GO TO” function, user can input the time he want to start directly.

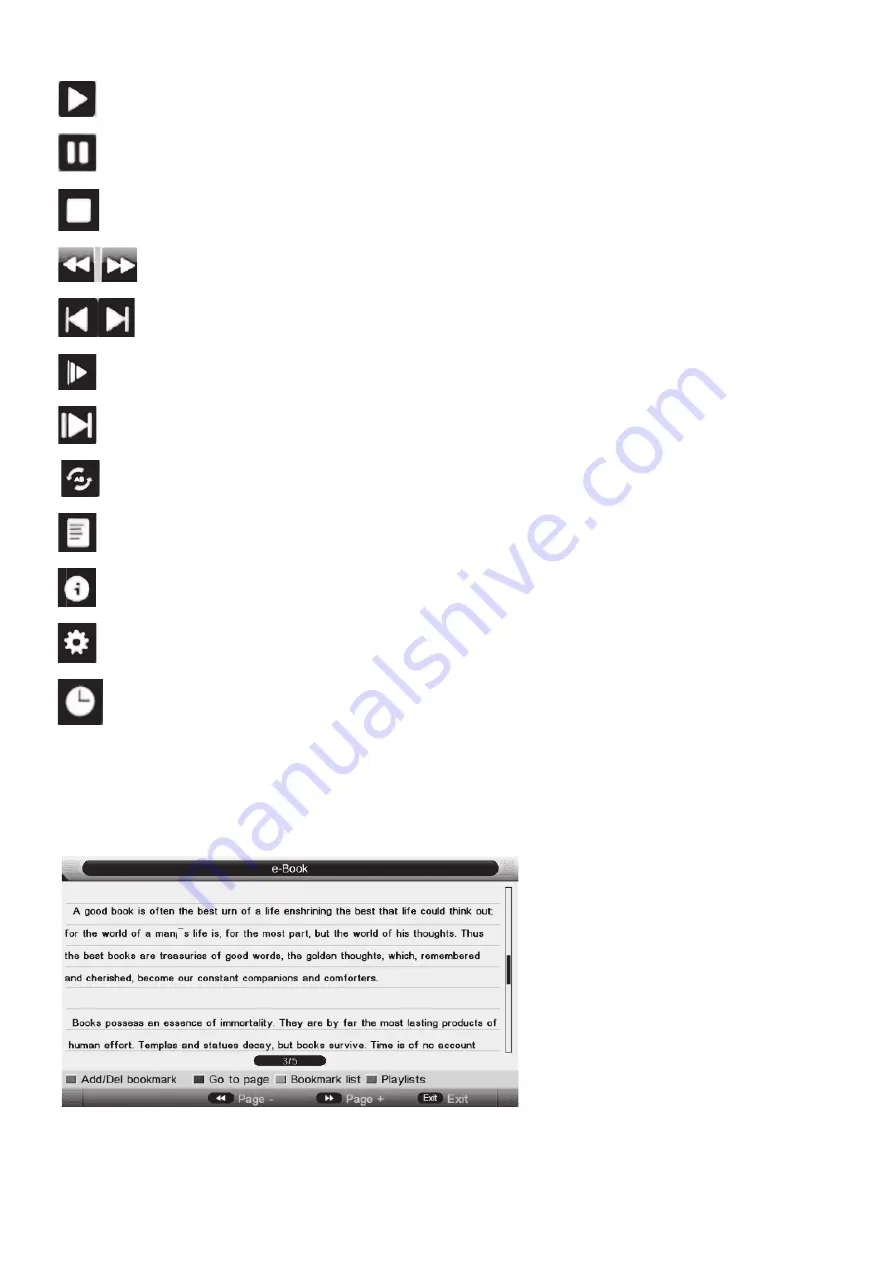
Highlight the “eBook” item in multimedia mainmenu by press “ 

Ż

 / 

Ź

” key, 

then press “OK” key enter eBook page, as follow:

eBook

Summary of Contents for K40DLM7F

Page 1: ...ente este manual antes del uso y cons rvelo como referencia en el futuro MODELO K40DLM7F ES MANUAL DE USUARIO 1 EN USER MANUAL 41 FR MANUEL UTILISATEUR 81 DE BENUTZERHANDBUCH 121 PT MANUAL DO USU RIO...

Page 2: ...G TOREDUCETHERISKOFFIRE ELECTRICSHOCK OR SERIOUSPERSONALINJURY IMPORTANT INSTRUCTIONS d CAUTION TO REDUCE THE RISK K dZ K K EKd Z DKs Ks Z KZ NO USER SERVICEABLE PARTS E Z Z Zs E dK Yh Zs W Z KEE d d...

Page 3: ...t CAUTION TOREDUCETHERISKORPERSONALINJURYOR PRODUCT PROPERTYDAMAGE d ds BATTERYHANDLINGANDUSAGE hd KE d d d K E...

Page 4: ...periods of time IMPORTANT INSTRUCTIONS 41 BATTERY HANDLING AND USAGE 42 FEATURES 45 Getting Started 47 All the pictures in this manual are just for your reference appearance and display should subject...

Page 5: ...B CONNECTION 55 INSERT A CI CARD 55 EARPHONE CONNECTION 55 FIRST TIME INSTALLATION 56 PICTURE MENU 58 PICTURE MODE 58 ASPECT RATIO 59 DIGITAL MANUAL SEARCH 65 CHANNEL 61 AUTO SEARCH TO SEARCH 65 FEATU...

Page 6: ...ort TV Guide Function Support TELETEXT Europe Function Support USB Multimedia Playback Support Multi languages On Screen Display Support Full Function Remote Control Support HDMI YPBPR AV VGA PC AUDIO...

Page 7: ...hreaded screws not supplied Do not use screws longer than 10 mm damage will occur to the internal components Caution Your new TV is heavy please consult with a professional wall mount installer to per...

Page 8: ...ENTRADA Audio Video input source selection 3 MEN Open settings menu 4 VOL Decrease volume 5 VOL Increase volume 6 P Previous channel 7 P Next channel 8 IR RECEIVER Receives infrared signals from the...

Page 9: ...Pr Connect to the YPbPr video output terminal of the DVD ANTENA Antenna connection 8 7 HDMI1 2 3 CEC HDMI1 ARC 6 S SONIDO DIGITAL PC AUDIO Connect it to the audio output terminal of the PC 9 VGA PC vi...

Page 10: ...cable cable TV company VHF UHF antenna cable receiver satellite box VGA cable Audio cable Connecting external devices to your LED TV RF Coaxial cable HDMI cable USB1 USB2 5V 0 5A Headphone S SONIDO D...

Page 11: ...Switch the audio channel when DVD or multimedia playing Play Pause TS In DTV mode press TS button to start the delay Stop playback SUB Select subtitle of media video file needs the support of disk or...

Page 12: ...mote to turn on the TV in green for the LED light CAUTION Always disconnect the TV from the power outlet when the TV will not be used for a long period of time The POWER button on the front panel is o...

Page 13: ...USB1 Use HDMI cable to connect the unit w other devices to receive high definitio multimedia signal Use VGA cable and Audio cable to connect the unit with TV or PC and use this product as a monitor PC...

Page 14: ...VIDEO CONNECTION Back of DVD VCR For basic connection use the composite Audio L R white red and CVBS yellow cable to connect the unit with other devices AV cable Mini AV cable HDMI3 S SONIDO DIGITAL...

Page 15: ...IAL CONNECTION Use coaxial cable not included to connect the unit with amplifier or other audio decoding devices for coaxial audio signal output AURICULAR AURICULAR SCART PC AUDIO VGA ANTENA S SONIDO...

Page 16: ...ccess Module to watch special digital channels in your area AURICULAR SCART PC AUDIO VGA ANTENA S SONIDO DIGITAL HDMI1 HDMI2 HDMI3 ARC USB2 USB1 YPbPr AV CI 5V 0 5A USB1 USB2 Auriculares USB Memory De...

Page 17: ...Connect to power source and turn on this TV the first time below installation menu page will display on the screen Setup 1 Press navigation button to select desired picture Mode Press OK button to cal...

Page 18: ...ype Press OK button to confirm selection and turn to next page Setup 6 Press navigation button to select desired searching type Press OK button to confirm selection and then this unit will search prog...

Page 19: ...menu is shown as follows Picture Mode Selecting Picture Mode Standard Mild Dynamic or User is the same as the function when pressing button IMAGEN on the remote Picture Menu Items Value Default Pictu...

Page 20: ...9 Zoom1 Zoom2 or Panorama is the same as the function when pressing button TAMA O on the remote Noise Reduction Noise reduction of the picture To reduce noise and improve the appearance of the picture...

Page 21: ...nce 50 50 0 Surround Off On Off AVL Off On Off SPDIF Off PCM Auto Off Audio Description ENTER The range and the default values of every sub items in Sound menu are shown in the following table Sound M...

Page 22: ...SPDIF Switch for SPDIF function Audio Description This is to facilitate for the disabilities whose eyes are not good TV Channel Press MENU to display the main menu and press to select the Channel Menu...

Page 23: ...mode All Digital Analogue Digital Manual Search To search digital channel by entering parameters manually only for Air Cable Analogue Manual Search To search analogue channel by entering parameters m...

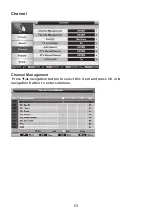
Page 24: ...Channel Channel Management Press navigation button to select this it em and press OK or navigation button to enter submenu...

Page 25: ...unlock a program c Press YELLOW button on remote control to add remove skip mark d Press BLUE button on remote control to enter MOVE mode Then use navigation button to select preferred position and pr...

Page 26: ...ng Digital Manual Search Select Digital Manual Search item to enter air channel manual search in DTV source and the user operation interface as following Analog Manual Search Select Analogue Manual Se...

Page 27: ...in mainmenu Press MENU to display the main menu and press to select the Feature Menu Lock The Lock sub page includes three parts Lock Channel Parental Lock Change Pin Code as shown in the following pi...

Page 28: ...ation button to enter submenu Press MENU button to return to previous page Warm Tip We strongly advise that you use Hotel Mode in hotels and you should just ignore it if take thi home use only Hotel L...

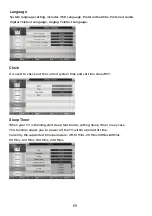
Page 29: ...ock It is used to check out the current system time and set time zone DST Sleep Timer When your TV is Running start sleep function by setting Sleep Timer in any case This function allows you to power...

Page 30: ...e options Off 10 Mins 20 Mins 30 Mins 60 Mins 90 Mins 120 Mins 180 Mins 240 ins Auto Power Off This item is used to set the Auto Power Off time Available options Off 1 Hour 2 Hours 4 Hours Hearing Imp...

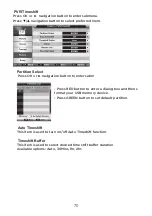
Page 31: ...igation button to enter subm Press RED button to enter a dialog box and then s format your USB memory device Press GREEN button to set default partition Auto Timeshift This item is used to turn on off...

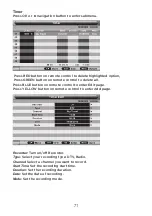
Page 32: ...page Press YELLOW button on remote control to enter Add page Timer Press OK or navigation button to enter submenu Mode Set the recording mode Recorder Turn on off Recorder Type Select your recording...

Page 33: ...he range and the default values of every sub items in Setup menu are shown in the following table The Setup Menu is shown as follows Setup Menu This chapter will describe the function of Setup in main...

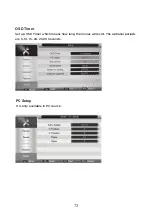
Page 34: ...OSD Timer Set up OSD Timer which means how long the menus will exist The optional periods are 5 10 15 20 25 30 Seconds PC Setup It is only available in PC source...

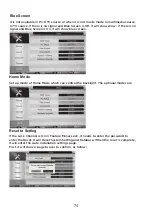
Page 35: ...ll show blue screen Home Mode Set up mode of Home Mode which can control the backlight The optional modes are Home Dynamic Standard Mild Reset to Setting If the Lock Channel is On in Feature Menu Lock...

Page 36: ...nter photo page as follow Key Operation Same as PLAY key on remote to star res in slide show mode Same as PAUSE key on remote to pause the playing file Same as STOP key on remote to stop sliding show...

Page 37: ...Same as key on remote to play fast backward or forward The speed can switch to twice four times eight times and sixteen times and displayed with X2 X4 X8 X16 on screen Same as key on remote to play t...

Page 38: ...s or next file directly To enter slow mode The speed can switch to 1 2 1 4 1 8 1 16 and displayed with X1 2 X1 4 X1 8 X1 16 on screen To enter step mode To set AB repeat the first press sets A point a...

Page 39: ...PEG 2 mkv mov MPEG 1 2 4 H 264 dat MPEG 1 MP1 vob MPEG 2 MP1 MP2 MP3 PCM rm rmvb RV30 RV40 AAC COOK Resolution 800x600 RV30 1280x720 Rv40 MUSIC z H K 8 4 K 2 3 e t a R e l p m a S 3 P M 3 p m Bit Rate...

Page 40: ...75W 6 1Kg 8 6 zW W PC AUDIO HDMI RF D Weight W t t W W SPECIFICATIONS Specifications are subject to change without notice COAXIAL K40DLM7F 40...

Page 41: ...Test ambient temperature 27 5 Test voltage in V and FREQUENCY IN HZ 230 0V 50HZ of the electricity supply system 0 71 Input terminal for the audio and video test signals HDMI mode The dynamic brosdcas...

Reviews: