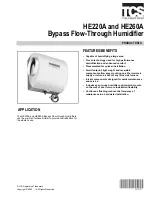
HE220A AND HE260A BYPASS FLOW-THROUGH HUMIDIFIER
68-0272
6
warm dry air from the furnace passes over the humidifier pad
and collects moisture and them circulates it through the
house.
Humidified air feels warmer and more comfortable so the
homeowner may be able to lower the thermostat heating
setpoint and save money on heating fuel bills. The end result
is that the humidifier gives the homeowner a comfortable
environment that is also energy efficient.
MAINTENANCE
A regular maintenance program prolongs the life of the
humidifier and provides a more comfortable environment.
Either hard or soft water can be used in the humidifier.
Frequency of cleaning depends on the condition of the water.
CAUTION
Voltage Hazard.
Can cause electrical shock and equipment
damage.
Disconnect power supply before installing or servicing.
IMPORTANT
Never oil any part of the humidifier.
Every 1 to 3 Months (Depending on Water
Quality)
Use the following procedure to clean the humidifier:
1.
Disconnect the power and turn off the humidifier water
supply.
2.
Remove the humidifier cover. See Fig. 5.
3.
Remove the humidifier pad assembly from the humidi-
fier by grasping the tray and pulling it toward you.
4.
Pull one side of the humidifier pad assembly frame
toward you and remove the tray from the frame.
5.
Gently pinch the water nozzle catches inward until the
water nozzle can be lifted off the tray.
6.
Slide the humidifier pad out of the frame.
7.
Carefully scrape any mineral deposits from the tray and
frame. Be sure the frame drain hole has nothing block-
ing it.
8.
Check the humidifier pad and if excessive mineral
deposits are present, replace with a new pad.
9.
Disconnect the tube from the drain fitting on the bottom
of the humidifier housing.
10.
Clean the drain fitting, if necessary.
11.
Bend the drain tube to loosen any mineral deposits.
12.
Flush the drain tube with pressurized water (a running
tap) to clean the tube.
13.
Reattach the drain tube to the drain fitting.
14.
Slide the humidifier pad back into the frame.
IMPORTANT
Be sure the marked side of the humidifier pad is fac-
ing up for proper performance.
15.
Snap the water nozzle back on the tray.
16.
Reattach the tray to the frame.
17.
Place humidifier pad assembly in humidifier housing
and press until assembly is completely seated. Be care-
ful not to pinch or kink water feed tube.
18.
Replace humidifier cover.
19.
Verify humidifier operation by following steps in Check-
out Procedure section.
.
Fig. 5. Location of humidifier parts.
End of Humidification Season
At end of heating season, follow steps 1 through 18 from the
Every 1 To 3 Months section to clean humidifier and shut if off.
IMPORTANT
Be sure the humidifier power is off.
Beginning of Humidification Season
Refer to the Checkout Procedure section to complete the
humidifier startup.
Vacation
When leaving on vacation, turn off humidifier water supply and
humidity control. When returning from vacation, turn on
humidifier water supply and reset humidity control to restart
humidifier.
CHECKOUT PROCEDURE
After winter startup or servicing, use the following procedure
to check the humidifier operation:
1.
Turn on the humidifier power and water supply.
2.
Turn humidistat to the highest setting and set the
thermostat to 10°F (6°C) above room temperature.
3.
Observe that water is flowing out of drain hose.
M20821
WATER
FEED NOZZLE
FRAME
HUMIDIFIER
HOUSING
WATER
FEED TUBE
HUMIDIFIER
PAD ASSEMBLY
COVER
SIDEWALL
BY-PASS SIDEWALL


