Test and Alignment Specification for MS6586 Series
Page 9 of 22
See Appendix (8
) “Network Connection Setup”
See Appendix (9
) “How to upgrade Flash SW using Network”(not support now)
Note
③
:
It’s not necessary to check video and audio from DLNA server.
2. Product Assembly (PA): Test & Alignment
2.1. Factory Menu & Main Menu\
Follow the below steps to pop-up the
Factory menu in case of “
Factory hotkey
” is disabled:
-
Press RCU “
MENU
” key to display
Setting
menu
- Select
Picture
- Scroll down to
“
Contrast
” item
- Press the subsequence RCU keys
“9”, “7”, “3” and “5”
- P
ress RCU “◄/
►
” key to change the “1—Factory hotkey” value from “Off” to “On”
In case of “
Factory hotkey
” is enabled, just press RCU “
Return
” key
(
)
to pop-up again the Factory menu.
The status of
“
Factory Key
” can be changed in “
Factory Menu
->
Factory hotkey
”
P
ress RCU “
OK/
►
” key to enter the submenu.
Press
RCU “
Menu
” key to go back to the root menu.
P
ress RCU “◄/
►
” key to change the values.
P
ress RCU “
OK
” key run the function.
P
ress RCU “
Exit
” key exit the Factory menu.
▪
Factory Captions Description
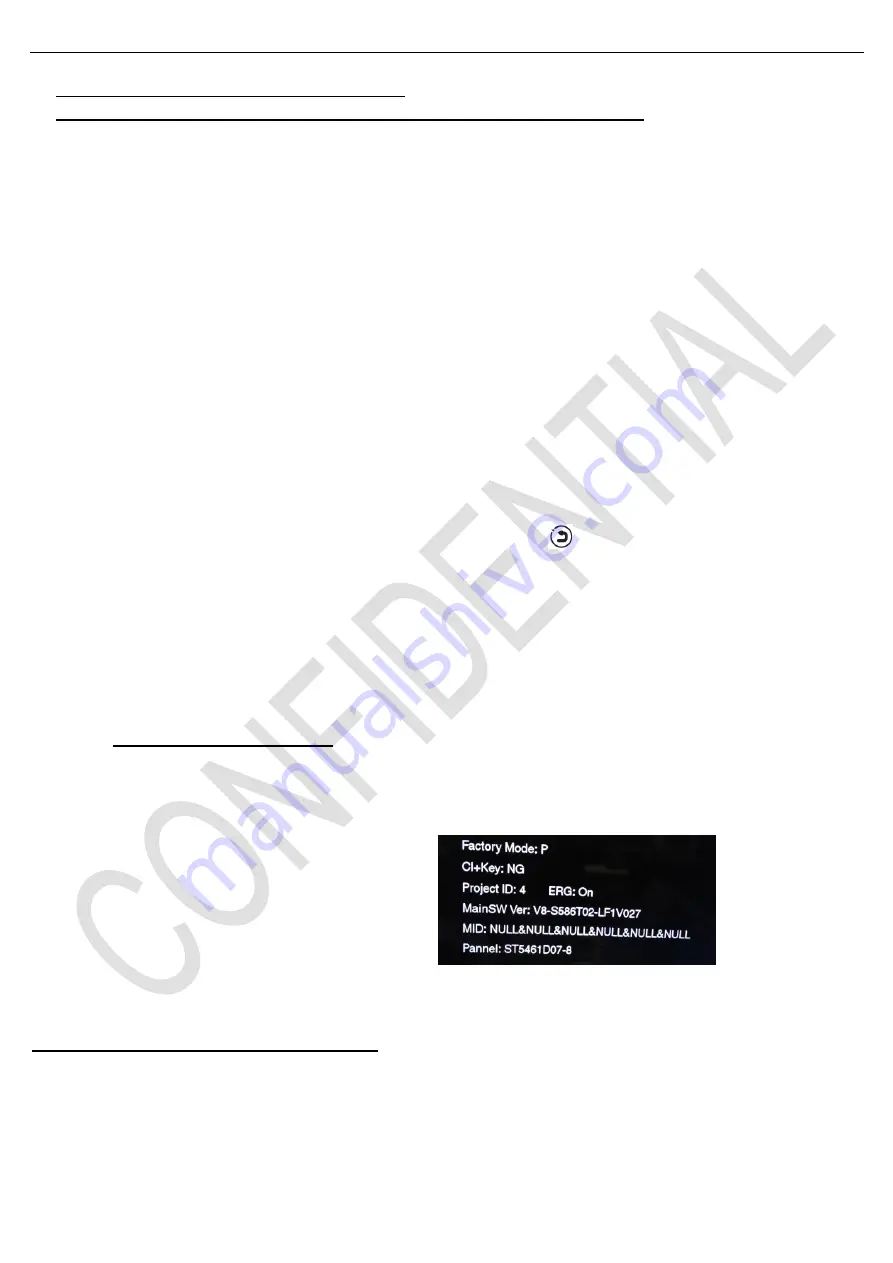
While “Factory hotkey” is enabled, there’s some toggled display information (~2s) relative to SW, Project ID, CI+,
Network ID to facilitate 100% quick screening without accessing to whatever else menu:
Factory Mode:P
[P (Production/Factory mode flag) /
S (Factory UART Parser mode flag) /
W (Warm-Up mode flag)]
CI+ Key
Main SW Ver
Project ID (ID) ERG
MID(Internet infor for factory)
See Appendix
(10)
“
Factory Menu Description
”
2.2. Warm-up Test
Following TCL standard and practices, it’s required minimum 15min of Warm-Up that can be considered as Burn-In.
Additional Aging for White Balance alignment is no more necessary due to consistent Picture Performance with Cloning
usage.


