background image


10

Chapter 3 

Basic TV Operations

Adjusting Volume

Volume control:

 press the 

/

 buttons on the remote 

control or the corresponding buttons on the TV set to 
increase or decrease the volume. 

Sound mute:

 press the 

 button to temporarily mute 

the sound. Press this button again or the 

 button to 

restore the sound. 

Installing Channels

This section describes how to search and store 
channels automatically. This may be done in either of 

the cases below:


-

you are prompted that there are no channels in TV 
mode;


-

you want to update your channels.

1. 

Press 


on the remote control and select 

(Settings)


> Channels & Inputs


>


Channels > 

Channel Scan

. Press 

OK/Right

 to enter.

2. 

The TV installs and arranges channels according 
to your country or region. Press 

Up/Down

 to select 

Country/Region

, and press 

OK

 to enter. Enter 

the password you have set in the 

(Settings)


System


>


Parental Controls 

menu. Press 

Up/

Down

 to select your country or region and press 

OK


to confirm.

3. 

Press 

Up/Down

 to select 

Scan


Automatically

 and 

press 

OK

 to enter.

4. 

Press 

Up/Down

 to select 

Channel Type

 and 

press 

Left

/Right

 to select 

Digital

Analog

 or 

Digital&Analog

.

5. 

After configuration is completed, press 

Down

 to 

select 

Search

 and press 

OK

 to start scanning 

channels.

6. 

The channel search may take a few minutes. After 
the automatic search, channels are arranged in a 
preset order. If you wish to hide or move channels, 
press 


on the remote control, select 

(Settings)


> Channels & Inputs > Channels


>


Channel 

Organizer

 and press 

OK

 to enter.

Note: 

If the channel search retrieved only the analogue 

channels it could be caused by poor broadcasting and 
therefore is not covered by manufacturer warranty. 
Manufacturers cannot be held responsible for lack of or 
poor broadcasting in some areas.

Accessing Channels

Using the Up/Down buttons:

 press the 

Up/Down


buttons on the remote control to scroll through the 
channels.

Using the OK button:

 press the 

OK

 button to display 

the freeview bar and press

 Left/Right 

and 

OK

 to enter.

Using the P+/P- buttons: 

press the 

P+/P-

 buttons on 

the remote control to scroll through the channels.

Using the 

 button: 

press 

 to display the virtual 

remote control keyboard, then you can use the numeric 
buttons or the 

List

 button to operate accordingly.
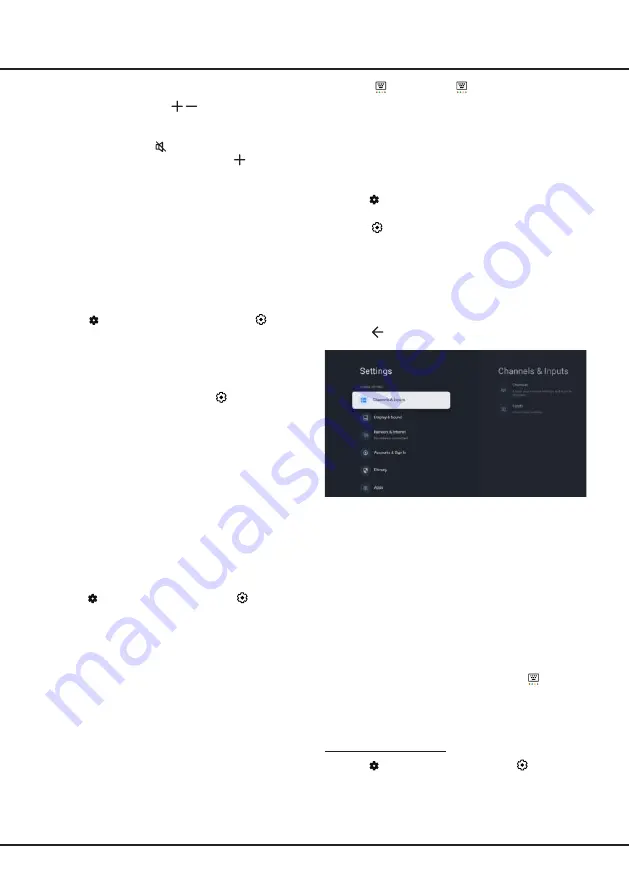
Using Settings Menu

Allows you to not only adjust settings, such as picture, 
Network & Internet, Accounts & Sign-In and Apps, etc., 
but also set preferences.

1. 

Press   on the remote control to display the 
dashboard menu

.

2. 

Select 

(Settings)

 and press 

OK

 to enter the 

settings menu.

3. 

Press 

Up/Down

 to select the desired item and press 

OK

 to enter the corresponding submenu.

4. 

In submenus, press 

Up/Down

 to select menu 

options, then press 

OK

 to enter the option list or the 

corresponding submenu, or press 

OK 

to toggle on or 

off, or press 

Left/Right 

to adjust the setting. 

5. 

Press 

 to return to the previous menu.

Note: 

Setting 

Clear LED Motion

 on will make fast 

moving images clearer by controlling the LED 
backlight, but the picture will be darker with 

more flickering than with 

Clear LED Motion 

set to off. (Not available for some models.)

Using Subtitles

You can enable subtitles for each TV channel. Subtitles 
are broadcast via Teletext or DVB-T digital broadcasts. 
With digital broadcasts, you have the additional option 
of selecting a preferred subtitle language.

Notes:

Subtitle

 can also be enabled by pressing 

 button on 

the remote control to display the virtual remote control 
keyboard and select 

Subtitle

 directly.

- Some options are available only when 

Subtitle

 is set 

to on.

Turning On/Off Subtitles

1. 

Press 


on the remote control, select


(Settings)


> Channels & Inputs > Channels > Subtitle

 and 

press 

OK/Right

 to enter.

2. 

Select the 

Subtitle 

option and press 

OK

 to toggle 

between on and off.

Summary of Contents for 55C845

Page 1: ...t a free TCL account and a reliable broadband internet connection are required Figures and illustrations in this User Manual are provided for reference only and may differ from actual product appearan...

Page 2: ...tronic Program Guide 11 Freeview 11 HbbTV 11 HbbTV Access 11 HbbTV Deactivation 11 Chapter 4 Using More of Your TV Accessing Google TV Homepage 12 Accessing TCL Channel 12 Watching Connected Devices 1...

Page 3: ...ce by yourself Refer all servicing to qualified personnel Do not touch the screen surface with fingers as this may scratch or mar the TV screen Do not impact the TV screen with hard pressure as this m...

Page 4: ...rs DVD players or games consoles The VIDEO IN socket provides composite video connection ANTENNA IN socket input This socket can be used to connect an outside aerial LAN RJ45 plug for connecting to ex...

Page 5: ...the usual ways to connect your TV to the wired or wireless network The connection method may be different depending on your actual network configuration If you have any questions about your home netw...

Page 6: ...Right OK To confirm an entry or selection To return to the previous menu or quit an app To access the Google TV homepage To access Electronic Program Guide only available for digital channels To selec...

Page 7: ...n using batteries Only use the battery types specified Make sure you use the correct polarity Do not mix new and used batteries Do not use rechargeable batteries Do not expose batteries to excessive h...

Page 8: ...ation about how to use the multi function menu please refer to the figure below Press to move the highlight to the next function selection Press and hold the button for more than 2 seconds to confirm...

Page 9: ...the network and more During each step either make a choice or skip the step If you skip a step you can perform the setup later from the Settings menu Notes It s recommended to select Set up Google TV...

Page 10: ...nnels Using the Up Down buttons press the Up Down buttons on the remote control to scroll through the channels Using the OK button press the OK button to display the freeview bar and press Left Right...

Page 11: ...vate it 3 Press to return to the previous menu Enabling Subtitle Languages on Digital TV Channels 1 Press on the remote control select Settings Channels Inputs Channels Subtitle Digital Subtitle Langu...

Page 12: ...functions depend on the devices connected and it is possible that some devices may not interoperate correctly when connected to this TV The Accessing Google TV Homepage Allows you to enjoy the enterta...

Page 13: ...tered trademarks owned by Bluetooth SIG Inc and any use of such marks by TTE Corporation is under license Other trademarks and trade names are those of their respective owners Blue Light Filter It red...

Page 14: ...y of the cases below a when TV is in HbbTV Netfilx or Media Player b if the video from phone DTV is scrambled c when the capacity of required video decoding exceeds 4K 60Hz When in full screen mode du...

Page 15: ...ty of hands free TV voice control depends on your region country language and your model For details please refer to your local dealer A quiet surrounding is required for better function when using it...

Page 16: ...or you need to press button on the remote control to display the virtual remote control keyboard first 5 In recording the PVR mini panel will also show on the screen to indicate the recording progres...

Page 17: ...not play files normally if the parameters of the file exceed the limitations of the system the file format is not supported the file is damaged or the file cannot be decoded Do not disconnect the USB...

Page 18: ...the language setting is correct Check if Google server is available and stable 1 Fail to link to the network Check if your TV is connected with the network Reboot your TV Consult your Internet service...

Page 19: ...n the fringe area of a television signal where the signal is weak the picture may be marred by dots When the signal is extremely weak it may be necessary to install a special antenna to improve the re...

Page 20: ...implied including but not limited to warranties of merchantability of satisfactory quality fitness for a particular purpose of accuracy of quiet enjoyment and non infringement of third party rights TC...

Page 21: ...TS Licensing Limited DTS DTS HD Master Audio DTS HD Virtual X and the DTS HD logo are registered trademarks or trademarks of DTS Inc in the United States and other countries 2021 DTS Inc ALL RIGHTS RE...

Reviews: