


8
PERFORM-VK User Manual
Editing HIT
HIT is controlled dynamically, which means you can make changes to each HIT
“state” whenever you choose. Taking the previous example as a starting point,
if you have Reverb on while HIT is off:
Then you turn Echo on:
Now, Echo and Reverb will be active when HIT is OFF. You can make similar
changes to the HIT ON state.
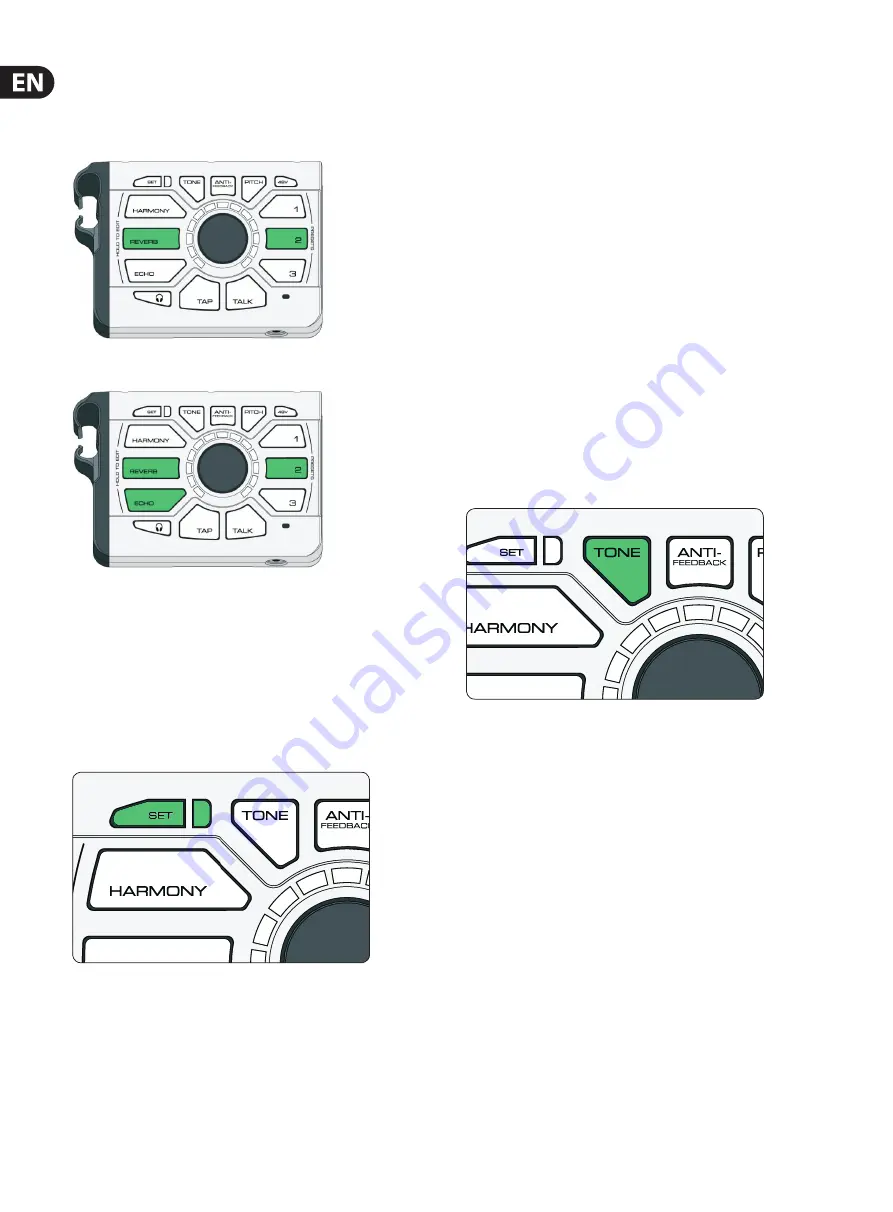
Set
The Set button performs 2 functions: LED brightness, and gain setting.
Pressing the Set button once will bring up a green LED ring, indicating the
brightness setting. The brightness can be adjusted, and this setting will be
recalled across power cycles.
Auto Gain
Holding the Set button until it turns red engages the automatic gain setting.
While holding the Set button depressed, sing as loud as you can. This sets the
gain to the proper level and ensures that you won't encounter clipping during
your performance. Releasing the Set button will bring up a red LED ring that
indicates the current gain setting.
At this point, you can let the gain setting window time out after a few seconds,
which will enable the "nudge" function. If you happen to sing louder during the
performance than you did while setting the gain, the nudge function will reduce
the gain slightly to avoid clipping.
However, if you do not want to have the "nudge" function active, you can set the
gain manually...
Manual Gain
Hold the Set button until it turns red, then release it. The LED ring will turn red
and you can now turn the knob to adjust the gain manually. Setting the gain this
way will remove the "nudge" function, so you won't have to worry about any
changes to this setting during your performance.
Note that pressing the Set button at all after setting the gain manually, even to
adjust the brightness, will cause the "nudge" function to become active again.
The gain setting is not saved across power cycles, so performing a gain setting
(either auto or manual) should be done each time you use your Perform VK.
Tone
Tone automatically adds EQ (equalization), Compression, De-Ess and Gate to your
overall vocal sound.
To activate Tone, press the button. White is OFF, Green is ON.
EQ helps to shape the tone of your voice to fit into a musical mix. We remove
some of the low “mud” frequencies and boost the highs for “sparkle” or “air”.
Every recording you hear has some manner of EQ on the lead vocal (and pretty
much everything else too).
Compression reduces the difference in volume between the loudest and quietest
notes. This gives you a more even sound that can blend into the music better.
It’s almost unheard of for vocals to go uncompressed in modern music, both
recorded and live.
De-Ess gets rid of harsh “S” sounds and makes them sound more pleasing to the
human ear. De-Ess goes hand in hand with Compression, since Compression can
make “S” sounds a bit more pronounced in the mix.
Gate “shuts off” an audio input when it falls below a certain volume.
This works great on things like drums where you want the drum hit to come
through, but then have the mic silent in between hits.
Summary of Contents for PERFORM-VK
Page 15: ...15 PERFORM VK User Manual ...
Page 16: ......


