


15
GO XLR User Manual
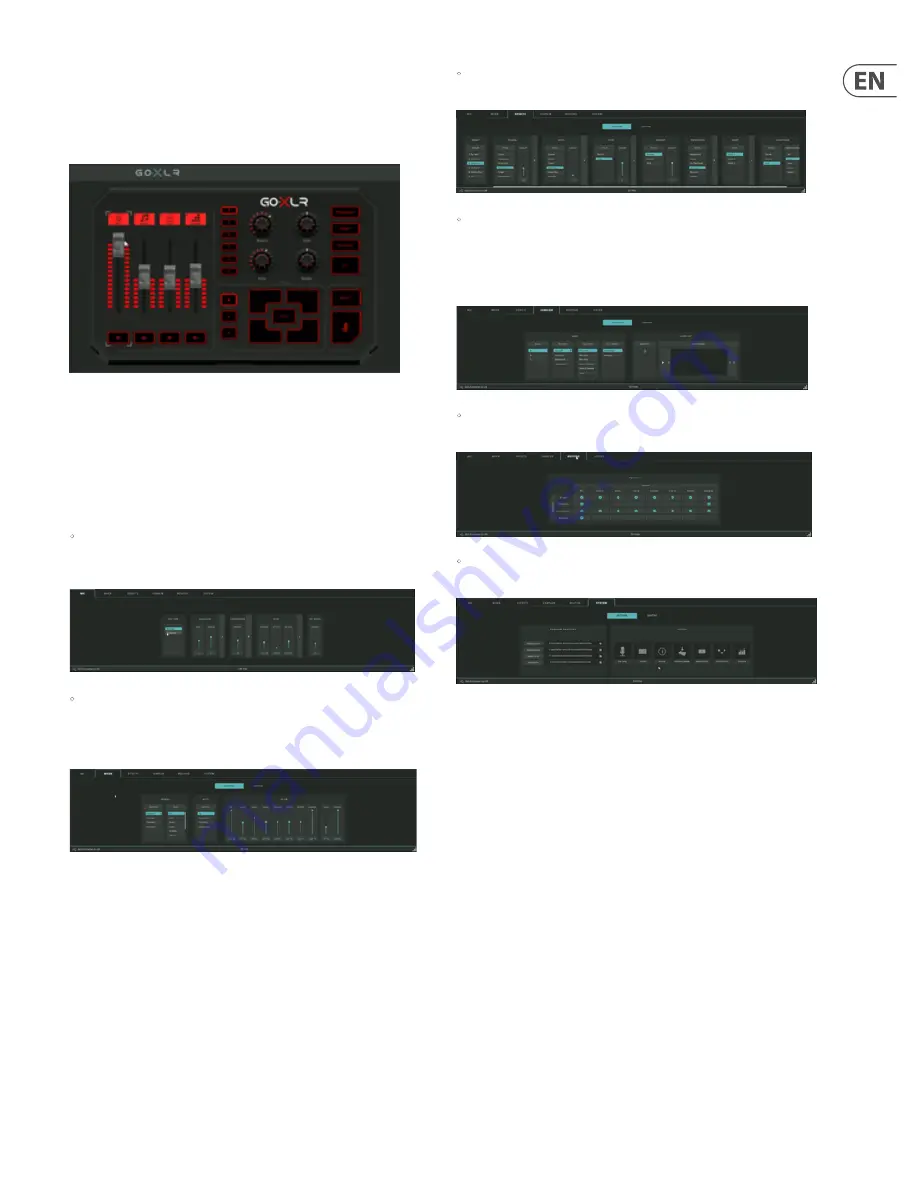
5.3 Live View
The Live View is the GO XLR app’s onscreen representation of the GO XLR panel.
This digital version of the mixer panel changes to reflect any control changes you
may make on the hardware, such as moving a slider, turning a knob or
pressing a button.
Live View in the GO XLR app
By clicking on individual sliders or other controls in Live View, you can go in and
change settings and processing for that control in the Control Tabs section.
5.4 Control Tabs
The Control Tabs live in the lower half of the GO XLR app screen and contain
these sections:
•
Mic
—Select settings to suit your mic, such Dynamic or Condenser (which
activates Phantom Power to run the mic), as well as EQ, compression, gating
and a de-esser.
•
Mixer
—View settings for the Mixer section, including fader assignments,
muting options and mix levels for all active devices, not just devices assigned
to the hardware faders. In the Lighting sub-section, you can also customize
the various LED colors for related controls on the hardware panel.
•
Effects
—Shows effects and settings assigned to the knobs and buttons in
the Effects section, as well as color customization for these controls.
•
Sampler
—Shows settings and sample assignments for each button in the
Sampler section, as well as controls for color customization. The Samples tab
in the upper left will automatically open when you open this section.
You can use this section to record, manipulate and assign samples to your
desired controls.
•
Routing
—Display a grid showing your inputs and outputs, so you can
control where your audio goes in detail.
•
System
—This is where you go to set up folders, set up mic gain,
watch tutorials, look for software updates, and so on.
Summary of Contents for GO XLR
Page 30: ......