


10
GO XLR User Manual
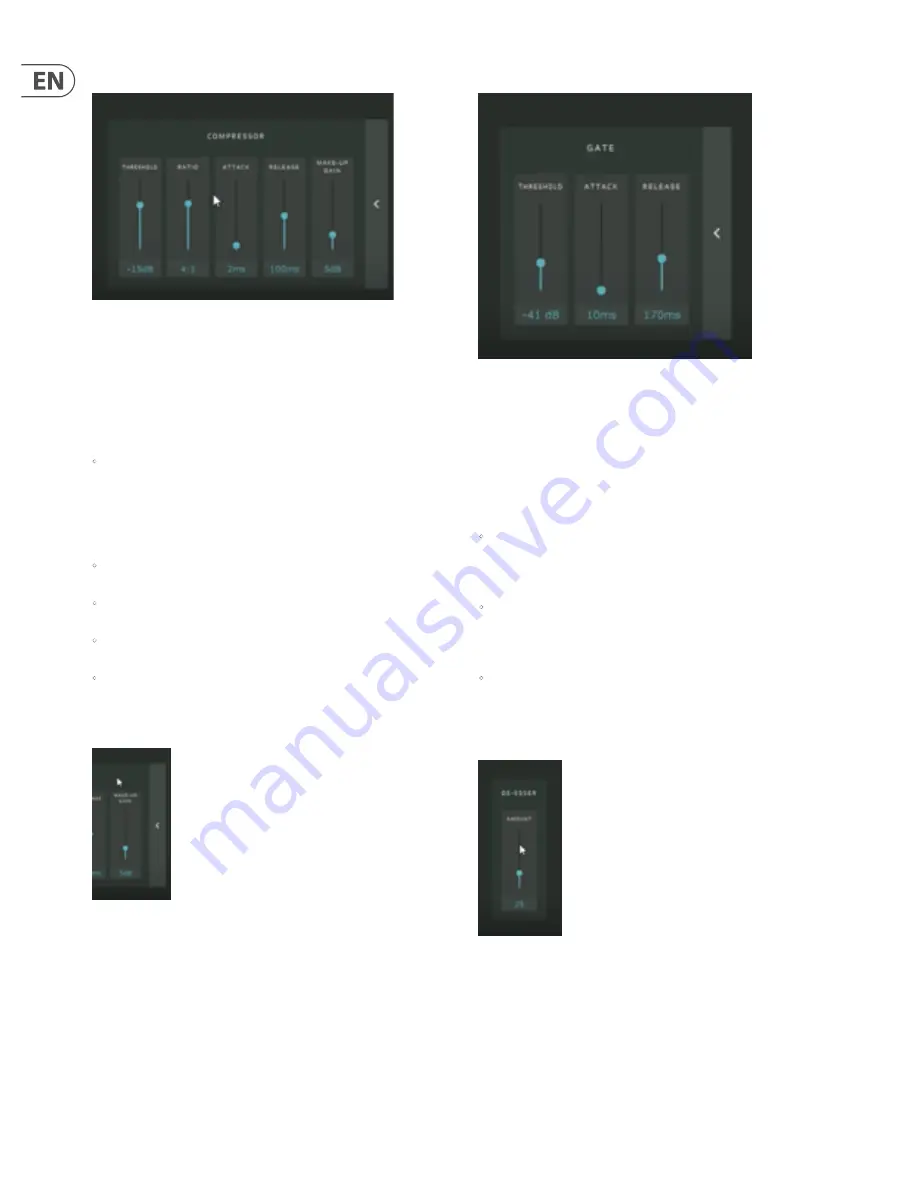
3.3.2 Compressor
Compressor with expanded controls
Compressors even out sounds by reducing the loud portions and increasing
the quiet parts, i.e., they “squish” or compress the sound into a more narrow
dynamic range. Compression is extremely important to voice professionals,
such as radio DJs and voiceover artists, so your livestream broadcast will sound
more professional.
The expanded Compressor controls include these functions:
•
Threshold
—This parameter controls the signal level at which the
compressor begins to work. If you want to manually control the Threshold,
speak into the mic while slowly lowering the Threshold slider from the top
0 dB setting, until you find an acceptable level. A high Threshold setting
will only affect the highest signal peaks, while a lower ratio will apply
compression to a greater proportion of the signal.
•
Ratio
—The Ratio controls the intensity of the compression effect. Higher
ratios will produce a more intense effect, while lower ratios will be gentler.
•
Attack
—The Attack parameter controls how quickly the compressor reacts
to signals that go over the Threshold setting.
•
Release
—This parameter determines how quickly the compressor lets go
of the signal.
•
Make-Up Gain
—This control is important because by reducing the loudest
parts of the signal, compression makes the overall signal seem more quiet,
even though you haven’t changed the volume. By increasing the gain on the
way out of the compressor, you can restore the original perceived volume.
Make-Up Gain control
NOTE:
Be careful about how much Make-Up Gain you apply. Too much Make-Up
Gain can distort your microphone signal.
3.3.3 Gate
Gate with expanded controls
A noise gate filters out background noise by switching the signal off when the
level drops below a pre-determined threshold, usually at a point just above
the ambient “noise floor” in the space where you are running the microphone.
Similarly, the noise gate opens back up again when the signal increases and
exceeds the set threshold.
The expanded Gate controls have the following advance parameters available
for adjustment:
•
Threshold
—The Threshold setting controls the audio level at which the
Gate is triggered to close or open. A good Threshold level will be just above
the level of ambient noise in the space around your microphone, but low
enough that your voice will easily trigger the Gate to open again.
•
Attack
—The Attack setting controls how quickly the Gate opens after
the sound coming into the mic exceeds the Threshold level. A good Attack
setting will open the Gate quickly enough that it does not cut off the first
sounds out of your mouth.
•
Release
—The Release parameter controls how quickly the Gate closes.
A fast release abruptly cuts off the sound, while a slower setting more
smoothly “fades” the closing of the gate.
3.3.4 De-Esser
De-Esser
The De-Esser in GO XLR does not have expanded functions, but we should take
a moment to describe how a de-esser works and why de-essing is a common
process in the audio world.
The De-Esser, true to its name, removes excessive “S” sounds or “sibilance” from
vocals. A vocal with too much sibilance will sound harsh and have a trebly “edge”
that can be unpleasant or distracting, so a de-esser is programmed to look for
those trebly “S” sounds and reduce their prominence in the sound.
However, if the de-essing filter is applied too heavily, your voice can have an
unnatural, lisping sort of sound, so you will need to find a setting that works for
you and your voice.
Summary of Contents for GO XLR
Page 30: ......