Page 7 of 1
5
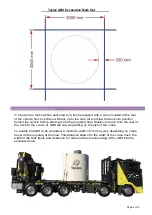
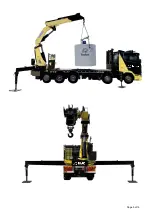
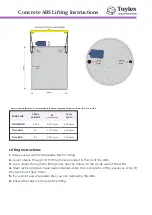
Except for person/s responsible for lifting and positioning of the tank in the excavated hole,
there must not be any person within 20m of the installation site during the lifting and
positioning of the tank.
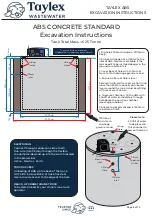
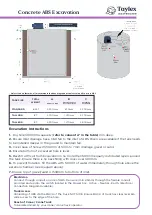
Excavation Instructions show excavated walls to be perpendicular. However, depending on
the soil conditions, the excavator may need to batter or retain the side walls to ensure they
don’t cave in during installation.
Level the base of the hole using an excavation bucket with a laser level attached.
Ensure that the excavated ground or base material is capable of carrying loads of
approximately 7 tonne (standard ABS).
The ABS must be level in both inflow/outflow direction and 90° to the inflow/outflow
direction (<1° deviation).
Evenly fill the system with approximately 5,000L of water through the centre Aeration
Chamber to prevent movement through the ground as the water pressure enters the
system.
Backfilling - Use sand or excavated material/spoil with maximum particle size of 50mm.
Backfilling of excavation to be completed in not more than 500mm equally distributed layers
around the tank perimeter. Ensure that sand or excavated material does not fall on the lid of
the ABS as this will fall into the system through the manholes and clog the system and
irrigation pump. Ensure that the backfill material is kept at least 100mm below the surface of
the systems lid.
Organise drainage contractors to connect to the system. The drainage connection
is a standard 100mm PVC sewer inlet.
Refer to Excavation Instructions on Pages 8-1
3
8.
ELECTRICAL CONNECTION
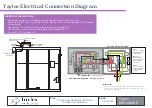
The electrical contractor must follow the electrical specification supplied with the
ABS system
Ensure all electrical works are only completed by licenced persons.
Ensure all electrical work is completed and compliant with AS/ANZ 3000.
Refer to Electrical Specifications on Page 1
5
9. COMMISSIONING
Please ensure the following is completed prior to having the system commissioned
Effluent Disposal area is installed
Effluent Disposal Area feed line is connected to ABS
Electrical power is connected
Drains connected
IMPORTANT: The Taylex ABS System cannot be commissioned unless power is connected to the
system.
The ABS will then be switched on (commissioned) by an Employee of Taylex
Australia
, a Taylex
Accredited
Wastewater Specialist
(TA
WS
) or a Taylex Accredited Service Technician (TASA).


