


TASCAM US-1200
5
2. Double-click “TASCAM_US-1200_driver_X.XX.dmg”, which
is the downloaded and saved driver disk image file, and
double-click “TASCAM US-1200 X.XX” inside the folder.
NOTE
Depending on the computer’s settings, the downloaded zip
file might not have opened automatically. In this case, open
the zip file first and then double-click the disk image file.
3. After the installer launches, follow the instructions on the
screen to proceed with the installation.
4. The following screen appears when that installation has
completed. Click the “Restart” button to complete instal-
lation and restart the computer automatically.
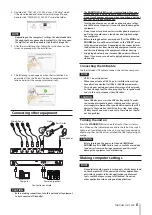
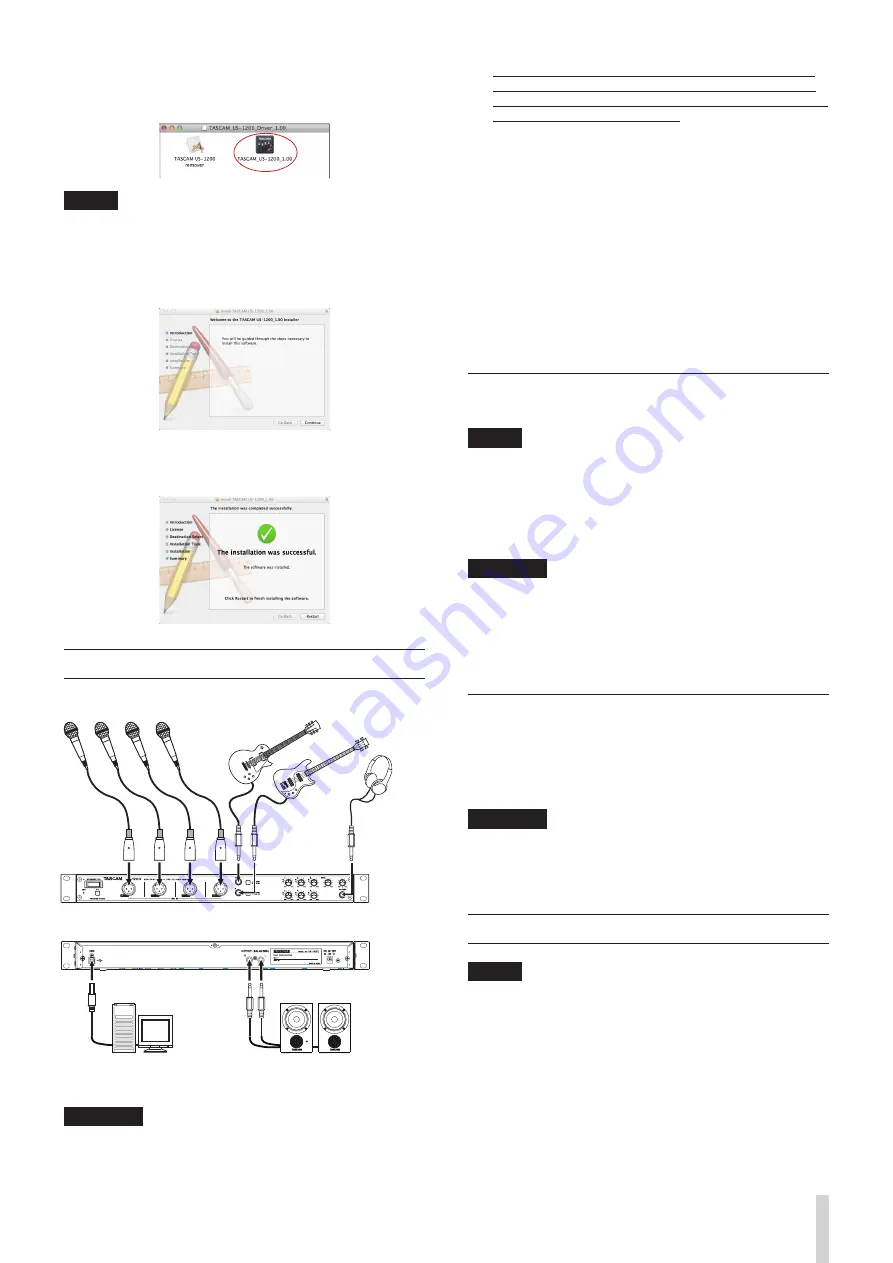
Connecting other equipment
Microphones
Guitar
Bass Guitar
Headphones
Computer
Powered speakers
Connection example
CAUTION
•
Before making connections, turn this unit and all equipment
to be connected off (standby).
•
The
PHANTOM (+48V)
switch is located below the power
switch and affects all four input channels simultaneously.
Do not turn Phantom power on when connecting a mic that
does not require phantom power.
•
Turning phantom power on when a dynamic mic or other
mic that does not require it is connected could damage the
equipment.
•
Do not connect or disconnect mics while phantom power is
on. Doing so could cause a loud noise and might damage
the equipment.
•
Before turning phantom power on or off, set the
MON
and
PHONES
knobs and the master fader on the “MIXER” screen
to their minimum values. Depending on the connected mics,
sudden loud noises from monitoring equipment could occur,
and this could damage the equipment or harm hearing.
•
Supplying phantom power to some ribbon mics will break
them. If you are unsure, do not supply phantom power to a
ribbon mic.
Connecting the USB cable
Use the included USB cable to connect the unit to a computer.
NOTE
•
USB 1.1 is not supported.
•
When connected to a USB 3.0 port, it will function in High
Speed mode equivalent to USB 2.0 (480 Mbps maximum).
•
This unit does not support computer suspend (sleep) mode,
So the unit might not function properly after suspend mode
ends. In this case, reconnect the USB cable.
CAUTION
Some USB devices access the USB bus frequently. In order
to avoid audio signal dropouts, clicking and other noises,
we strongly recommend that you do not connect other USB
devices to the same bus that this unit is using. Connecting
USB keyboards and mice, however, to the same bus should
not be a problem.
Turning the unit on
Press the STANDBY/ON switch on the front of the unit to turn
it on. When on, the indicator above and to the left of the switch
light green. In addition, when the unit is correctly connected to
a computer that has the driver installed, the USB indicator lights
orange.
CAUTION
Before turning on the power, set the unit’s
MON
and
PHONES
knobs to
MIN
. Failure to do so could cause sudden
loud noises from monitoring equipment, and this could
damage the equipment or harm hearing.
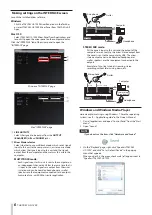
Making computer settings
NOTE
Since digital audio signal processing puts a fairly heavy load
on the computer CPU, the operation of other applications,
particularly graphic-intensive applications and Internet
tools, could cause processing to fall behind. Do not run
other applications when using audio applications.


