background image

HIDE NUMBER

The unit can hide numbers that are attached to the begin-
nings of track and folder names.

Disable (default setting)

Such numbers will be shown.

Enable

Such numbers will not be shown.

NOTE

When an MP3/WAV CD is made on a computer, the ordi-
nary file playback order is not determined. By adding 
numbers like 01, 02 and 03 to the beginnings of MP3/WAV 
file names, however, they can be played back in numerical 
order.

STOP KEY

You can set the function of the stop (

8

) button on the 

main unit.

Navigation (default setting)

Pressing the stop (

8

) button activates navigation mode.

All Folder

Pressing the stop (

8

) button activates “all folder” mode.

Disable

Pressing the stop (

8

) button does not activate navigation 

or all folder mode.

MFE (Music Frequency Enhancement)

MP3s and other files that use irreversible compression for-
mats have reduced audio quality compared to the original 
sound sources due to their compression.
Use MFE to optimize compressed audio.

Disable (default setting)

MFE is not used.

Enable

MFE is used.

ASb (Auto Standby)

When the Auto Standby function is on, the unit will auto-
matically enter standby mode if 20 minutes pass under the 
conditions described below.

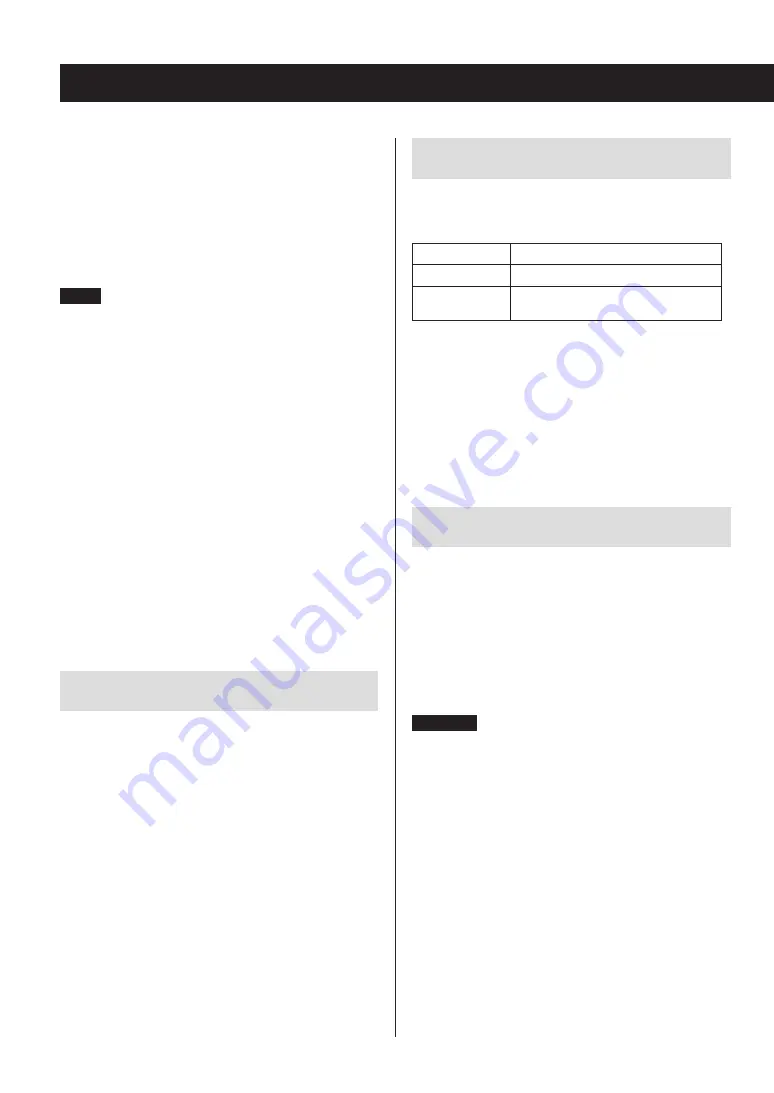
Playback source

Condition

CD

No disc loaded or disc stopped

NET

USB

Input source not playing

When this function is enabled, “ASb” appears on the display.
Use the “Net Standby” setting to set how network control 
affects standby (page 45).

Off (default setting for US/Canadian model)

Auto Standby is disabled.

On (default setting for European model)

Auto Standby is enabled.

NET Setting

To use network services, make network settings on this 
unit in advance.
Make the settings according to the characteristics of the 
network to which it is being connected.


o

An Internet connection is necessary to listen to Internet 
radio.


o

The “Net Standby” setting is not necessary for connect-
ing this unit to a network.

CAUTION


o

If DHCP is set to Enable (default), “IP Address”, “Subnet 
Mask”, “Gateway” and “DNS Server” settings will appear, 
but cannot be changed.
If DHCP is set to Disable, “IP Address”, “Subnet Mask”, 
“Gateway” and “DNS Server” will appear and must be set.


o

When you press the RETURN button when viewing the 
“NET Setting” submenu, “Network Save?” will appear. 
After changing a setting, press the ENTER button to 
save it. If you press the RETURN button, the menu 
screen will close without applying the setting changes.


o

To set the IP Address, Subnet Mask, Gateway and DNS 
Server, you must use Internet Explorer or another web 
browser on a computer connected to the same net-
work as this unit to open the Web Setup screen. Click its 
Network Setting tab to open the Network Setting 
screen where you can set these items. See page 34 for 
information about opening the Web Setup screen.

Settings (continued)

44

44

Summary of Contents for CD-240

Page 1: ...ENGLISH D01240720A CD 240 CD NETWORK PLAYER OWNER S MANUAL...

Page 2: ...this accessory with iPod or iPhone may affect wireless performance Apple iPhone iPod iPod classic iPod nano and iPod touch are trademarks of Apple Inc registered in the U S and other countries App Sto...

Page 3: ...ot cause harmful interference and 2 this device must accept any interference received including interference that may cause undesired operation CAUTION Changes or modifications to this equipment not e...

Page 4: ...osition o o The mains plug is used as the disconnect device the discon nect device shall remain readily operable o o Caution should be taken when using earphones or head phones with the product becaus...

Page 5: ...ronment and human health because of the presence of hazardous substances in them d The WEEE symbol which shows a wheeled bin that has been crossed out indicates that batter ies and or accumulators mus...

Page 6: ...of parts main unit 15 Names and functions of parts remote control 16 Using the remote control 17 Information shown on the display 18 Basic operation 19 Information shown on the display CD USB NET 22 L...

Page 7: ...he unit with a disc inside could cause a malfunction o o This unit consumes power when in standby mode o o Supply voltage to the unit that matches the voltage indicated on the rear panel If you are in...

Page 8: ...remote control buttons do not work properly with your iPod or iPhone updating its software might solve the problem Download the latest software for your iPod or iPhone from the following Apple websit...

Page 9: ...nd WAV formats o o Be sure to finalize discs created by CD recorders o o Depending on the quality of the disc and the condition of the recording playback might not be possible For details see the oper...

Page 10: ...so could cause discs to become deformed or degraded making them unplayable o o CD R and CD RW discs are more susceptible to the impacts of heat and ultraviolet rays than ordinary CDs For this reason d...

Page 11: ...zes MP3 and WAV files by their file extensions which are mp3 and wav respectively Always include the extension in the file name o o The unit cannot recognize files without these file exten sions Even...

Page 12: ...kbps or VBR FLAC File extension flac FLAC Sampling frequency 8 kHz 11 025 kHz 16 kHz 22 05 kHz 32 kHz 44 1 kHz 48 kHz 64 kHz 88 2 kHz 96 kHz 176 4 kHz 192 kHz Quantization bit rate 8 bit 16 bit 24 bit...

Page 13: ...the unit might not be able to read its data correctly or supply power properly o o During the use of USB flash drives please be aware that our company will take no responsibility should data be lost o...

Page 14: ...ital audio input connector of an amplifier or digital recording device such as a CD recorder They can be connected to different devices at the same time COAXIAL Coaxial digital cable RCA OPTICAL Optic...

Page 15: ...s receiver E SOURCE button Use this button to select the source F USB port Use to connect an iPod iPhone or USB flash drive to the unit o o When changing the input source this port is iden tified as U...

Page 16: ...USB button to switch between USB F and USB R c Number buttons Use these to input track file and folder numbers d PROGRAM button Use to set program playback e Stop 8 button Press to stop playback f Pla...

Page 17: ...from a distance of 5 m 16 ft or less o o Do not place obstructions between the main unit and the remote control o o The remote control might not work if the remote con trol signal receiver on the unit...

Page 18: ...indicator When the source is set to CD this indicator shows what information about the disc is being displayed TOTAL Total disc playback time REMAIN Remaining playback time of track being played TOTAL...

Page 19: ...When the Auto Standby function is On the unit will auto matically enter standby mode if there is no audio input and this unit is not operated for 20 minutes When the Auto Standby function is enabled t...

Page 20: ...Skipping to search for a track Turn the MENU ENTER dial to skip to tracks before or after the current track Keep turning until the desired track is selected When using the remote control use the skip...

Page 21: ...files are ordinarily managed on a computer Moreover some store multiple folders in one folder Example of folder numbers and file playback order 1 9 for a disc containing audio files during normal pla...

Page 22: ...d album ID3 tag information for the MP3 WAV file playing back is shown Elapsed time of current track File name Folder name Title if file has ID3 tag Artist if file has ID3 tag Album if file has ID3 ta...

Page 23: ...rtist and album ID3 tag information for the audio file playing back is shown Title if file has ID3 tag Artist if file has ID3 tag Album if file has ID3 tag Elapsed time of current track Playback time...

Page 24: ...at the center of the tray o o When the tray is opening or closing do not force it by hand 4 Press the tray open close button to close it V V CAUTION Be careful not to let your fingers be pinched when...

Page 25: ...rol number buttons to select a track by number For a single digit number press the corresponding number button For a double digit number press the 10 button followed by the number button for the tens...

Page 26: ...n The name of the first folder inside the Root directory appears If there are no folders the name of the first file appears 3 Use the skip buttons to select folders and files on the same level To sele...

Page 27: ...folder mode is activated NOTE When the setting STOP KEY on page 44 is set to All Folder pressing the main unit stop 8 button acti vates all folder mode 2 Use the skip buttons to select a folder and pr...

Page 28: ...WAV disc Follow the procedures in Selecting tracks on MP3 WAV discs on page 26 to add tracks Folder number File number Program number 3 Press the play 7 button to start playback Program playback Progr...

Page 29: ...k numbers and playback times Clearing tracks from the program When stopped press the CLEAR button to remove the last track that was added to the program Adding tracks to the end of the program When st...

Page 30: ...n o o Not Connected will appear when nothing is connected 2 Connect a USB flash drive to the selected USB port or When a USB flash drive is detected its volume label will be displayed o o In this stat...

Page 31: ...is stopped Press the SHUFFLE button to activate shuffle playback mode When activated the icon will appear on the left side of the display o o If you press the SHUFFLE button during playback the curren...

Page 32: ...page 31 when shuffle playback mode ends the set repeat playback mode will become active again Listening to an iPod iPhone The Apple products that can be connected to and used with this unit are listed...

Page 33: ...Internet radio programs you can add them to the My Favorites item in the network service menu DLNA media sharing This allows you to play audio files in a shared library Home Media folder sharing This...

Page 34: ...ton 2 Use the direction k j buttons to select NET Setting and press the ENTER button 3 When IP Address appears press the ENTER button Make a note of the IP address 4 Turn the computer on and open Inte...

Page 35: ...use the ENTER button to select Create new station Press the ENTER button again to show fields where characters can be input and input the name and URL o o To remove a radio station that has been added...

Page 36: ...ork server If using Windows Media Player see Setting up Windows Media Player on page 39 1 Start the computer or network server 2 Press the NET button to open the network service menu 3 Use the directi...

Page 37: ...rk and enables this unit to play audio files that are saved on those devices o o A DLNA compliant controller device or computer and this unit must be connected to the same network in order to make My...

Page 38: ...ion k j buttons to select the server that you want to use and press the ENTER button o o Confirm the server name of your computer by viewing its properties 4 Use the direction k j buttons to select th...

Page 39: ...dows Media Player select Automatically allow devices to play my media o o If Automatically allow devices to play my media or More streaming options does not appear select Turn on media streaming 4 Fro...

Page 40: ...ng Center 4 Click Change advanced sharing settings 5 For Public folder sharing select Turn on sharing so anyone with network access can read and write files in the Public folders 6 Copy the music file...

Page 41: ...Network and Sharing Center 4 Click Change advanced sharing settings 5 For Public folder sharing select Turn on sharing so anyone with network access can read and write files in the Public folders 6 C...

Page 42: ...ce is set to USB NET o o MP3 setting only appears when the source is set to CD o o The setting shown first depends on the current source You can also turn the MENU ENTER dial on the main unit to do th...

Page 43: ...Set how MP3 WAV file information is shown o o Regardless of the setting characters that cannot be shown in ID3 tag information are replaced with asterisks Replace If a track or folder name contains a...

Page 44: ...function is enabled ASb appears on the display Use the Net Standby setting to set how network control affects standby page 45 Off default setting for US Canadian model Auto Standby is disabled On defa...

Page 45: ...using the NET Setting and My Favorites menus for example 1 Use the remote control direction k j l buttons to select a character or symbol and press the ENTER button Repeat this procedure to input mor...

Page 46: ...he labeled side up e e If the disc is dirty wipe it clean e e If a blank disc is loaded replace it with a disc that has recordings on it e e Depending on the quality of the disc and the condi tion of...

Page 47: ...computer is using antivirus or security software the unit might not be able to connect to it Home Media Cannot find a folder file e e Make folder file sharing settings e e Add the file to the shared f...

Page 48: ...Hz 22 05 kHz 32 kHz 44 1 kHz 48 kHz 64 kHz 88 2 kHz 96 kHz 176 4 kHz 192 kHz Quantization bit rate 8 bit 16 bit 24 bit Ogg Vorbis Sampling frequency 8 kHz 11 025 kHz 16 kHz 22 05 kHz 32 kHz 44 1 kHz 4...

Page 49: ...supply Model for Europe AC 220 240 V 50 Hz 60 Hz Model for USA Canada AC 120 V 50 Hz 60 Hz Power consumption 31 W Standby power 0 42 W in normal standby mode 5 6 W in network standby mode External di...

Page 50: ...50...

Page 51: ...the warranty we will pay return surface shipping charges to any destinationwithintheUnitedStates LIMITATION OF IMPLIED WARRANTIES Any implied warranties INCLUDING WARRANTIES OF MERCHANTABILITY AND FIT...

Page 52: ...TY CD 240 TEAC CORPORATION http tascam jp Phone 81 42 356 9143 1 47 Ochiai Tama shi Tokyo 206 8530 Japan TEAC AMERICA INC http tascam com Phone 1 323 726 0303 1834 Gage Road Montebello California 9064...

Reviews: