background image

26

Programmed Playback 

The program function enables you to store your
favorite tracks from any disc in the receiver memory. A
program can contain 300 tracks.

1. Insert a disc.

Audio CD or MP3/WMA Discs:
AUDIO CD or MP3/WMA menu appears.

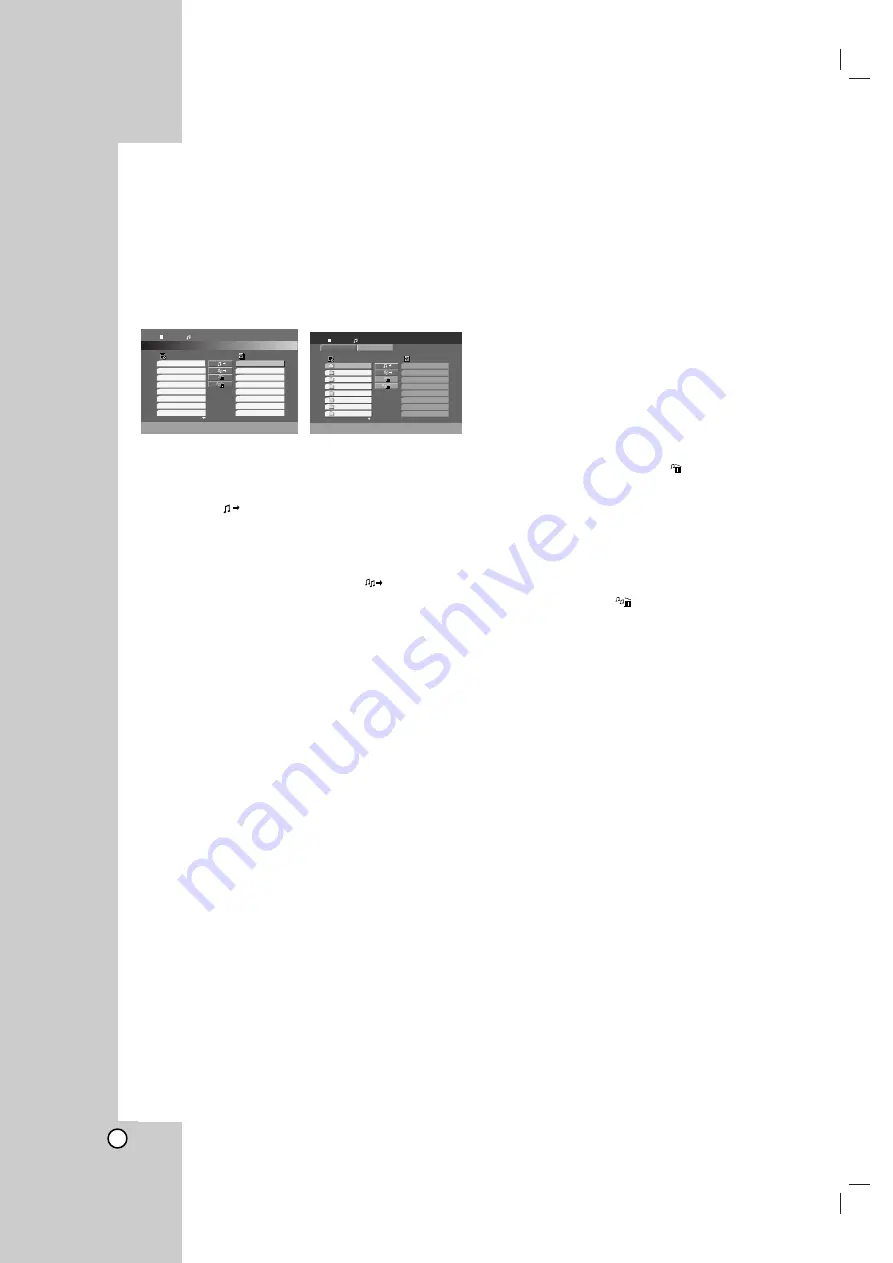
Audio CD Menu

MP3/WMA Menu

2. Select a track on the “List”, then press PROGRAM

or select “

(Add)” icon then press ENTER to

place the selected track on the “Program” list.
Repeat to place additional tracks on the list.

Note:

You can add all tracks in the disc. Select “

(Add All)” icon

then press ENTER.

3. Select the track you want to start playing on the

“Program” list. Press and hold 

v

/

V

to move to the

next/previous page.

4. Press PLAY or ENTER to start. Playback begins in

the order in which you programmed the tracks.
Playback stops after all of the tracks on the
“Program” list have played once.

5. To resume normal playback from programmed

playback, select a track of AUDIO CD (or
MP3/WMA) list and then press PLAY.

REPEAT PROGRAMMED TRACKS 

1. Press REPEAT when playing a disc. The repeat

icon appears.

2. Press REPEAT to select a desired repeat mode.

• TRACK: repeats the current track
• ALL: repeats all the tracks on programmed list.
• Off(No display): does not play repeatedly.

ERASING A TRACK  FROM “PROGRAM”

LIST

1. Use 

v V

to select the track that you wish to erase

from the Program list.

2. Press CLEAR. Or, select “

(Delete)” icon then

press ENTER to place the selected track on the
Program list. Repeat to erase additional tracks on
the list.

ERASING THE COMPLETE PROGRAM 

LIST

Use 

v

/

V

to select “

(Del all)”,  then press

ENTER.

Note:

The programs are also cleared when the disc is removed.

Program

List

Track1

Track2

Track3

Track4

Track5

Track6

Track7

Track8

Track8

Track3

Track12

Track7

Track6

Track9

Track1

Track10

0:00:00

1 / 12

Audio CD

Program

List

0:00:00

1 / 104

MP3  / WMA

JPEG

JPEG

Music Folder 1

Music Folder 2

Music Folder 3

Music Folder 4

Music Folder 5

Music Folder 6

Music Folder 7

Music Folder 8

Summary of Contents for HC-5100x

Page 1: ...DVD CD RECEIVER OWNER S MANUAL MODEL HC 5100x Before connecting up operating or repairing this product please read this instruction booklet carefully and completely GH T6348D_JA3GOTG_ENG...

Page 2: ...ome discs When recording and playing the pictures of these discs on a VCR picture noise will appear This product incorporates copyright protection technology that is protected by method claims of cert...

Page 3: ...ny way such as power supply cord or plug is damaged liquid has been spilled or objects have fallen into the apparatus the apparatus has been exposed to rain or moisture does not operate normally or ha...

Page 4: ...Playing a DVD or Video CD 21 23 PLAYBACK SETUP 21 General Features 21 MOVING TO ANOTHER TITLE 21 MOVING TO ANOTHER CHAPTER TRACK 21 SEARCH 21 CHANGING THE AUDIO CHANNEL 21 STILL PICTURE AND FRAME BY F...

Page 5: ...sented by the symbol DVD and finalized DVD R RW Video CDs Audio CDs MP3 Discs WMA Discs JPEG Discs DivX Discs About the Symbol Display may appear on your TV display during operation and indicates that...

Page 6: ...s may not be available or other functions may be added REGIONAL CODE This DVD CD receiver is designed and manufactured for playback of region 2 encoded DVD software This unit can play only DVD discs l...

Page 7: ...o CD only Playback control is available for Video CD VCD version 2 0 disc formats PBC allows you to interact with the system via menus search functions or other typical computer like operations Moreov...

Page 8: ...rent audio stream Indicates current surround mode RDS Data type indicators MUTE indicator SLEEP indicator Repeat playback mode indicators Total playing time Elapsed time Frequency Sleep time Surround...

Page 9: ...CLOSE PROGRAM p 26 CLEAR p 22 REPEAT p 22 25 REPEAT A B p 22 STOP PAUSE STEP PLAY VOLUME SKIP SCAN p 21 FUNCTION SELECTOR You can also select the desired function with the FUNC PLAY on the front panel...

Page 10: ...the buttons Distance About 20 ft 6 m from the front of the remote sensor Angle About 30 in each direction in front of the remote sensor Attention Dispose worn out batteries not with your domestic wast...

Page 11: ...supplied V S Video connection The video signal is saperated into luminance Y and colour C signals for the S VIDEO jack The S VIDEO signals enables high quality colour reproduction If your video compo...

Page 12: ...al for listening to the radio Connect the AM loop aerial to the AM aerial connector Connect he FM wire aerial to the FM aerial connector Notes To prevent noise pickup keep the AM loop aerial away from...

Page 13: ...akers using the supplied speaker cords To obtain the best possible surround sound adjust the speaker parameters volume distance etc Notes Be sure to match the speaker cable to the appropriate terminal...

Page 14: ...ker The centre speakers and front speakers are ideally the same height But normally place it above or below the television Rear speakers Place left and right behind the listening area These speakers r...

Page 15: ...ng an advanced high purity matrix surround decoder that extracts the spatial properties of the original recording without adding any new sounds or tonal colorations MOVIE mode The Movie mode is for us...

Page 16: ...the on screen display disappears PLAYBACK STATUS RESTRICTIONS Repeat title Repeat sequence Enter a Marker Marker Search menu Resume play from this point Action prohibited or not available 1 2 3 1 9 1...

Page 17: ...tion Some items require additional steps 5 Press SET UP or PLAY to exit the Setup menu LANGUAGE OSD Select a language for the Setup menu and on screen display Disc Audio Subtitle Menu Select the langu...

Page 18: ...ore suitable scenes as an alternative The parental control feature allows you to block access to scenes below the rating you input thereby preventing your children from being able to view material you...

Page 19: ...1 Select Country Code on the LOCK menu then press B 2 Follow step 2 as shown left Rating 3 Select the first character using v V buttons 4 Press ENTER and select the second character using v V buttons...

Page 20: ...rs Left or Rear speakers Right Note Certain speaker settings are prohibited by the Dolby Digital licensing agreement Size Since the speaker settings are fixed you cannot change the settings Volume Pre...

Page 21: ...me features may also be available on the Setup menu MOVING TO ANOTHER TITLE When a disc has more than one title you can move to another title Press DISPLAY while playback is stopped then the appropria...

Page 22: ...uring playback to select a desired repeat mode DVD Video Discs Repeat Chapter Title Off Chapter repeats the current chapter Title repeats the current title Off does not play repeatedly Video CDs DivX...

Page 23: ...S DVDs may offer menus that allow you to access special features To use the disc menu press DVD MENU Input the corresponding number or use the b B v V buttons to highlight your selection Then press EN...

Page 24: ...Sampling frequency within 32 48 kHz MP3 within 24 48kHz WMA Bit rate within 32 320kbps MP3 40 192kbps WMA The player cannot read an MP3 WMA file that has a file extension other than mp3 wma CD R physi...

Page 25: ...nputting its number REPEAT TRACK ALL OFF You can play a track all on a disc 1 Press REPEAT when playing a disc The repeat icon appears 2 Press REPEAT to select a desired repeat mode TRACK repeats the...

Page 26: ...ogrammed playback select a track of AUDIO CD or MP3 WMA list and then press PLAY REPEAT PROGRAMMED TRACKS 1 Press REPEAT when playing a disc The repeat icon appears 2 Press REPEAT to select a desired...

Page 27: ...TE PICTURE Press b B during showing a picture to rotate the picture clockwise or counter clockwise PLAYBACK OF CD DVD WITH MP3 WMA JPEG DIVX 1 Mark the Header MP3 WMA JPEG DIVX by pressing the Title b...

Page 28: ...with this player is limited as follows Available resolution size of the DivX file is under 720x576 W x H pixel The file name of the DivX subtitle is available by 20 40 characters different by language...

Page 29: ...y not be displayed AUTO Select when DVD CD Receiver is connected with Multi system TV NTSC Select when DVD CD Receiver is connected with NTSC TV PAL Select when DVD CD Receiver is connected with PAL T...

Page 30: ...essage will appear in the display window for a moment and then a preset number will flash To change the preset number follow the steps 5 6 as above Listening to the Radio Preset radio stations in the...

Page 31: ...les the unit to receive the actual time and show it in the Display Window Note Some RDS stations may not choose to include some of these additional features If the data required for the selected mode...

Page 32: ...lorussian 6669 Cambodian 7577 Catalan 6765 Chinese 9072 Corsican 6779 Croatian 7282 Czech 6783 Danish 6865 Dutch 7876 English 6978 Esperanto 6979 Estonian 6984 Faroese 7079 Language Code Fiji 7074 Fin...

Page 33: ...g period of time since they leave marks on the surface Cleaning the unit To clean the player use a soft dry cloth If the surfaces are extremely dirty use a soft cloth lightly moistened with a mild det...

Page 34: ...is set The disc is dirty The speakers and components are connected poorly The DVD CD Receiver is located too close to the TV Correction Plug the power cord securely into the wall outlet Insert a disc...

Page 35: ...ensor of the DVD CD Receiver The remote control is too far from the DVD CD Receiver There is an obstacle in the path of the remote control and the DVD CD Receiver The batteries in the remote control a...

Page 36: ...A Filter Video output 1 0 V p p 75 negative sync RCA jack S video output Y 1 0 V p p 75 negative sync Mini DIN 4 pin x 1 C 0 3 V p p 75 Tuning Range 87 5 108 0 MHz or 65 0 74 0 MHz 87 5 108 0 MHz Inte...

Page 37: ...P N 3834RH0057D Targa GmbH Lange Wende 41 59494 Soest www targa online com www targa de...

Reviews: