Targa NDAS 500 eSATA
English
11
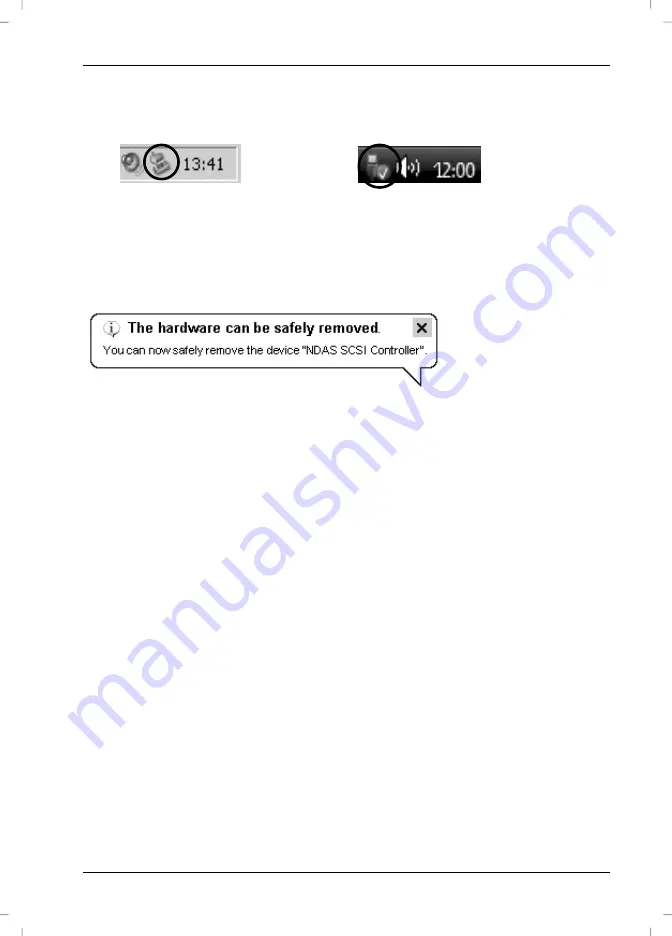
To disconnect, first click with the left mouse button on the "Safely Remove Hardware"
icon in the task bar beside the system clock (see figure below).
In the following menu select the "USB Mass Storage Device" by clicking with the left
mouse button. A message will soon appear, indicating that you can now safely remove
the Targa DataBox NDAS 500 eSATA:
Connecting via the eSATA Cable
To use the SATA standard your computer must have available an external SATA
connector (eSATA). This should be properly installed on your operating system.
Depending on the manufacturer of the eSATA connector, you must also have the
corresponding driver installed on your computer. If you are not sure whether the
connector is correctly installed, check in the documentation of your computer or in the
third-party expansion card.
The Targa DataBox NDAS 500 eSATA is designed for the eSATA standard and
therefore offers also "Hot Swap" technology. This means that you can connect and
disconnect the Targa DataBox NDAS 500 eSATA from your computer without having to
shut down the operating system.
On first use – depending on the hardware used – an automatic message may appear
or an acoustic signal may be heard.
1. Insert any connector of the eSATA cable [D] into a free eSATA port on your
computer.
2. Next connect the other connector of the eSATA cable to the eSATA port [4] of
your Targa DataBox NDAS 500 eSATA.
3. Power on the Targa DataBox NDAS 500 eSATA using the On/Off switch [2].
The operating system will automatically detect that a new device has been
connected and will install the corresponding driver.
Fig.: Safely remove hardware example
from Windows
®
XP
Fig.: Safely remove hardware example
from Windows Vista™
Summary of Contents for External network hard disk
Page 38: ...Targa NDAS 500 eSATA English 37...
Page 39: ...English Targa NDAS 500 eSATA 38...
Page 76: ...Targa NDAS 500 eSATA Dansk 37...
Page 77: ...Dansk Targa NDAS 500 eSATA 38...
Page 114: ...Targa NDAS 500 eSATA Norsk 37...


