


19
Zo o m
A picture may be enlarged up to four times
during either playback or slow motion through
the unit's zoom function. Press the ZOOM key
once and it enlarges the image 2x, press a
second time and the image enlarges 3x. A
third press enlarges the image 4x. A forth
press the image 1/2x, a fifth press the image
1/3x, a sixth press the image 1/4x . To
return to normal-size playback, press the
ZOOM
key a seventh time. Enlargement takes place
in the center of the picture.
Vo l u m e an d Mu t e
The volume on this DVD receiver is easily
controlled with the remote control by
pressing
either the VOL + key to raise the volume
or the
VOL- key to lower it. By pressing the
MUTE
key, no audio will be heard. To rein state
the audio,
press the MUTE key again.
Pr o g r am
Allows you to program specific tracks in a
desired order of play. Press PROG key program
menu well appear on the screen, set up the
program play in number key. The scroll to the
START, Press ENTER key to program play. To
exit the Programmed play mode, press the
PROG button again.
SYSTEM SETUP
FUNCTIONS
DVD Men u Set u p
By pressing the SETUP key on the remote
control, the main setup menu appears.
1. After accessing the setup menu, press the
scroll key for up or down movement to select a
desired Item. Once an item is selected, press
the PLAY key to confirm your entry and to move
to the Sub-entry.
2. Use the left or right scroll key to move the
pointer and the up or down scroll key to select
the Desired option. Once an item is selected,
press the ENTER key to confirm your selection.
This Completes the setup of the selected
function.
Note: Regardless of what screen format is
chosen, if the screen displays in 4:3 format, the
picture can only be shown in that format. With
DVDs, the screen format is convertible. If the
screen displays only in 4:3 format, when a DVD
with 16:9 display format is used, the picture will
be flattened.
TV
screen
Film
format
Normal
4:3
4:3
16:9
16:9
Full view
Mailbox
Wide screen
ANGLE MARK
When a DVD providing multiple angles is used,
the user may select a particular shooting angle.
Follow the operating instructions stated in "DVD
MENU SETUP" in combination with the Desired
option in the following figure.
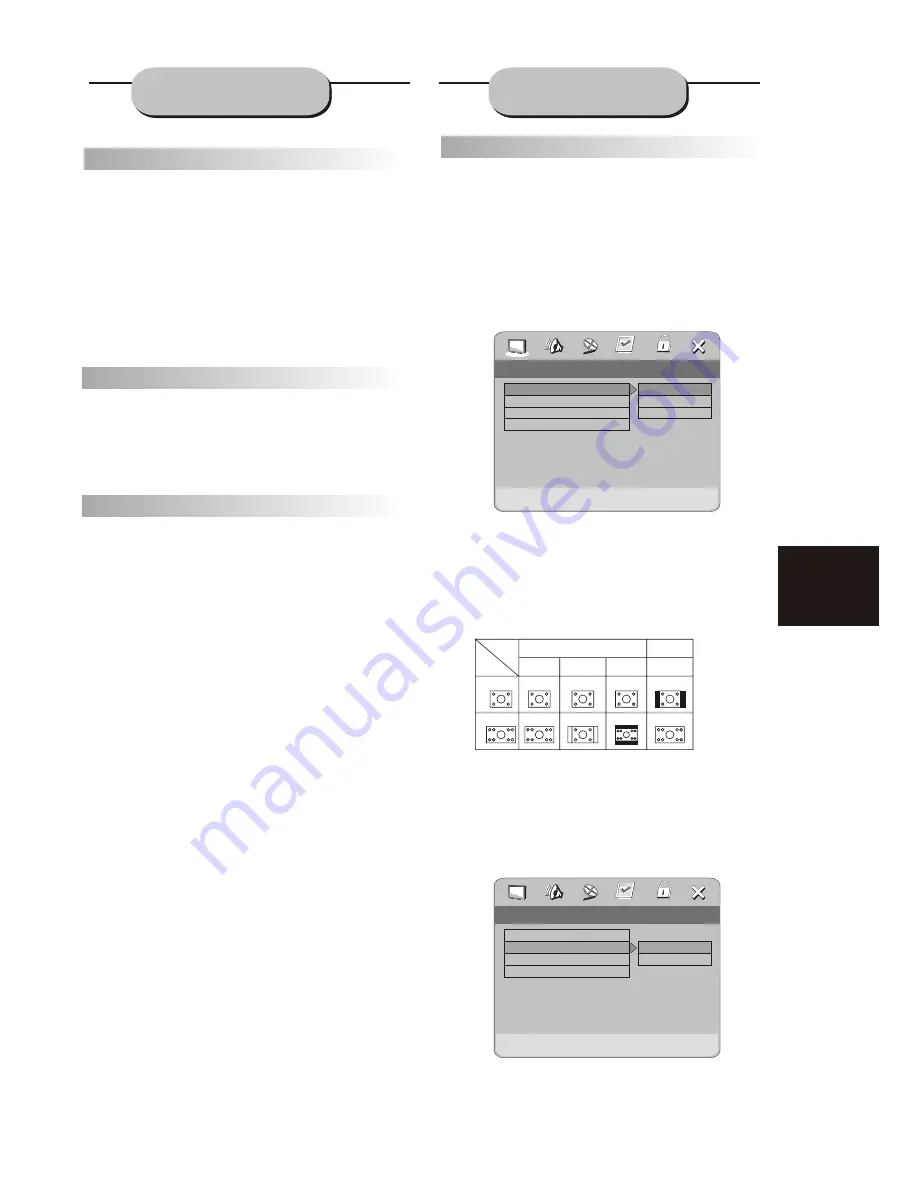
GENERA L SETUP
This option is used to set up TV screen
format, video functions and DVD functions,
with options of "TV DISPLAY", "ANGLE MARK",
"OSD LANGUAGE", "CAPTIONS", "MENU
STYLE" .
TV DISPL AY
Follow the operating instructions stated in
"DVD MENU SETUP" in combination with the
desired option in the following figure.
Normal/PS
Normal/LB
Wide
TV Display
Angle Mark
OSD Lang
Captions
.. General Setup Page ..
Wide
On
ENG
On
Set TV Display Mode
Set Angle Mark
On
Off
TV Display
Angle Mark
OSD Lang
Captions
.. General Setup Page ..
Wide
On
ENG
On
Summary of Contents for HT-50
Page 1: ...Operating Instruction Manual HT 50 DVD HOME THEATER SYSTEM ...
Page 29: ...28 ...
Page 30: ......


