


6.
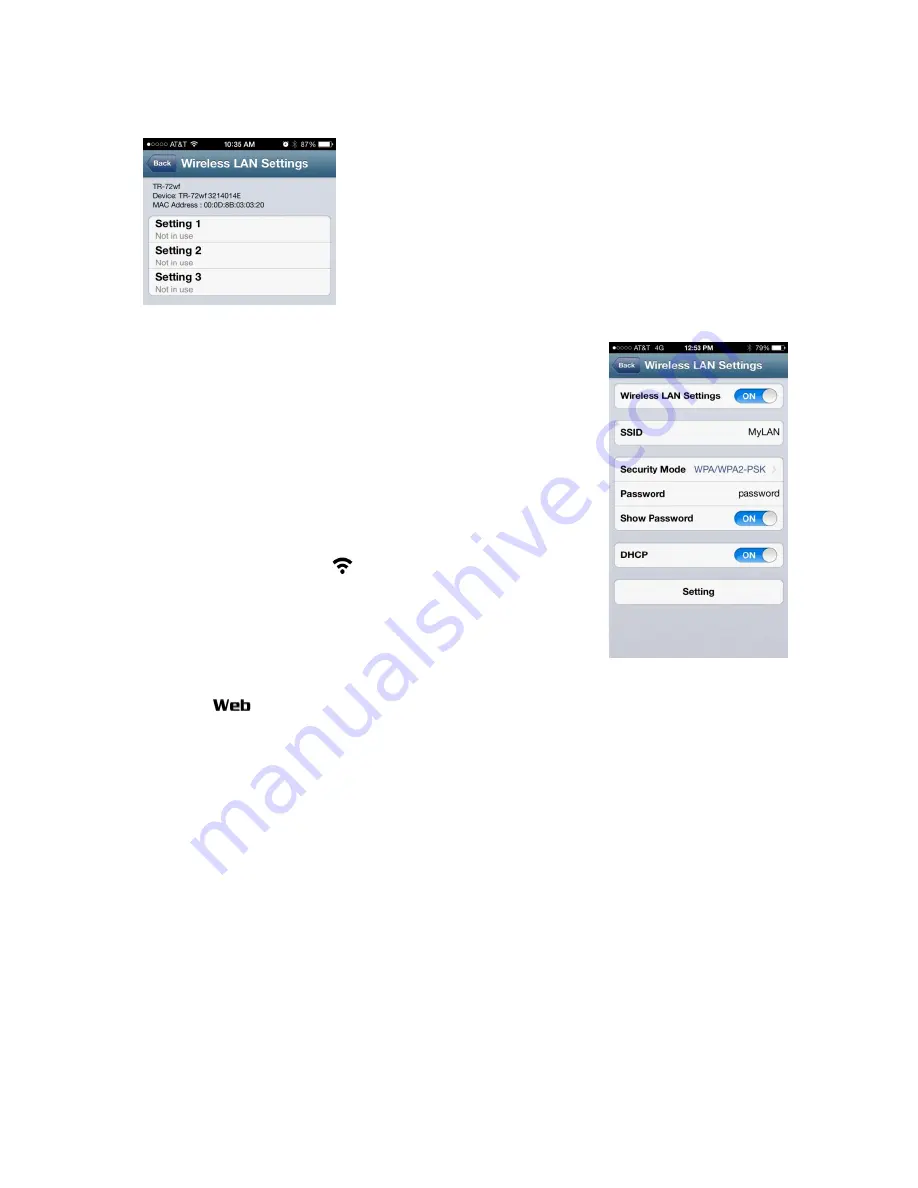
From the Wireless LAN Settings screen you can
configure the TR-7wf to log on to up to three different
connection points or networks. To start tap Setting 1.
7.
In the Wireless LAN Setting screen enter the SSID for the
first network that you would like to connect to. Set the
Security Mode and Password, and most of the time you will
want to enable DHCP, unless your network requires a fixed
IP address. Tap Setting to send the Wireless LAN log on
information to the logger. You should see a Setting
Completed notification. Tap Back four times to disconnect
the App from the logger. The logger will exit the AP mode
and now attempt to log onto the Wireless LAN. You will
see the Wireless Icon blink a few times while
connection with the Wireless LAN is established. When
connection is established the icon will stop blinking and
remain on. If you do not see this, log back on to the logger
from the App and double check the Security Mode and
Password to make sure they are compatible with your Wireless LAN router. The WEB
Icon
may continue to blink. This is because a connection to T&D’s WebStorage
Service hasn’t been established yet. Do not worry about this for now.
Important Note: The TR-7wf does not support Enterprise Mode W-Fi Security.


