


D14489.01—JULY 2009
34
Quick Set C20/C20plus
Administrator Guide
Contents
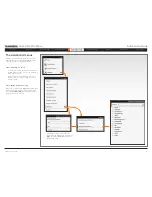
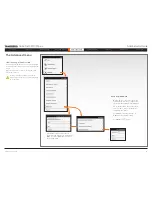
Introduction
Getting started
About the menus
Advanced settings
Settings Library
Cameras
Appendices
Contact us
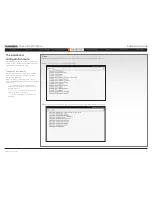
Settings library
selected if this is to be used.
AutoDetect: Set to AutoDetect to automatically detect if the signal is analog RGB or digital.
Digital: Set to Digital to force the DVI video input to Digital when using DVI-I cables with both analog and
digital pins and AutoDetect fails.
AnalogRGB: Set to AnalogRGB to force the DVI video input to AnalogRGB when using DVI-I cables with
both analog and digital pins and AutoDetect fails.
Example:
xConfiguration Video Input DVI 2 Type: AutoDetect
xConfiguration Video Input Source [1..2] CameraControl Mode:
<On/Off>
Determines whether or not the camera control (pan/tilt/zoom) should be enabled for the specific video input
source.
On: Set to On to enable camera control for the camera.
Off: Set to Off to disable camera control for the camera.
Example:
xConfiguration Video Input Source 1 CameraControl Mode: On
xConfiguration Video Input Source [1..2] CameraControl CameraId:
<1..1>
Select the ID of the camera (Not configurable on Codec C20).
Example:
xConfiguration Video Input Source 1 CameraControl CameraId: 1
xConfiguration Video Input Source [1] Connector:
<HDMI>
Select which video input connector to be active on video input source 1.
HDMI: Select HDMI when you want to use the HDMI connector as input (Not configurable on Codec C20)
Example:
xConfiguration Video Input Source 1 Connector: HDMI
xConfiguration Video Input Source [2] Connector:
<DVI>
Select which video input connector to be active on video input source 2.
DVI: Select DVI when you want to use the DVI connector as input (Not configurable on Codec C20)
Example:
xConfiguration Video Input Source 2 Connector: DVI
xConfiguration Video Input Source [1] Name:
<S: 0, 50>
Enter the name of the video input source 1, which for Codec C20 generally will be the main camera.
Format: String with a maximum of 50 characters.
Example:
xConfiguration Video Input Source 1 Name: “Camera”
xConfiguration Video Input Source [2] Name:
<S: 0, 50>
Enter the name of the video input source 2, which for Codec C20 generally will be a PC.
Format: String with a maximum of 50 characters.
Example:
xConfiguration Video Input Source 2 Name: “PC”
xConfiguration Video Input Source [1..2] Quality:
<Motion/Sharpness>
When encoding and transmitting video at a specific bandwidth there will be a tradeoff between high
resolution and high framerate. For some video sources it is more important to transmit high framerate than
high resolution and vice versa. The Quality setting specifies whether to give priority to high frame rate or to
high resolution for a given source. Addresses the selected video input connector.
Motion: Prioritizes framerate over resolution (30fps of 60fps depending on the Threshold60fps configuration.
Used when there is a need for higher frame rates, typically when a large number of participants are present
or when there is a lot of motion in the picture. Most camera inputs will be configured to motion.
Sharpness: Gives the highest possible resolution. Used when you want the highest quality of detailed
images and graphics, typically from PC’s or other presentation sources.
Example:
xConfiguration Video Input Source 1 HDMI 1 Quality: Motion
xConfiguration Video Layout ScaleToFrame:
<Manual/MaintainAspectRatio/
StretchToFit>
Defines what to do if the aspect ratio of a video input source doesn’t match the aspect ratio of the
corresponding image frame in a composition. For example if you have a 4:3 input source (like XGA) to be
displayed on a 16:9 output (like HD720).
Manual: If the difference in aspect ratio between the video input source and the target image frame is less
than the ScaleToFrameThrshold configuration (in percent), the image is stretched to fit. Unless the system
will maintain the original aspect ratio.
MaintainAspectRatio: Will maintain the aspect ratio of the input source, and fill in black in the rest of the
frame (letter boxing or pillar boxing).
StretchToFit: Will stretch (horizontally or vertically) the input source to fit into the image frame.
Example:
xConfiguration Video Layout ScaleToFrame: MaintainAspectRatio
xConfiguration Video Layout ScaleToFrameTreshold:
<0..100>
Only applicable if the ScaleToFrame configuration is set to manual. If the difference in aspect ratio between
the video input source and the target image frame is less than the ScaleToFrameThrshold configuration (in
percent), the image is stretched to fit. Unless the system will maintain the original aspect ratio.
Example:
xConfiguration Video Layout ScaleToFrameTreshold: 5
xConfiguration Video Layout Scaling:
<On/Off>
Defines whether the system should automatically adjust aspect ratio for images or frames when it differs
between the image and the frame it is to be placed in.
On: Let the system automatically adjust aspect ratio.
Off: Do not do any aspect ratio changes automatically.
Example:
xConfiguration Video Layout Scaling: On
xConfiguration Video MainVideoSource:
<Camera/PC>
Define which video input source shall be used as the main video source, i.e. the source to be transmitted
when in a call.
Camera: Select the camera input (HDMI) to be used as the main video source.
PC: Select the PC input (DVI) to be used as the main video source.


