background image

D14324.03—AUGUST 2009

9

Profile

Administrator Guide

Contents

Introduction

Getting started

About the menus

The settings menu

Settings Library

Cameras

Appendices

Contact us

Getting started

Chapter 2

In this chapter...

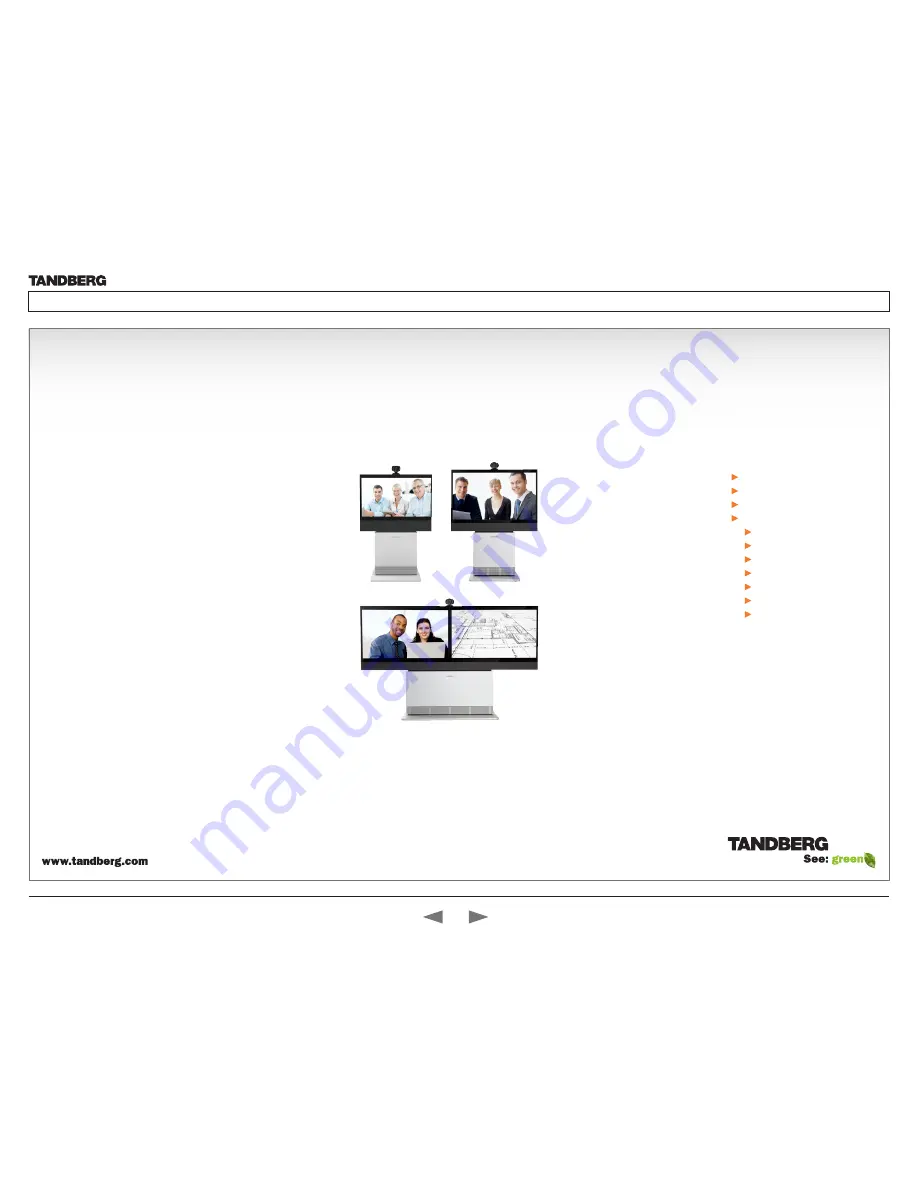
  System overview
  Cable configurations
  Using the remote control
  Initial configurations

  Waking up the system
  Verify IP address settings
  Setting a static IP address
  Add the system to the network
  Verify your settings
  Date and time settings
  Menu password

This chapter introduces you to the video 
system and gets you up and going.
The guide has been divided into several 
chapters, all of which provide different 
information. You can access the chapters 
directly by clicking on the menu bar at the 
top of this page. 

Summary of Contents for Profile 42"

Page 1: ...D14324 03 AUGUST 2009 1 Profile Administrator Guide Software version TC2 0 AUGUST 2009 TANDBERG Profile Administrator Guide...

Page 2: ...your settings 17 Adjusting the date and time settings 17 Setting a menu password 18 About the menus The Home menu 20 The Settings menu 20 The Advanced menu 20 The system settings menus The Advanced me...

Page 3: ...ation search functionality 61 The Wallpaper page 62 The Call page 63 The SSL Certificates page 64 The XML files page 65 The Logs page 66 The Add release key page 67 TANDBERG DNAM 68 The DNAM Loudspeak...

Page 4: ...le has been designed to give you many years of safe reliable operation How to read this document You will find that some places information has been copied from other chapters but adapted when needed...

Page 5: ...th 1080p wide screen LCD PrecisionHD 1080p camera and Codec C60 s Ideal camera and display height for natural communication s Use of recyclable aluminium materials to supports our commitment to the en...

Page 6: ...ery effort has been made to supply complete and accurate information in this Administrator Guide however TANDBERG assumes no responsibility or liability for any errors or inaccuracies that may appear...

Page 7: ...connect attached power supply cord to other products s In case any parts of the product has visual damage never attempt to connect main power or any other power source before consulting service perso...

Page 8: ...WEEE Waste Electrical and Electronic Equipment and 2002 95 EC RoHS The primary aim of the WEEE Directive and RoHS Directive is to reduce the impact of disposal of electrical and electronic equipment...

Page 9: ...e remote control Initial configurations Waking up the system Verify IP address settings Setting a static IP address Add the system to the network Verify your settings Date and time settings Menu passw...

Page 10: ...s PrecisionHD 1080p camera Full HD Camera designed for visual communication with s 12 x optical zoom s Fast and precise pan tilt and zoom Monitor 42 Full HD LCD 16 9 1080 x 1920 resolution Audio modul...

Page 11: ...for the TANDBERG Profile 52 for instructions on how to install the system Codec C60 s Full HD video s High resolution data sharing s Full HD Multisite s Rich I O capabilities PrecisionHD 1080p camera...

Page 12: ...lities PrecisionHD 1080p camera Full HD Camera designed for visual communication with s 12 x optical zoom s Fast and precise pan tilt and zoom Dual monitor Dual 52 Full HD LCD 16 9 1080 x 1920 resolut...

Page 13: ...o the TANDBERG Codec C60 Make sure the codec has been switched off and disconnected from the line voltage whenever connecting or disconnecting other equipment Video to the camera HDMI to HDMI LAN Ethe...

Page 14: ...iew in the menu Batteries Make sure the remote control has working batteries 4 x AAA batteries ARROW UP DOWN Use the up and down arrow keys to navigate in the menu ARROW LEFT Press the left arrow key...

Page 15: ...middle part of the remote control is used to handle the video part of the call while the lower part of the remote control resembles very much the keypad of a mobile phone Touch the rubber line sensor...

Page 16: ...ving 5 Press Home to exit Verify IP address settings How to go to the System Information page to verify the IP address 1 Navigate to Settings System Information to open the System information page 2 W...

Page 17: ...you verified you IP address setting 1 Navigate to Settings System Information 2 Verify the previous configurations s If you successfully registered to a Gatekeeper the Status will show Registered If...

Page 18: ...ystem and should be done by the system administrator NOTE When you define or change a password make sure you save a copy of the password in a safe place How to set the menu password Navigate to Settin...

Page 19: ...09 19 Profile Administrator Guide Contents Introduction Getting started About the menus The settings menu Settings Library Cameras Appendices Contact us About the menus In this chapter Explains the me...

Page 20: ...BERG user guides from the web site Go to http www tandberg com docs The Home menu The Home menu is explained in the TANDBERG Profile User Guide s Call Menu for making calls s Presentation Select a pre...

Page 21: ...le Administrator Guide Contents Introduction Getting started About the menus The settings menu Settings Library Cameras Appendices Contact us The system settings menus In this chapter Explaining the s...

Page 22: ...value from a drop down list and press the OK button to save or press the left arrow to leave without saving s Enter a value text in a value text field Press Save to save the change or Cancel to leave...

Page 23: ...g for words like H323 SIP or key all settings with these characters in the name will be listed s Search Enter the as many characters as needed until the setting you are searching for displays in the l...

Page 24: ...e the password is not set When you define or change a password make sure you save a copy of the password in a safe place Set a new password 1 On the remote control press the key to toggle between lowe...

Page 25: ...k Services Phone Book Server Provisioning Serial Port SIP Profile Standby System Unit Video Experimental Chapter 5 This chapter gives a detailed description of the advanced system settings The advance...

Page 26: ...codec If a loop is detected this unwanted feedback is suppressed On Set to On to activate Loop Suppression Off Set to Off to deactivate Loop Suppression Note Codec C60 does currently not support Loop...

Page 27: ...e left channel of a stereo signal Right The Audio Line output signal is the right channel of a stereo signal Mono The Audio Line output signal is a mono signal Example Audio Output Line 1 Channel Left...

Page 28: ...ange 0 7 Example Cameras Camera 1 Gamma Level 0 Cameras Camera 1 7 Gamma Mode Auto Manual Applies to cameras which supports Gamma mode The Gamma Mode setting enables for gamma corrections Gamma descri...

Page 29: ...be used for the camera Example Cameras Camera 1 Whitebalance Mode auto Conference 1 1 AutoAnswer Delay 0 50 Defines how long in seconds an incoming call has to wait before it is answered automaticall...

Page 30: ...s the Authentication Login Name and the Authentication Password to a H 323 Gatekeeper for authentication The authentication is a one way authentication from the codec to the H 323 Gatekeeper i e the s...

Page 31: ...e range 2326 to 2487 Each media channel is using two adjacent ports ie 2330 and 2331 for RTP and RTCP respectively The ports are automatically selected by the system within the given range Firewall ad...

Page 32: ...teway S 0 64 Defines the IP default gateway Only applicable if Static IP assignment is chosen Format Compact string with a maximum of 64 characters Example Network 1 IPv4 Gateway 10 47 5 100 Network 1...

Page 33: ...H323 Mode On Off Determines whether the system should be able to place and receive H 323 calls On Set to On to enable the possibility to place and receive H 323 calls This is the default setting Off...

Page 34: ...1 Address NetworkServices SNMP Mode Off ReadOnly ReadWrite SNMP Simple Network Management Protocol is used in network management systems to monitor network attached devices routers servers switches p...

Page 35: ...n external manager management system Off The system will not try to register to any management system TMS If set to TMS the system will try to register with a TMS server as described in Provisioning E...

Page 36: ...ip outbound 20 On Set up multiple outbound connections to servers in the Proxy Address list Off Connect to the single proxy configured first in Proxy Address list Example SIP Profile 1 Outbound Off SI...

Page 37: ...ll be enabled Example SystemUnit IrSensor Mode On SystemUnit MenuLanguage English Norwegian Swedish German French Italian Japanese Chinese Russian Spanish Korean Turkish The setting is used to select...

Page 38: ...ublin Edinburgh Lisbon London Video DefaultPresentationSource 1 3 Define which video input source shall be used as the default presentation source e g when you press the Presentation key on the remote...

Page 39: ...The Quality setting specifies whether to give priority to high frame rate or to high resolution for a given source Addresses the selected video input connector Motion Gives the highest possible frame...

Page 40: ...ideo output This will force the selected resolution on the monitor Auto The system will automatically try to set the optimal resolution based on negotiation with the connected monitor Range 640x480 60...

Page 41: ...one Growing Summersky Custom The Video Wallpaper setting determines whether or not a background picture should be displayed on screen when idle None Set to None if you do not want a wallpaper to be di...

Page 42: ...o Equalizer 1 Section 1 b2 0 0 Experimental Audio Input Line 1 4 Equalizer ID 1 8 Select equalizer ID 1 8 Example Experimental Audio Input Line 1 Equalizer ID 1 Experimental Audio Input Line 1 4 Equal...

Page 43: ...2 Softbutton 1 5 Value S 0 255 To be described Example Experimental CustomSoftbuttons State 1 Softbutton 1 Value Experimental SoftwareUpgrade Mode Auto Manual To be described Example Experimental Soft...

Page 44: ...tact us Cameras Chapter 8 In this chapter The PrecisionHD 1080p camera Connecting the camera Best view Face recognition Video output formats Cameras in daisy chain Your TANDBERG PrecisionHD 1080p Came...

Page 45: ...tion is 1080p30 s The HDMI and HD SDI can be used simultaneously The maximum resolution is then 1080p30 if you want both to run with the same resolution Kensington lock The Kensington lock may be used...

Page 46: ...HD SDI socket HDMI and HD SDI can be used simultaneously VISCA is a trademark of Sony Corporation The PrecisionHD 1080p camera cont Connecting the camera The HDMI and HD SDI can be used simultaneously...

Page 47: ...sentation on the screen Read this before using Best view s The Best view optimization process may take up to 5 seconds s The detection of faces works better when people look towards the camera s The a...

Page 48: ...quency when it is 50 or 60Hz You may set the video output format to a specific value use the DIP switches to override the auto frequency detection if a different line voltage frequency is an issue DIP...

Page 49: ...taneously on the same camera s Power The first camera in the chain is powered up from the codec by the VISCA camera control cable Additional cameras must use the 12V DC Power in s Extra camera cable T...

Page 50: ...ices Chapter 7 In this chapter General room guidelines Meeting room setup Remote control TRC5 Password protection Startup scripts The web interface System info page Software upgrade Advanced configura...

Page 51: ...PC s PC s placed on the table should not cover the microphones as this will reduce the audio quality at the far end Position of the system s Position the TANDBERG T1 in such a way that all participant...

Page 52: ...tion Making eye contact with the far end participants will improve the natural communication between the people s Adjust the camera view using zoom in out to allow the participants to be shown in full...

Page 53: ...ture all participants in the room s If the participants are sitting too close to the monitor the camera will look down at the participants This may not give a good presentation of the participants at...

Page 54: ...on the remote control the default presentation source is activated The DVI VGA input is compliant with VESA Extended Display Identification Data EDID and will be able to notify the PC of the supported...

Page 55: ...Press the or on the key to zoom the camera in and out Arrows s Up Down Use the and arrow keys to navigate in the menu s Arrow Right Press the arrow key to expand the selected menu item or to move to t...

Page 56: ...emUnit AdminPassword Set Password 4 Reboot the codec Setting the menu password Do the following to define a password for the Advanced menus 1 Open the menu on screen and go to Home Settings Advanced C...

Page 57: ...ng the following command mkdir user scripts d 3 Put an executable file permission must be changed to executable in this directory Example of such a file About the startup script file s The file must s...

Page 58: ...Upgrade software s Advanced configuration s Wallpaper s Call s Upload certificates s XML files s Logs s Add release key Password protection of the web interface If the codec is password protected with...

Page 59: ...ng menu options s System info s 5PGRADE SOFTWARE s Advanced configuration s Wallpaper s Call s Upload certificates s XML files s Logs s Add release key How to upgrade the software on the codec 1 Conta...

Page 60: ...of the codec From this page you have the following menu options s System info s Upgrade software s DVANCED CONlGURATION s Wallpaper s Call s Upload certificates s XML files s Logs s Add release key Th...

Page 61: ...ss of the codec From this page you have the following menu options s System info s Upgrade software s DVANCED CONlGURATION s Wallpaper s Call s Upload certificates s XML files s Logs s Add release key...

Page 62: ...dvanced configuration page and search for Wallpaper From the drop down list select Custom The new wallpaper should now show on the monitor which is connected to the codec If the new wallpaper does not...

Page 63: ...istration of the system Open a web browser and enter the IP address of the codec From this page you have the following menu options s System info s Upgrade software s Advanced configuration s Wallpape...

Page 64: ...d the certificate 1 Contact your system administrator to obtain the required files PEM format 2 Click Browse and locate the certificate files PEM 3 Enter the Passphrase optional 4 Click the Upload but...

Page 65: ...s changes Command The Command file gives an overview of the commands available to instruct the system to perform an action and are issued from the API A Command type command is usually followed by a s...

Page 66: ...ptions s System info s Upgrade software s Advanced configuration s Wallpaper s Call s Upload certificates s XML files s OGS s Add release key Historical log files Time stamped historical log files Cli...

Page 67: ...nterface allows for remote administration of the system Open a web browser and enter the IP address of the codec From this page you have the following menu options s System info s Upgrade software s A...

Page 68: ...use 2A 250V Slow 5 x 20mm Littelfuse type 215002 Push and twist anti clockvice to release TANDBERG DNAM The TANDBERG DNAM Digital Natural Audio Module is built on two specially designed and separate m...

Page 69: ...An Offer Answer Model with SDP s RFC 3311 UPDATE method s RFC 3361 DHCP Option for SIP Servers s RFC 3420 Internet Media Type message sipfrag s RFC 3515 Refer method s RFC 3550 RTP A Transport Protoco...

Page 70: ...2009 70 Profile Administrator Guide Contents Introduction Getting started About the menus The settings menu Settings Library Cameras Appendices Contact us China RoHS table This product complies with t...

Page 71: ...EC HARMONIZED STANDARDS Applied in order to verify compliance with directives EN 60950 1 2006 EN 55022 2006 EN 55024 1998 A1 2001 A2 2003 EN 61000 3 2 2006 EN 61000 3 3 1995 A1 2001 A2 2005 EN 60950...

Page 72: ...nistrator Guide Contents Introduction Getting started About the menus The settings menu Settings Library Cameras Appendices Contact us Dimensions Profile 42 with standalone foot The dimensions in mm 9...

Page 73: ...ile Administrator Guide Contents Introduction Getting started About the menus The settings menu Settings Library Cameras Appendices Contact us Dimensions Profile 42 with wall mount foot The dimensions...

Page 74: ...Administrator Guide Contents Introduction Getting started About the menus The settings menu Settings Library Cameras Appendices Contact us 980 198 1527 3 817 96 808 390 Dimensions Profile 42 with whe...

Page 75: ...tents Introduction Getting started About the menus The settings menu Settings Library Cameras Appendices Contact us Dimensions Profile 52 with standalone foot The dimensions in mm 1205 1205 3 1498 3 6...

Page 76: ...file Administrator Guide Contents Introduction Getting started About the menus The settings menu Settings Library Cameras Appendices Contact us Dimensions Profile 52 with wall mount foot The dimension...

Page 77: ...nistrator Guide Contents Introduction Getting started About the menus The settings menu Settings Library Cameras Appendices Contact us Dimensions Profile 52 with wheelbase foot The dimensions in mm 12...

Page 78: ...nts Introduction Getting started About the menus The settings menu Settings Library Cameras Appendices Contact us Dimensions Profile 52 Dual with standalone foot The dimensions in mm 2412 1268 607 9 1...

Page 79: ...ions and that the wall is able to safely support the product It is highly recommended that the wall mounted system is installed by trained personnel Mounting Use the Allen key which is found in the fo...

Page 80: ...etting started About the menus The settings menu Settings Library Cameras Appendices Contact us 220 0 105 0 20 5 105 9 eye centre 32 2 148 1 114 6 82 0 79 6 2 5 2 5 62 4 125 4 142 0 4 4 63 0 190 0 14...

Page 81: ...1080p60 s 1920 x 1080 50 Hz 1080p50 s 1920 x 1080 30 Hz 1080p30 s 1920 x 1080 25 Hz 1080p25 s 1280 x 720 60 Hz 720p60 s 1280 x 720 50 Hz 720p50 s 1280 x 720 30 Hz 720p30 s 720 x 576 50 Hz 576p50 s 720...

Page 82: ...ghtness white balance s Far end camera control s Daisy chain support Visca protocol camera s Dual HDMI and HD SDI output s Upside down mounting with automatic flipping of picture SYSTEM MANAGEMENT s S...

Page 83: ...ces Contact us U S HEADQUARTERS TANDBERG 1212 Avenue of the Americas 24th Floor New York NY 10036 Telephone 1 212 692 6500 Fax 1 212 692 6501 Video 1 212 692 6535 E mail tandberg tandberg com EUROPEAN...

Reviews: