


11
11. Video format
Choose between various available video formats:
1080p60 / 1080p50 / 1080p30 / 1080p25
12. Computer view
Choose between Camera only (default) and View all. If View all is
selected, menus and applications will be overlayed on the live video
of the USB 3.0 output. This feature allows you to use a computer to
display the microscope live image and screen share the output during
video conferences.
13. Image format
Choose between different image formats when saving an image.
Available formats are TIFF, PNG, JPG or BMP
14. Image prefix
Replace the default image prefix (img_) preceding the date and time
stamp in filenames of captured images. This feature requires an
attached keyboard.
15. Assign image name
When this setting is active, the microscope will prompt for an image
name before storing a captured image.
NB! When using an attached scanner to name captured images on the
TAGARNO FHD microscopes we advise that the scanner is connected
directly to one of the two USB ports on the microscope.
It is not recommended to connect the scanner to an attached USB
Hub unless it has been thoroughly tested. The communication through
some hubs can unfortunately introduce data loss resulting in one or
more random characters missing in the scanned image name.
16. Image preview
This feature allows users to quickly inspect and capture images of new
samples. When an image is captured the default behavior is to preview
the image at the center of the display for 5 seconds. Image preview
can now be disabled, which will display a more discrete text box for 3
seconds.
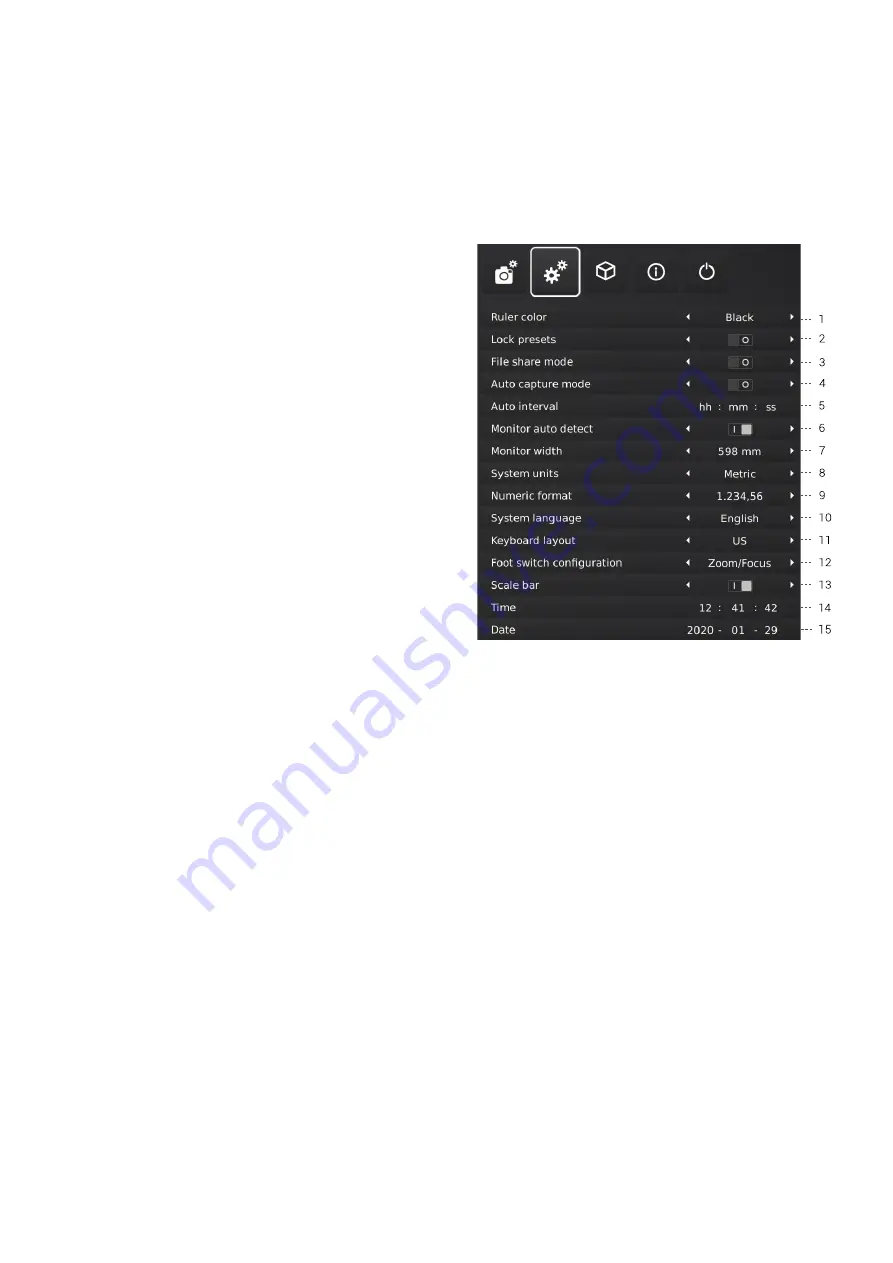
2. GENERAL SETTINGS
1. Ruler color
Set the ruler color to your prefered color choice to separate it from
your displayed object. Choose between 6 different colors: Yellow, Blue,
Red, Black, White and Green. The chosen color will also be used in the
Verification Lines app (see section 3, APPLICATIONS).
2. Lock presets
When this feature is enabled, users are prevented from accidentally
overwriting presets in the Preset manager.
The XPLUS control box can therefore simply be removed. The operator
can instead use an attached numerical USB keyboard to operate the
digital microscope.
3. File share mode
Activate File share mode to save images to the internal storage of the
microscope. The images can then be accessed via computers on the
same network as the microscope.
To access photos saved on the internal storage, see section ACCESS
SAVED FILES.
NB: To minimize security risk, it is highly recommended to disable SMB
1.0 support on any Windows based operating system on your corporate
network. You do this by accessing Programmes and Features in your
Control Panel.
SETUP MENU (2/5)


