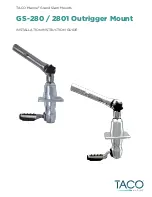
6 / GS-280 / 2801 OUTRIGGER MOUNT
1. To find the proper location of the mounting plate keep in mind that the handle of the GS-280
and 2801 requires 9-1/2" of clearance from the center of the 3-1/8" hole in order to rotate the
outrigger 90º from facing aft to the outboard position. The handle positions can be changed
on this model.
2. If you are going to weld your own mounting plates to the frame, unlace the canvas and
remove any wires that may be inside the tubing of the brace bars and the T-Top frame where
you are going to weld. If you are using one of our weld-on or clamp-on plates, steps 3 and 4
have been done for you. If you are using our clamp-on plate it is not necessary to unlace the
canvas.
3. If you are having plates made, they should be 3/8" thick by 5" wide and long enough to fit
between the brace bars. When drilling the holes, it is best to cut the 3-1/8" hole and drop the
GS-280 into the hole and mark the location of the four (4) mounting holes right through the
holes in the unit. When determining where to place the 3-1/8" hole in the plate, refer to step 1.
4. Weld the plates to the frame and brace bars. The mounting plates should be welded on three
(3) sides.
5. Reinstall the lacing on the canvas.
6. With a razor knife, cut an X in the center of the canvas through the 3-1/8" holes in both of the
aluminum mounting plates. Then cut each of those triangular pieces in half so you now have
eight (8) flaps of canvas going down through the hole in the plate.
7. The Grand Slam pair come with the outrigger tube facing the same direction as the hole for
the handle. If this is the handle position you want, one of the units will be ready to drop right
in with the upper adjusting knob facing outboard and the outrigger tube facing aft along
with the handle opening you will need to install into.
8. On the underside of the Grand Slam put a bead of Silicone around all (five) 5 holes of the
unit and place on top of the canvas directly over the holes in the plate, insert the bolts and
tighten with a 3/16" Allen wrench and reinstall the handle.
9. Re-install the handle but do not screw it in. Pull down on the handle and rotate it until the
outrigger holder on top is facing aft with the adjusting knob facing outboard. You may have
to flip the outrigger holder over to the other horizontal position to accomplish this.
10. Someone else should stand on the gunwale, and pull up on the outrigger holder. The person
below can now rotate the handle to any desired position. If the handle does not rotate, pull
the handle out and loosen the bolt one more complete turn and try again.
11. Now re-install the hex head screws and plastic cap and the installation is complete.
INSTALLATION
SOFT TOP
OPTIONAL BACKING PLATE
GSE-1939BXY30-1
NOTE:
Place bead of marine-grade sealant around
hole in mounting plate.


