


4
SECTION #3 SET UP OF THE MACHINE:
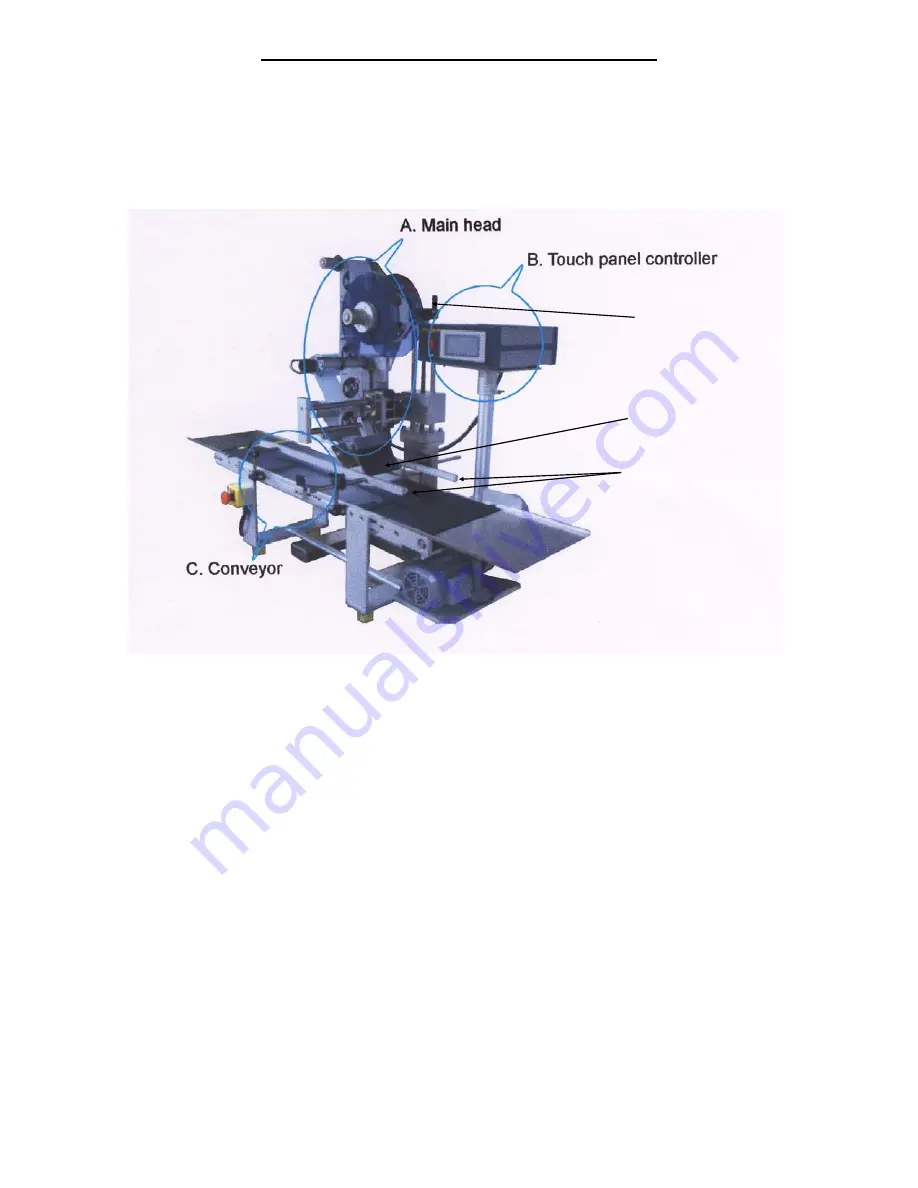
Please note that the Mini-Con is Shown but parts are the same on the Mini-Con-S
Please Identify, confirm and check each of the below main components of the Mini-Con and Mini-Con-S Labeler.
Main Label Head for Mini-Con shown for purposes of this manual. All loading and functions are the same.
Controller
Conveyor
1) Attach the Stainless Stations to the ends of the Conveyor (C-3) if desired see Figure #1 above.
2) To set up the machine, place the item to be labeled onto the Conveyor Belt and put it in the position relevant to
the label Dispensing Plate (A-6) where the label is to be applied on the product. The Dispensing Plate (A-6) can
be moved across the width of the Conveyor by loosening the Black Knobs (A-4) and sliding the entire Main
Label Head to the desired position relevant to the Conveyor and than tightening the Black Knobs (A-4).
3) Locate the 2 adjustable Product Rails that run along the length of the Conveyor. These Product Rails are
adjustable in both height and location. Locate the Black Knobs which hold the Product Rails in place and move
them either into or away from the product so that the product is contained and can not move either left or right,
but not so that the Product Rails are tight enough to impede the product moving along the Conveyor Belt.
4) Locate The Main Label Head Height Adjuster (A-5) which is located on the back of the machine behind the
Main Label Head. This screw adjustment is used to put the Label Dispensing Plate at the correct height relative
to the product to be labeled. If at this point it is below the height of the product, turn the handle and raise the
Main Label Head so that it is about 1” above the product. Put the product directly below the Label Dispensing
Plate (A-6) and slowly turn the Main label Head Height Adjuster (A-5) until it is from 0.5mm to 1mm above the
product. See Figure 2 on the following page for details. After the above is completed, move the package to the
right of the Main Label Head and adjust the brush so that it lightly touches the top of the package.
5) The machine is now ready for the product and the next step will instruct on how to load the pressure sensitive
labels onto the machine.
Product Rails
Brush
Main Label Head Height
Adjuster (A-5)
Figure #1
Summary of Contents for Mini-Con
Page 12: ...12 SECTION 9 PARTS LIST...


