background image


If you are not sure Press 

 to discard and go back. If you are pretty sure Press 

 to calibrate and save changes. 

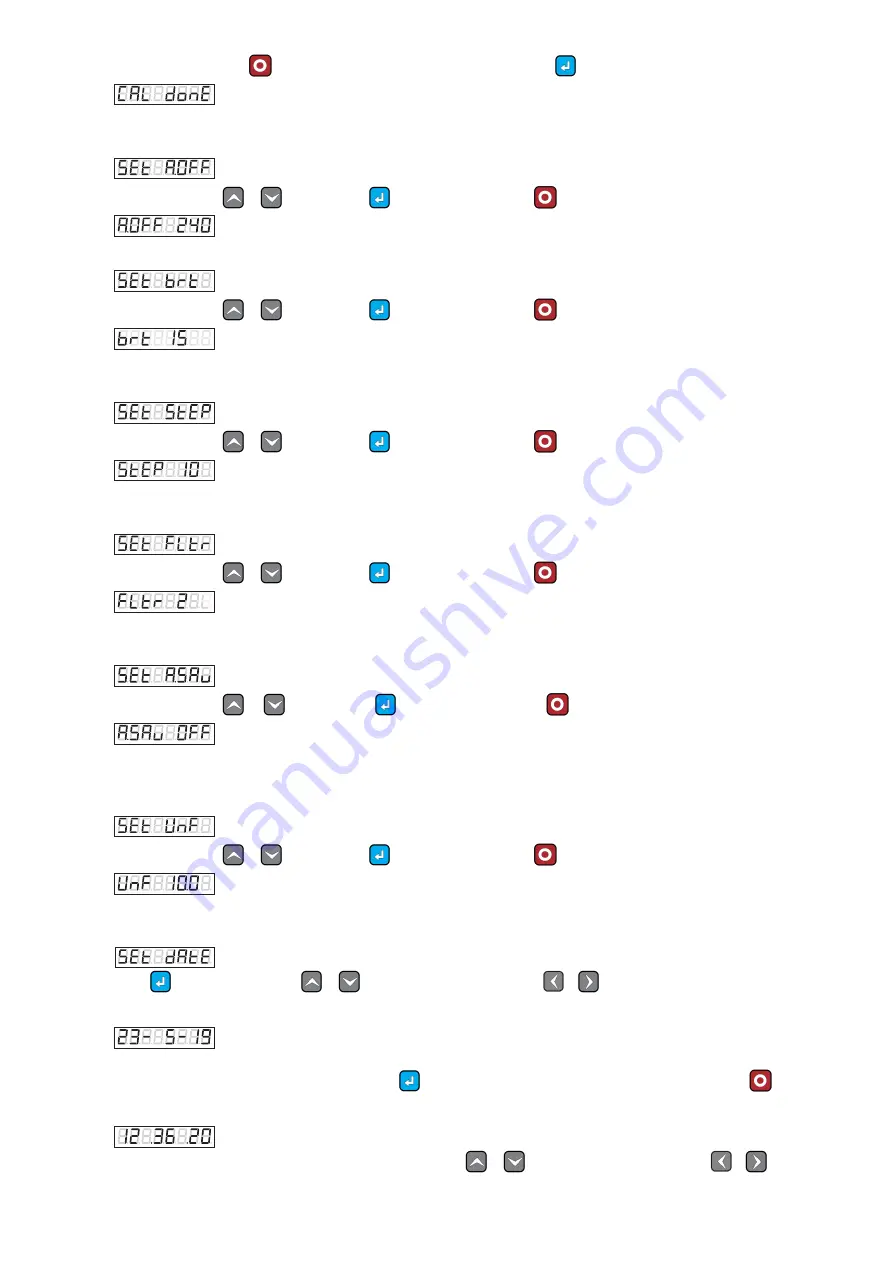
 (Calibration done screen will be shown for two seconds, and then the Main screen will appear) 


2.13.


AUTO OFF TIME


Scale auto-off time can be selected from here in seconds. 

Change value using 

 & 

 keys and Press 

 to save changes or Press  

  to discard and go back. 

 (240 seconds equals to 4 minutes. 4x60=240) 

2.14.


SET BRIGHTNESS


 Display brightness can be controlled here (1 for lightest, 15 for brightest) 

Change value using 

 & 

 keys and Press 

 to save changes or Press  

  to discard and go back. 

  (Values: 1 to 15


2.15.


DIVISION (RESOLUTION)


 To select the minimum increment or resolution in grams. 

Change value using 

 & 

 keys and Press 

 to save changes or Press  

  to discard and go back. 

 (1 to 100) 


2.16.


FILTER TIME


 In auto-saving when weight is stable at this specific filter seconds, It will be auto-saved. 

Change value using 

 & 

 keys and Press 

 to save changes or Press  

  to discard and go back. 

 (1 to 10) 


2.17.


SAVING MODE: 


Select saving mode from here, to enable autosave select 

‘On’, to disable select ‘OFF’.


Change value using 

  & 

  keys and Press 

   to save changes or Press  

  to discard and go back. 

 (ON/OFF) 


2.18.


UNIFORMITY SETTINGS


  Select the Uniformity percentage from here. 

Change value using 

 & 

 keys and Press 

 to save changes or Press  

  to discard and go back. 

 (e.g 10.0 %) 


2.19.


SET DATE


Press 

 to Select the date, use 

 & 

keys to adjust the value, and use 

 keys to select different parameters of 

date. 

  DAY  - MONTH - YEAR 


Date Format is Day/Month/Year. 

After adjusting the desired parameter of date Press 

 to save the date and proceed to time adjustment, or Press  

  to discard 

the process and go back to settings. 

.HOUR    .MIN      .SEC 


After saving the date, the time selection screen will appear, use 

 & 

 keys to adjust the value, and use 

 keys to 

select different parameters of time 

Summary of Contents for TAC-APS-WR

Page 1: ...S WR Capacity 30Kg Resolution up to 1 gram Charging Specs 5 0V 2 5A PORT USB TYPE B for charging and PC Communication 3 5mm Jack for Thermal Printer THE AUTOMATION COMPANY F 453 Satellite Town Rawalpi...

Page 2: ...n manual saving mode weight can be stored by pressing Up button On successful saving Sto will appear on screen like this 0 125 is weight and Sto indicates Data stored successfully 1 7 AUTO SAVING IN S...

Page 3: ...to be deleted Press button to confirm the delete or press to cancel and back to weighing list 1 12 UNIFORMITY OTHER STATISTICS To calculate the uniformity and other statistics press and hold button f...

Page 4: ...elect and change the desired settings press button to enter in edit mode Then follow the below specific Instructions 2 1 SET PEN SEt PEn Press to select the pen number by using keys and Press to save...

Page 5: ...n and get the pen ready for new readings Press to discard the process and go back Press to proceed It will ask for confirmation If not sure Press to cancel and go back Press to Clear the memory Clear...

Page 6: ...ing when weight is stable at this specific filter seconds It will be auto saved Change value using keys and Press to save changes or Press to discard and go back 1 to 10 2 17 SAVING MODE Select saving...

Page 7: ...TTERY STATUS To view Battery status in percentage Press key on the main screen Press to back to the main screen or wait 3 seconds for auto return Battery 60 Remaining 3 2 CHARGING When the charger is...

Page 8: ...ICATIONS Thermal Printer settings will be as follows Baud Rate Rate settings 19200 n 8 1 Serial Port RS232 Paper width 80mm ____________________________________________________________________________...

Reviews: