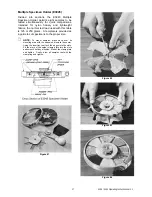


specimen wear path, an average should be
computed from the four readings.
EXAMPLE:
0.003” Average Depth of Wear in 5000 Cycles
0.003” x 1000 cycles = 0.0006 Wear Factor
5000 cycle test
(Depth Method)
The specimen material, type of wheels used,
number of cycles, abradant pressure and
average wear depth are then recorded so that
specimen wear characteristics can be
compared.
E. Other Physical Change Methods
–
Performance specifications may be incorporated
when a material is used for a particular
application. For example, a tensile test might be
utilized before and after abrading a textile
webbing material that is used in the manufacture
of seat belts. A Burst test could be incorporated
in evaluating the abrasion resistance of a rubber
seal. Or, an air permeability test might be
included for medical packaging materials that
require the product be kept in a sterilized
environment.
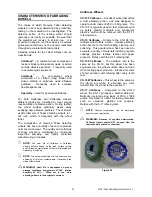
SPECIMEN PREPARATION
Specimen Cleaning
Specimens should be cleaned in such a way
that the surface is free from grit, grease,
fingerprints or other contaminants. Since many
different kinds of materials can be tested, a
specific cleaning treatment cannot be given. If
contact with solvents or cleansers result in
changes to the material properties, surfaces
might be cleaned with isopropyl alcohol or a soft
cloth.
Specimen Conditioning
Prior to testing, it is recommended that
specimens be ‘conditioned’ for at least 24 hours
in the test atmosphere. Organic materials
should be conditioned for 48 hours. The drying
and curing conditions for printing or coating on
plastics versus metals can be different and may
influence the test results. Cure these specimens
under conditions specific to the material. Also,
heat and moisture are known to affect the
physical properties of many materials. It is
recommended that all tests be conducted in the
standard laboratory atmosphere of 23 ±2°C
(73.4
±3.6°F)
with 50 ±5% relative humidity.
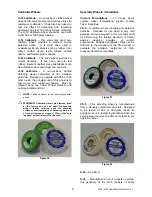
Rigid Materials
Rigid specimens are often cut from a larger
sheet utilizing a cutting method appropriate for
that material. A 100 mm
(4 inch)
square sample
is recommended with a 6.35 mm
(0.25 inch)
center
hole.
•
Rigid materials
are generally mounted to the
standard specimen holder without the Clamp
Ring (E100-102), and require a 6.35 mm
(0.25 inch)
center hole. When using the S-21
Extension Nut, a 9.525 mm
(0.375 inch)
center
hole is required.
•
It is possible to test specimens without a
center hole by using S-37 or S-37-1
Mounting Sheets and the Drive Pin Type
Holder (E140-19).
•
Specimens of uneven thickness should be
shimmed so that the top surface runs true.
A Ring Clamp Specimen Holder (E140-14)
or Threaded Ring Specimen Holder (E140-
21) can be used to test materials that are
slightly warped.
•
To subject specimens to a wet abrasion test,
the Rimmed Specimen Holder (E140-75)
can be used. This is useful to determine the
effect of absorbed and / or surface moisture
on abrasion resistance.
•
The recommended specimen thickness is
6.35 mm
(0.25 inch)
. Using the S-21 Extension
Nut, specimens up to 12.7 mm
(0.5 inch)
in
thickness can be evaluated. The Arm Height
Extension modification will permit testing up
to 40 mm
(1.57 inch)
in thickness.
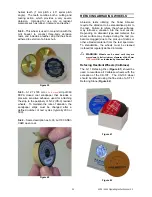
Flexible Materials
Most flexible materials can be cut to size using
the Taber Sample Cutter – Model 5000.
Manually operated, this bench top cutter uses an
industrial cutting blade to prepare an exact 107
mm
(4.2 inch)
diameter specimen. A punch lever
evenly transfers force through a spring-loaded
clutch to punch a 6.35 mm
(0.25 inch)
center hole.
Textile materials may be prepared using
scissors [approximate size should be 135 mm
(5.25 inch)
round or square]. To cut the center
hole, fold the sample twice and cut a small
portion of the resulting corner.
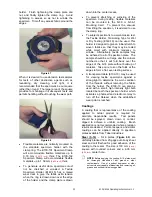
To mount the specimen, place the test specimen
on the holder with the side to be abraded facing
up. Lightly secure the clamp plate and nut in
place to hold the center of the specimen. Adjust
the clamp ring such that it is a snug fit, and
place it half way on the specimen holder. Draw
the fabric taut over the specimen holder by
pulling on corners and edges of fabric. Tighten
the clamp ring further, and push the ring all the
way down over the edge of the holder, thus
putting tension on the fabric as it is secured on
31
5135 / 5155 Operating Instructions ver 1.1


