background image

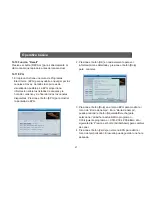
2. Vuelva a presionar el botón [PAUSA], la imagen de la
    pantalla saltará a la imagen actualmente reproducida, y el
    sonido del canal corresponderá con la reproducción.  

23

Operativa básica

10.19 Stop

1. En el modo diferido, presione el botón [STOP] para
    detener la reproducción en diferido y volver a la
    reproducción normal.
2. Cuando esté grabando, presione el botón [STOP] para
    mostrar los programas grabados. Vuelva a presionar el
    botón [STOP] para detener la grabación.
3. Cuando reproduzca un archivo grabado desde lista de
    grabaciones, presione el botón [STOP] para detener la
    reproducción del archivo y volver al menú de lista de
    grabaciones.        

10.20 FB

Presione el botón [FB] para rebobinar con velocidades de
X2, X4, X8, X16 y X24.

10.21 FF
Presione el botón [FF] para avanzar con velocidades de X2,
X4, X8, X16 y X24. 

Summary of Contents for SY-3127HD

Page 1: ......

Page 2: ...DVB T recorder SY 3127HD Please read this manual carefully before operating your product and pay close attention to the precautions which are mentioned below Store this user manual in a safe place for...

Page 3: ...1 2 4 5 6 6 7 10 11 18 19 24 25...

Page 4: ...1...

Page 5: ...change wetness to wet hands Do not place the unit in extreme temperatures location with poor ventilation Turn off the unit before connecting the antenna 2 AAA battery 2...

Page 6: ...3...

Page 7: ...orite channel list Press FAV button once more to access the other favorite list Displays the main menu on the TV screen Press once more to return to normal view Displays the Electronic Program Guide A...

Page 8: ...5...

Page 9: ...The Media Player function will be disabled when no USB is plugged in The Media Play List will not be saved when the USB is plugged out or when the unit turns to standby mode or power off When accessi...

Page 10: ...to switch the device press the SWAP key to highlight USB HDD device and then press the Left Right key to select the correct device In this state press the SWAP key once more to witch the TAB between...

Page 11: ...ed key to enter the lock mode function 2 Press the Up Down key to move the highlight bar to the desired channel and press OK A message will appear asking you to input the password the default password...

Page 12: ...highlight the option Then press the OK button to Edit rename 6 1 5 3 Delete Press the BLUE button and then UP DOWN to highlight the option Then press OK to select the channel you wish to delete When s...

Page 13: ...TA free to Air to activate or deactivate 3 Move the highlight bar to Search and press OK to start the automatic scan The below picture will appear If at any time you wish to exit the Auto scan functio...

Page 14: ...226500Hz and CH21 474000Hz to CH69 858000Hz 4 Adjust the desired frequency by pressing the Left key or Exit to go back to the main menu 5 Bandwidth Select the corresponding bandwidth 6 Once the change...

Page 15: ...uage preference if the viewed channel contains the second audio language instead of the first audio language the unit will play the second audio language If the 2 audio languages do not match with the...

Page 16: ...Audio Output Select the desired audio output The options are LPCM Out Audio without compression Volume level can be controlled from the remote BS Out BS out gives fixed volume output of AC3 raw data a...

Page 17: ...cord a channel Select the desired option 4 Wakeup Channel Press the OK key to select the desired channel which you would like to watch or record when the timer is activated 5 Wakeup Date Input the des...

Page 18: ...10 AGE 12 AGE 16 AGE 18 A password will be required to play any of the rated channels 4 New Password The New password function allows the user to change the default password Simply input the new pass...

Page 19: ...meshift REC TMS Move the highlight bar to PVR Setting and press the OK 8 9 PVR Setting key The following display will appear 1 Timeshift Press the Left Right keys to activate or deactivate the timeshi...

Page 20: ...activate or deactivate the Timeshift function When the Timeshift function is activated press the RECORD key while watching a channel The unit will then start to record not only from the current time...

Page 21: ...back to the main menu 9 2 Load Factory Settings When choosing OK a warning message will appear upon pressing YES all the settings will return to the factory default settings Please use this function w...

Page 22: ...tching a program in full screen press VOL VOL to adjust the volume 10 4 Numerical Numbers 0 9 While watching a program in full screen press any of the numerical keys 0 9 to access to a particular chan...

Page 23: ...vate the sound A mute Icon will appear on your TV screen Press the Mute key once more to restore the sound 10 9 Favorite 1 While watching a program in full screen press the FAVORITE key to access to t...

Page 24: ...the FAVORITE section in this manual Pressing the RECALL Key will directly switch back to the previous channel that you played before the current channel to display the time bar change the channel to...

Page 25: ...n the Channel List press the Page Page keys to move the pages up or down in the channel list Press the Record key to record the current program onto a USB drive The default record duration is of 2 hou...

Page 26: ...When playing a recorded file from the record manager folder press the Stop key once to go back to the main menu of 23 record manager...

Page 27: ...remote control are weak Check your aerial antenna Turn on the DVB T Aim the remote control directly to the sensor of the DVB T Clear all obstructions between the remote control and the DVB T Replace...

Page 28: ...25...

Page 29: ...26...

Page 30: ......

Page 31: ......

Page 32: ...ci n a las precauciones que se muestran a continuaci n Guarde este manual de instrucciones en un lugar seguro para futuras consultas Estamos seguros de que el nuevo DVBT HD GRABADOR satisfar sus neces...

Page 33: ...del Sistema Operativa b sica Resolucion de Problemas Especificaciones 1 2 4 5 6 23 24 25 Pantalla de bienvenida Reproductor Multimedia Men Principal Editar canales Instalaci n Configuraci n del Sistem...

Page 34: ...cable y de la unidad desconecte inmediatamente y lleve la unidad a un t cnico cualificado No conecte el cable de alimentaci n cerca de agua u otros l quidos como un ba o fregadero piscina lavadora o d...

Page 35: ...d Por favor lee este manual de instrucciones antes de usar el aparato Para evitar el riesgo de electrocuci n o fuego nunca abra la unidad o quite su carcasa Utilice un pa o h medo para limpiar el exte...

Page 36: ...3 Introducci n LED Encendido Receptor de Infrarrojos USB Entrada RF Coaxial HDMI Euro conector Enlace RF Interfaz de conexi n...

Page 37: ...16 ZOOM Aumenta el tama o de la imagen 17 ASPECT Cambia la proporci n de pantalla 18 POWER Enciende la unidad o activa el modo reposo Standby 19 TTX Muestra la funci n de Teletexto en caso de que el...

Page 38: ...5 Conexi n del Sistema Amplificador Cable HDMI Cable RF Cable RF Cable RF...

Page 39: ...a resaltar una opci n 2 Pulse Izquierda Derecha para seleccionar regi n idioma formato de v deo y formato de pantalla 3 Resalte la opci n de modo de pantalla Display Mode y pulse el bot n OK para most...

Page 40: ...bot n Amarillo Nota La unidad soporta FAT32 y NTFS no siendo necesariamente compatible con todos los dispositivos de almacenamiento USB del mercado 6 1 Lista de Canales TV 6 1 1 Favoritos 1 Pulse el b...

Page 41: ...lado 1 Pulse la tecla Roja para entrar en la funci n de bloqueo 2 Pulse la tecla Arriba Abajo para mover la barra de resaltado al canal deseado y pulse OK Aparecer un mensaje pidi ndole que introduzca...

Page 42: ...luego los botones Arriba Abajo para resaltar su opci n y pulse el bot n OK para seleccionar el canal que desea borrar Despu s de guardar los cambios y salir al men Editar Canal el canal seleccionado...

Page 43: ...n la opci n de S lo FTA pulse Izquierda Derecha para elegir s o no 3 Resalte la opci n de b squeda y pulse OK para iniciar la b squeda autom tica Si en cualquier momento quiere salir de esta funci n s...

Page 44: ...o los botones Izquierda Derecha 5 Hay tres opciones de ancho de banda 6 7 y 8 MHz 6 Cuando complete sus modificaciones resalte la opci n de b squeda y pulse el bot n OK para iniciar la b squeda 7 Puls...

Page 45: ...spondiente al segundo audio en lugar de la del primer audio el sintonizador emitir por defecto el segundo idioma de audio que haya seleccionado 4 Teletexto El usuario puede configurar su preferencia d...

Page 46: ...s conveniente 3 Salida de V deo puede elegir entre CVBS y RGB 4 Salida digital de audio Puede elegir entre las opciones LPCM BS Out 5 Pulse el bot n EXIT para salir del men en cualquier momento 8 4 Aj...

Page 47: ...uncionando o en reposo sintonizar el canal para verlo o grabarlo Duraci n Tras el tiempo establecido se finalizar la programaci n y el equipo ir al modo reposo Mueve la barra hacia Guardar y pulse OK...

Page 48: ...ontrase a para visualizar los canales bloqueados 4 Nueva contrase a puede cambiar la contrase a introduciendo una nueva en esta opci n 5 Pulse el bot n EXIT para salir de este men en cualquier momento...

Page 49: ...arecera la imagen a continuaci n 2 Cuando presione el bot n OK de nuevo aparecer n las 3 opciones mencionadas arriba para el tipo de grabaci n Timeshift Pulse las teclas izquierda derecha para activar...

Page 50: ...Pulse las teclas izquierda derecha para activar o desactivar la funci n Timeshift Cuando la funci n Timeshift es activada presione el bot n RECORD mientras se ve un canal La unidad comenzar a grabar n...

Page 51: ...versa informaci n de la unidad incluyendo la versi n de software y su fecha 9 Herramientas 9 2 Cargar valores de f brica Seleccione esta opci n y pulse el bot n OK para cargar la configuraci n por def...

Page 52: ...nalo de nuevo para volver a ver el ultimo canal que estaba viendo Si la unidad no se va usar durante un periodo de tiempo prolongado 10 Botones de Acceso R pido 10 3 Volumen Arriba Volumen Abajo En el...

Page 53: ...ver la barra de selecci n presionando el bot n Canal Arriba Canal Abajo y presione el bot n OK para seleccionar un grupo favorito 3 En la ventana del Grupo favorito X puede mover la barra de selecci n...

Page 54: ...resione el bot n EPG para mostrar la pantalla de EPG 21 Operativa b sica 2 Presione el bot n OK en cada elemento para ver informaci n m s detallada y presione el bot n Rojo para cancelar 3 Presione el...

Page 55: ...volver a men anterior o salir de la funci n de men 10 15 Salir Presione el bot n EXIT para salir del men actual volver al men anterior o cerrar el men 10 16 P gina Arriba P gina Abajo 1 En la Lista de...

Page 56: ...producci n normal 2 Cuando est grabando presione el bot n STOP para mostrar los programas grabados Vuelva a presionar el bot n STOP para detener la grabaci n 3 Cuando reproduzca un archivo grabado des...

Page 57: ...Resolucion De Problemas 24 En algunas regiones la se al terrestre digital puede ser d bil Es recomendable utilizar un amplificador repetidor para obtener una mejor se al...

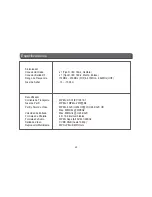
Page 58: ...10 70 dbm Decodificador Corriente de Transporte MPEG 2 ISO IEC 13818 1 Nivel de Perfil MPEG 1 MPEG 2 MP ML Perfil y Nivel de V deo MPEG 4 AVC H 264 HP L3 H 264 AVC HD M x 80Mbit s MPEG2 Velocidad de...

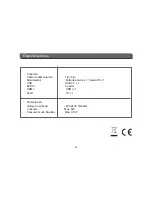
Page 59: ...Cable de Alimentaci n Tipo Fijo Sintonizador Entrada antena x 1 Salida RF x 1 USB USB 2 0 x 1 SPDIF Coaxial HDMI HDMI x 1 Scart TV x 1 Alimentaci n Voltaje de entrada 220 240V 50 60Hz Consumo Max 6W C...

Page 60: ...ra propia responsabilidad que el producto cumple las siguientes directivas Directivas CE est ndar EMC Directiva 2004 108 EC EN55013 2001 A1 2003 A2 2006 EN55020 2007 A11 2011 EN61000 3 2 2006 A1 2009...

Reviews: